# Monaca

Monaca is a mobile app development platform. You can develop iOS and Android apps using the web technologies JavaScript and HTML.
We provide various development tools, web services, and technical support so that anyone can easily develop mobile applications. So far, it has been used in more than 200 countries and more than 100,000 apps have been created.
### Start app development in the cloud
Access Monaca from your web browser and start developing. You can learn the flow of application development in the following tutorial.
{% content-ref url="/pages/-MfWeAi\_cLwi4nQiNa3E" %}
[Monaca Cloud IDE Tutorial](/tutorials/monaca_ide)
{% endcontent-ref %}
### Start app development locally
By using Monaca's local development tools "Monaca Localkit" and "Monaca CLI", you can start application development using the local development environment (editor and version control tool) that you are familiar with.
{% content-ref url="/pages/-MfWeAgY0RKTdjrXdnJf" %}
[Monaca CLI Tutorial](/tutorials/monaca_cli)
{% endcontent-ref %}
### FAQ
{% content-ref url="/pages/-MfWeAgmvoP1w3U3eCgk" %}
[FAQ](/faq)
{% endcontent-ref %}
# Create Your First App
In this tutorial, we will create a camera app. The app will launch the camera and display the captured photo within the app.
## Creating a New Project
To develop your first app in Monaca, start by creating a new project. The project will be based on an empty template and can be created following these steps:
1. Click the "Create New Project" button
2. Select "Blank Template"
3. Click the "Create" button
## Creating the Screen
Next, we will create a screen to launch the camera.
In the body tag of index.html, add a button tag to start the camera and an img tag to display the captured image as follows:
```html
```
## Launching the Camera
We will now create the process to launch the camera.
This process will be written in JavaScript. In the script tag of index.html, write the following code for the camera execution process (shoot function).
```javascript
```
## Enabling the Camera Plugin
To use the mobile device's camera functionality, you need to install the plugin.
Plugins are necessary when utilizing mobile device features from JavaScript code.
1. Navigate to the "Configure" menu > "Cordova Plugin Settings"
2. Enable the "Camera" plugin
## Running the App
At this point, the camera app is complete. Let's check the finished camera app on your device. There are two ways to do this:
1. Building the project for Android or iOS and checking it
2. Checking it using the "Monaca Debugger" provided on the iOS and Android stores
Here, we will explain both methods: building the project for Android and checking it with the "Monaca Debugger."
### Android Build
To build the project for Android, follow these steps:
1. Go to the "Build" menu > "Build App for Android"
2. Start the build process
### Monaca Debugger
Install the Monaca Debugger from the following app store link:
{% embed url="" %}
Once you log in to the app, you will see the project you created.
Click on the project to launch the camera app.
# Release Notes and Updates
## **September 11, 2025**
### Monaca Barcode Scanner Plugin **1.6.0 / 1.6.1** released
* v1.6.1: Added edge-to-edge display support for the torch button
* v1.6.0: Added support for 16KB page size
## **August 5, 2025**
### Support for **Cordova Android 14.0.1 (API Level 35)**
* Available from IDE menu: *Build → Configure Build Environment* (Cordova 12 projects)
## **March 10, 2025**
### Support for **Xcode 16**
* Available for Cordova 12 projects
* Select Xcode 16 via IDE menu: *Build → Configure Build Environment*
## **December 8, 2024**
Barcode Scanner Plugin **1.5.0** released
* Added a **torchlight feature** for improved barcode scanning in low-light environments
## **September 17, 2024**
End of support notice for **Cordova 9 build environment**
* End date: **March 31, 2025**
* Migration to Cordova 10 or later is recommended
## **September 5, 2024**
### Barcode Scanner Plugin **1.4.2** released
* Resolved conflicts with *cordova-plugin-health* and improved stability
## **July 17, 2024**
Support for **Cordova Android 13.0.0** (Cordova 12 projects)
## **April 22, 2024**
### Monaca now supports **Cordova iOS 7.1.0**
* Enables app development compliant with the latest iOS Privacy Manifest
## **February 23, 2024**
### Barcode Scanner Plugin **1.4.0** released
* Added support for nearly all barcode formats supported by MKKit on iOS/Android
* Newly supported formats include: CODE\_93, AZTEC, DATA\_MATRIX, UPC\_E, etc. (some iOS only)
## December 15, 2023
### Support for Xcode 15.0.1 Started
We have begun supporting Xcode 15.0.1. It is now available for the latest projects (Cordova 12).
## September 26, 2023
### Support for Cordova iOS 7 Started
We have started supporting Cordova iOS 7.
### Support for Cordova Android 12.0.1 Started
Monaca has begun supporting Cordova Android 12.0.1.
The release of Cordova Android 12.0.1 has fixed issues with adaptive icons.
## August 28, 2023
### Release of Barcode Scanner Plugin 1.3.0
We have resolved an issue where the plugin did not work on Sharp's Android smartphone, AQUOS, and confirmed its operation on AQUOS sense7. We have also improved the plugin to correctly handle cases where the image width and the 'rowStride' of the plane buffer differ.
## August 8, 2023
### Support for Cordova 12 Started
We have started supporting Cordova 12.0.0. For more information about Cordova 12 support, please check [here](https://medium.com/the-web-tub/monaca-now-supports-cordova-12-upgrade-details-and-steps-inside-890bb0728526).
## March 16, 2023
### Support for Xcode 14.2.0 Started
We have begun supporting Xcode 14.2.0, available for the latest projects (Cordova 11).
Please note that the simulator build only supports ARM architecture, and builds for unsupported architectures are not possible.
## December 28, 2022
### Discontinuation of iOS Store Version Monaca Debugger and Alternative Functionality Guidance
Due to updates and changes in interpretation of Apple's guidelines, the iOS Store version of the Monaca Debugger will be discontinued on the Apple Store starting January 6, 2023.
We apologize for any inconvenience this may cause to our users and appreciate your understanding.
For more details, please check [here](https://en.docs.monaca.io/release_notes/ios-monaca-debugger-discontinuation-and-alternative-features).
## November 18, 2022
### Support Cordova Android 11.0.0
Support for the latest versions of Cordova Android platforms for Cordova11 project.
The latest version can be used from the build environment setting screen. For more information, please see [this article](https://medium.com/@takuya_52869/db1e450b5759).
## September 26, 2022
### Barcode Scanner Plugin 1.2.0 is released.
With this update, ITF codes can be scanned.\
Please click [here](https://en.docs.monaca.io/reference/power_plugins/monaca-plugin-scan-barcode) for information on how to install and use the plugin in your project.
## June 7, 2022
### Barcode Scanner Plugin Support
Barcode scanner plugin is now available for all plan users.
Please click [here](/reference/power_plugins/monaca-plugin-scan-barcode) for information on how to install and use the plugin in your project.
## April 21, 2022
### Android Platform 10.1.2 Support
Support for Android platform 10.1.2 is now available.
## March 28, 2022
### Cordova11 Support
Monaca now supports Cordova11. Please click here for Cordova11 support details.
## December 10, 2021
### **Xcode13 support**
Support for Xcode13.\
The latest version can be used from [the build environment setting screen](/products_guide/monaca_ide/build/build_env_settings).
## December 7, 2021
### **Cordova Electron3.0.0 support**
Support for Cordova Electron platforms 3.0.0.\
The latest version can be used from [the build environment setting screen](/products_guide/monaca_ide/build/build_env_settings).
## June 10, 2021
### **Cordova Android 9.1.0 / iOS 6.2.0 support**
Support for the latest versions of Cordova Android and iOS platforms.\
The latest version can be used from the build environment setting screen.\
For more information, please refer to [Build environment settings](/products_guide/monaca_ide/build/build_env_settings).
## May 31, 2021
### **Termination Announcement of Monaca Backend**
The Monaca Backend which is used for user management was terminated on May 31, 2021. We apologize for any inconvenience.
## November 19, 2020
### **Cordova 10 release**
Cordova 10 is now supported. For more information, see [here](/release_notes/20201119_cordova10).
### **MacOS / Linux support**
For Cordova10 and later projects, We are no longer offering Mac OS and Linux build feature.
## Oct 05, 2020
### The Monaca Backend service will be terminated on May 31 2021.
Schedule of service termination:\
New Applications: October 31, 2020.\
End of the whole service: May 31, 2021.
Please follow this migration guideline to migrate to our partner’s service.\
We apologize for any inconvenience.
## Aug 19, 2020
Build log download function added the ability to download build logs from the build history screen.
## Jul 28, 2020
Improving the build log, messages are now highlighted according to the error level and a date field has been added to the log.
## Dec 23, 2019
Support for Xcode 11.3 iOS builds are now compatible with Xcode 11.3. (Target projects: Cordova 9 series projects)\
Please select Xcode 11.3 in the “Build Environment” screen and try to build iOS.\
For more information, please refer to [Build Environment Settings](/products_guide/monaca_ide/build/build_env_settings).
## June 27, 2019
### Monaca start supporting Cordova 9.
The supported operating systems are Android and iOS. Windows support will be available on a later date. For details, see [here](/release_notes/20190627_cordova9).
## Dec 26, 2018
### Monaca iOS build support Xcode 10.1.
Please select Xcode 10.1 from the `Build Environment Settings` page and try the iOS build. For details, see [here](/products_guide/monaca_ide/build/build_env_settings).
## Oct 3, 2018
Added sorting functionality to the dashboard project list. Now you can sort by created time, last accessed time and project title.
## Sep 29, 2018
Released project recovery feature. This allows the user to repair the project if something is going wrong. To access the feature, open the project menu in dashboard, and click **Recover** button under the **Configure** tab.
## Sep 18, 2018
Released new Monaca CLI and Localkit, along with the updates to Monaca Cloud IDE. This is a major change to how Monaca serves and builds the project. Your project will be also affected. For more details, please see [New Monaca CLI and Localkit release details](/release_notes/20180918_monaca_cli_3.0).
## Sep 11, 2018
PWA build feature is released with the deployment options to Firebase. This feature is experimental, and your feedback is greatly appreciated. For details, see [here](/products_guide/monaca_ide/build/build_pwa).\
# Privacy Manifest Requirement for iOS Apps
Thank you for your continued support and trust in Monaca.
We would like to inform you about a recent development in Apple's App Store privacy protection initiative. As of May 1, 2024, all apps published on the App Store will be required to incorporate a new file called the "Privacy Manifest."
The Privacy Manifest must include information about the types of APIs used by the app and any integrated third-party SDKs, the reasons for their use, the types of data collected, and the purpose of data collection. This change directly impacts iOS app developers.
### Monaca's Support
To ensure a smooth transition for our customers in meeting these new app requirements, Monaca is taking the following steps:
1. **Cordova Support:** We have submitted a pull request to Cordova to support the Privacy Manifest. As soon as this pull request is merged, we will prepare Monaca to accommodate these changes.
2. **Plugin Updates:** We are updating the plugins provided by Monaca to comply with the new app requirements.
3. **Guides and Documentation:** We will enhance our documentation and guides on how to create Privacy Manifests and declare API permission reasons.
### **Required Preparations**
* Your project will need to be updated to Cordova 12.
* Additionally, an update to the latest cordova-ios will be required.
### **Setting Up the Privacy Manifest**
You can configure the Privacy Manifest by adding the following to your `config.xml` file:
```xml
NSPrivacyTrackingNSPrivacyTrackingDomainsNSPrivacyAccessedAPITypesNSPrivacyCollectedDataTypes
```
The example above sets the following information:
* `NSPrivacyTracking`: Specifies whether the app tracks users. Set to `` or ``.
* `NSPrivacyTrackingDomains`: Specifies the tracking domains as an array of strings.
* `NSPrivacyAccessedAPITypes`: Specifies the APIs used by the app and their reasons as an array.
* `NSPrivacyCollectedDataTypes`: Specifies the collected data types, user linking, tracking, and purpose of data collection as an array.
These settings allow you to explicitly declare information about your app's privacy practices.
For more information, please refer to Apple's official documentation:
Specific APIs used:
{% embed url="" %}
Data collected:
{% embed url="" %}
## Note
A phenomenon has been confirmed where the App Store cannot recognise the privacy manifest you have set up if the app name contains Japanese characters. Even though the privacy manifest has been set, if the privacy manifest is found to be incomplete during Apple's review, please set it in config.xml as follows. Please set as follows in config.xml.
```xml
[English App Name]
```
Monaca is fully committed to supporting our customers in smoothly adapting to Apple's new app requirements. We will keep you updated on the latest information through this announcement.
If you have any questions or concerns, please don't hesitate to reach out to us. Thank you for your continued support and trust in Monaca.
# Plugin uses-permission Tag Deduplication Feature
In the latest versions of Cordova plugins, especially `cordova-plugin-media-capture` and `cordova-plugin-camera`, changes have been made to the `android:maxSdkVersion` attribute. This has increased the potential for duplication errors in the `AndroidManifest.xml` settings when combining multiple plugins.
Specifically, the following build error was occurring: (The example below is a case where the `WRITE_EXTERNAL_STORAGE` permission is duplicated.)
```
/tmp/download/platforms/android/app/src/main/AndroidManifest.xml:14:5-108 Error:
Element uses-permission#android.permission.WRITE_EXTERNAL_STORAGE at AndroidManifest.xml:14:5-108 duplicated with element declared at AndroidManifest.xml:13:5-108
```
### **Feature Details**
To resolve this issue, we have released a feature that detects duplicates of the `uses-permission` tag and automatically unifies them.
### **How to Use**
1. Open your project.
2. Click on "Build" in the header menu, and select "Configure Build Environment" from the list.
3. Move to the Android environment settings page and look for the "Remove Duplicate Permissions" option.
4. Enable the "Remove Duplicate Permissions" option and save the settings.
With this, the function to automatically resolve duplicates of the `uses-permission` tag will be enabled for the next build.
# iOS Monaca Debugger Discontinuation & Alternative Features
Thank you very much for your continued patronage of our Monaca.
Due to the update and interpretation change of Apple's guidelines, the delivery of Monaca Debugger on the Apple store will be suspended from January 6, 2023.
We apologize for any inconvenience to all those who are using the iOS store version of Monaca Debugger, but we kindly ask for your understanding.
\* You can continue to use the Monaca Debugger installed on your device after the deactivation date. \
\* The Android version of Monaca Debugger is still available from the Google Play Store.
## After the discontinuation of iOS Store version Monaca Debugger
### **For those who have already registered for the Apple Developer Program**
Those who can use the Apple Developer Program can use the Custom Build Debugger to check operations on iPhones.
#### ・[Custom Build Debugger](/products_guide/debugger/custom-build-debugger-for-ios)
The Custom Build Debugger is a debug app dedicated to a specific Monaca project, equipped with plugins used in the project. You can create a debug app specialized for that project based on the plugins and settings information of the project you want to test.
### For those who are not registered with the Apple Developer Program
For those who are not registered with the Apple Developer Program, please use the following Monaca functions to check the operation on the iOS terminal.
#### ・[Quick Viewer](/products_guide/quick-viewer) (New Release)
By accessing Monaca from a mobile device, you can check the screen and operation of the project you are developing on iPhones.
#### ・[Simulator Build](/products_guide/debugger/ios_simulator_build)
You can build an app that runs with iOS Simulator on Mac.
If you have a Mac, you can simply drag and drop the generated ZIP file to the simulator to run the app. Otherwise, you can use the external service "[Appetize.io](/products_guide/monaca_ide/monaca_ci/appetizeio)" to start the generated ZIP file without a Mac.
# Error submitting to iOS App Store (ITMS-90165)
## Incident
IOS upload does not complete successfully with the following error.
```
ERROR ITMS-90165: "Invalid Provisioning Profile Signature. The provisioning profile included in the bundle 'xxxxx' cannot be used to submit apps to the iOS App Store until it has a valid signature from Apple. (Expired profile signing certificate.) For more information, visit the iOS Developer Portal."
```
## Cause
The Apple iPhone Certification Authority certificate and the Apple iPhone OS Provisioning Profile Signing certificate expired. As a result, the provisioning profile has been disabled.
## Solution
You can successfully submit to the iOS App Store by updating a new provisioning profile and building a new one.
Please follow the steps below.
1. Go to the Apple Developer Center, select the target profile, and click the Edit button.
2. Click the Save button without changing any information.
3. Check that the expiration date of the profile has been updated.
4. Download the updated profile
5. Register the downloaded profile in the Monaca IDE and use it for release builds
# Build error in cordova-custom-config
Due to the dependent library of the "cordova-custom-config" plugin, the build may not finish successfully.
### Incident
In the application build, an infinite loop occurs, resulting in the error "JavaScript heap out of memory".
### Cause
The npm package "colors" was released with a bug that caused an infinite loop. The plugin "cordova-custom-config" also uses the npm module "colors", causing the bug.
### How to fix it
The error has been fixed and "cordova-custom-config" v5.1.1 has been released. You can select the plugin version on the Cordova plugin settings page.

If the problem occurs with a plugin other than "cordova-custom-config", you can avoid using the version that contains the bug by modifying "package.json" in the root directory of the Monaca project as follows.
```
"dependencies": {
・・・
"colors": "1.4.0",
・・・
}
```
# Cordova 11 changes
## Android
The following versions are the default values for the cordova11 project.
* Cordova Android Platform: 10.1.1 (API level 30)
* Gradle version: 7.1.1
## iOS
The following versions are the default values for the cordova11 project.
* Cordova iOS platform: 6.2.0
* Xcode: 13.0
# Cordova 10 changes
## Android
* Cordova Android Platform: Updated to "9.0.0" (API level 29)
* Gradle version: Updated to "6.5"
## iOS
* Cordova iOS platform: Updated to "6.1.1"
* Xcode: "11.3" (Xcode12 support will be announced separately.)
## iOS app icon (20x20)
Registration of iOS app icon size `20x20` is required. Please follow the steps below to register.
1. From Monaca Cloud IDE, choose **Configure → App Settings for iOS**.
2. Register the image in "20 x 20" in the icon section.
## Notes on WKWebView
From Cordova 10, the WebView used in iOS has been updated from the conventional "UIWebView" to "WKWebView". Please note that UIWebView is no longer available for Cordova 10 projects.
## Remove Custom Scheme plugin
From Cordova 10, Cordova comes standard with the same functions as the "Custom Scheme" plugin. Therefore, the "Custom Scheme" plugin is no longer required, and if it is used in the project, it will be deleted from the project when you upgrade your project to Cordova 10.
In addition, the following settings will be added to `config.xml` in order to use the functions installed in Cordova.
```markup
```
## Taking over the LocalStorage data in iOS
Since Cordova 10 now supports WKWebView and CustomScheme plugin is no longer required, the following steps are required to take over LocalStorage contents by updating from an existing project. (Note that if you are using UIWebView in Cordova 9, you will not be able to inherit the LocalStorage data. Also the custom debugger will not inherit the contents of LocalStorage.)
### If you were using the CustomScheme plugin in Cordova 9
If you were using the CustomScheme plugin in your existing Cordova 9 project, Remove the CustomScheme plugin and update the `config.xml` preference as follows.
```markup
```
## Notes on Android external storage
The security of the data storage area has changed in Android 10 (API level 29), which is used as standard from Cordova 10. This change may require additional settings for some plugins.
For the plugin provided by Monaca, `cordova-plugin-media-capture` is applicable. In Monaca Debugger for Android, `requestLegacyExternalStorage` is set to access the data storage destination of `cordova-plugin-media-capture`.
When using `cordova-plugin-media-capture` in a built app or custom build debugger, you need to add the Android namespace to the widget tag in `config.xml` and add `requestLegacyExternalStorage="true"`.
```markup
```
# Cordova 9 changes
## Android
* Cordova Android Platform: Updated to "8.0.0" (API level 28)
* Gradle: Updated to "4.10.3"
## iOS
* Cordova iOS Platform: Updated to "5.0.1"
* Xcode: The version can be selected from "10.1" "10.2" "10.2.1"
## Plugin deployment directory
The location where plugins are saved has changed.\
When importing plugins in the plugin list page, the place where the plugin is saved has changed.
* Before : `/plugins/`
* After : `/res/custom_plugins/`
## Deprecated plugin
The following plugins have been deprecated since Cordova 9.\
The plugin will continue to be available, but will not be eligible for activity by the Cordova community.
* cordova-plugin-contacts
* cordova-plugin-device-motion
* cordova-plugin-device-orientation
* cordova-plugin-file-transfer
* cordova-plugin-globalization
## Obsolete plugin
The following plugins have been deprecated since Cordova 9.
* mobi.monaca.plugins.datepicker
* cordova-plugin-ms-azure-mobile-apps
* mobi.monaca.plugins.BarcodeScanner
## Number of available characters for Android package name
In the Android package name, it is not possible to use it with one letter.\
For the package name, reverse domain format is recommended (for example: `mobi.monaca.appname`).
## Application name
The cordova 9 cannot set "number" at the beginning of an application name.
## About pairing Monaca Localkit and Monaca CLI
When using a custom build debugger on Android 9 or later, you need to add the Android namespace to the `widget` tag in `config.xml` and add `usesCleartextTraffic="true"`.
Create the custom build debugger after adding the following settings to `config.xml`.
{% hint style="info" %}
If you are using Android custom build debugger v9.0.1 or later, the following settings are not required.
{% endhint %}
```markup
```
# New Monaca CLI and Localkit
## What's new in Monaca CLI 3.0 and Localkit
The new Monaca CLI and Localkit is a significant improvement from the past toolkits, providing you the more flexibility and robustness to your development.
### Ejecting all build dependencies
The new version of Monaca toolkits enable to configure everything for the project.
In the previous version of CLI and Localkit, common modules used for building, bundling, and previewing apps were globally installed. Some example of these modules were Webpack, Browser-sync, Loader, and Babel. Installed globally meant that all Monaca projects shared a single set of tools and version locked.
The new release removes the global modules and installs them with each project. We now have the freedom of managing our toolset. Additionally, being installed into the project scope means the ability to customize each project uniquely.
The freedom to customize and manage is now in your hands.
### Cordova of your choice
From this new release, Cordova is also decoupled from the project. It is now installed as one of the `devDependencies` for each project. That means the developer can now choose to use different Cordova versions for their projects.
At the moment, remote build server is still using a preconfigured Cordova distribution and you cannot change the version freely. We are working on to eliminate this limitation too!
### Configurable tasks with package.json scripts
To provide more flexibility to developers in choosing their previewing and building tool, you can define each task in package.json. Now, `monaca preview`, `monaca transpile`, and `monaca debug` commands basically just execute scripts defined in `package.json`.
### New Monaca CLI Commands
The following commands are added to the CLI.
#### monaca init
Initialize the current project as a Monaca project. With this command, you can migrate the project from PhoneGap, Ionic, Angular and Vue CLI. For more details, please refer to [Migrating from other platforms](/products_guide/migration).
#### monaca update
This command is used to update project created using Monaca CLI 2 or lower.
## Migration to the new version
**All existing projects are required to update.**
#### Monaca Cloud IDE and Localkit users
When opening the project, a dialog will appear to automatically update the project. Please follow the instruction and the update is done.
#### Monaca CLI Users
For Monaca CLI users, run **monaca update** to update the project.
### How it affects your project?
#### Non-Transpile projects
The `package.json` will be created/modified with the following changes:
* A `monaca:preview` command will be added to the `script` property.
* A `dev` command will be added to the script unless it already exists.
* `"dev": "browser-sync start -s www/ --watch --port 8080 --ui-port 8081"`
* `Browser-sync` and `Cordova` will be added as `devDependencies`.
```javascript
"scripts": {
"monaca:preview": "npm run dev",
"dev": "browser-sync start -s www/ --watch --port 8080 --ui-port 8081"
}
```
#### Transpile projects
The `package.json` will be modified with the following changes:
* `monaca:preview`, `monaca:transpile` and `monaca:debug` commands will be added to the `script` property.
* `dev`, `build`, and `watch` commands will be added to the script unless they already exist.
* Required packages including `Webpack` and `Cordova` will be added as `devDependencies`.
```javascript
"scripts": {
"monaca:preview": "npm run dev & npm run watch",
"dev": "PORT=8080 node ./monaca_preview.js",
"monaca:transpile": "npm run build",
"build": "webpack --config ./webpack.prod.new.config.js",
"monaca:debug": "npm run watch",
"watch": "webpack --watch --config ./webpack.prod.new.config.js"
}
```
**Other file changes**
* `monaca_preview.js`: a script to manage webpack and webpack-dev-server instance.
* `webpack.dev.new.config.js`: a refined webpack configuration for development mode. It is used in `monaca_preview.js`.
* `webpack.dev.prod.config.js`: a refined webpack configuration for production mode.
{% hint style="info" %}
If you have changed your webpack configuration files (i.e *webpack.dev.config.js* or *webpack.prod.config.js*), you might need to modify the new generated webpack config files to your requirements.
{% endhint %}
## Summary table
Confused with many changes? Here there is a table summarizing the changes we have made.
| Changes | | Previous Version | New Version |
| ------------------------ | -------------------- | ------------------------------------------------------------------------------- | ----------------------------------------------------------------------------------------------------------------------------------------------------------------------------------------------------------------------------------------------------------------------------------------- |
| **Package Dependencies** | | Install globally | Install required build modules to the project. |
| **Cordova** | | Install globally | Install to the project |
| **Monaca CLI Commands** | **monaca preview** | Using **globally installed** browser-sync or webpack-dev-server for previewing. |
Run monaca:preview script in package.json file. It by default will use locally installed browser-sync or webpack-server for previewing. For migrated project, it will use webpack-dev-server.
|
| | **monaca transpile** | Use **globally installed** Webpack to transpile and build the project. |
Run monaca:transpile script in package.json file. It will use locally installed Webpack by default.
|
| | **monaca debug** | Use **globally installed** Webpack to transpile and watch the file changes. |
Runs monaca:debug script in package.json file. It will use locally installed Webpack by default.
|
If you have any questions, please feel free to contact us via the [contact form](https://monaca.io/service/index.html) or directly on chat (click the icon on the right-bottom corner). We also have the commercial technical support to solve any particular problems you have in your project.
# Migration from Cordova to Capacitor
This article explains the changes and things to check after converting a Cordova project to a Capacitor project.
### What is Capacitor?
Similar to Cordova, Capacitor is a cross-platform native runtime that makes it easy to build performant mobile applications that run natively on iOS, Android, and more, using modern web tooling.
### What does it mean for Monaca User?
Monaca now supports both Cordova and Capacitor projects. Users can create new Capacitor projects or convert existing Cordova projects to Capacitor projects.
To convert, users can click on the "Convert To Capacitor" sub-menu from the "Configure" menu.

Then, the following dialog will appear.

After confirming the dialog, the project will be converted into a Capacitor project.
### What are the changes?
The following new files are created and updated after the conversion.
#### Capacitor configuration file
In Cordova, the project configuration is stored in "config.xml". In a Capacitor project, it is defined in "capacitor.config.json". During the migration process, some configurations are copied from "config.xml" to "capacitor.config.json".
```json
{
"appId": "jp.co.asial.monaca",
"appName": "capacitor-basic",
"webDir": "www"
}
```
#### Trapeze configuration file
In Capacitor, some native settings are configured directly in Xcode or Android Studio. Thus, a new file "config.yaml" is created to copy some native settings from Cordova's "config.xml" file.
```yaml
platforms:
android:
versionName: 1.0.0
manifest:
-
file: AndroidManifest.xml
target: manifest/application/activity
attrs:
'android:screenOrientation': unspecified
-
file: AndroidManifest.xml
target: manifest
inject: |
-
file: AndroidManifest.xml
target: manifest
inject: |
-
file: AndroidManifest.xml
target: manifest
inject: |
ios:
targets:
App:
version: 1.0.0
xcconfig:
-
file: App/Config.xcconfig
set:
TARGETED_DEVICE_FAMILY: '1,2'
plist:
-
replace: true
entries:
-
UISupportedInterfaceOrientations:
- UIInterfaceOrientationPortrait
- UIInterfaceOrientationLandscapeLeft
- UIInterfaceOrientationLandscapeRight
- NSCameraUsageDescription: 'Take photos'
- NSPhotoLibraryAddUsageDescription: 'Add photos'
- NSPhotoLibraryUsageDescription: 'Access photos'
```
#### New dependencies
The following dependencies will be added to your Capacitor project:
* @capacitor/core
* @capacitor/android
* @capacitor/ios
* @capacitor/cli
* @trapezedev/configure
* @capacitor/assets
#### Cordova plugins
Not all Cordova plugins are supported in Capacitor projects. The following are known unsupported plugins:
* monaca-plugin-monaca-core (the plugin is no longer need for Capacitor project)
* cordova-plugin-add-swift-support (not needed, Capacitor has built in Swift support)
* cordova-plugin-admobpro
* cordova-plugin-braintree
* cordova-plugin-code-push
* cordova-plugin-compat
* cordova-plugin-console (not needed, Capacitor has its own)
* cordova-plugin-crosswalk-webview (Capacitor doesn't allow to change the webview)
* cordova-plugin-fcm
* cordova-plugin-firebase
* cordova-plugin-ionic-keyboard (not needed, Capacitor has it's own)
* cordova-plugin-ionic-webview (not needed, Capacitor uses WKWebView)
* cordova-plugin-music-controls (causes build failures, skipped)
* cordova-plugin-qrscanner
* cordova-plugin-splashscreen (not needed, Capacitor has its own)
* cordova-plugin-statusbar (not needed, Capacitor has its own)
* cordova-plugin-wkwebview-engine (not needed, Capacitor uses WKWebView)
* cordova-plugin-googlemaps (causes build failures on iOS, skipped for iOS only)
If your plugins are not supported, you may first try to update the plugin to the latest version. If it still doesn't work properly, you might need to use the new Capacitor plugins from the [official](https://capacitorjs.com/docs/apis) or [community](https://github.com/capacitor-community) sources.
### What's next
#### Configuration Files
* You will need to manually check whether all necessary settings and configurations are defined in the new files - [capacitor.config.json](https://capacitorjs.com/docs/config) and [config.yaml](https://trapeze.dev/docs/).
#### Application Icons and Splash Screen
* The application icon and splash screen are not set in the Capacitor project during the migration process. You can set them up with "App Settings for Android" or "App Settings for iOS" sub-menus from the "Configure" menu.

A new sliding window will appear.

* For iOS application, you will need to check and add neccessary permission to privacy manifest file - PrivacyInfo.xcprivacy.
### References
*
*
*
*
# Product Guides
{% content-ref url="/pages/-MfWeAjb\_L9I2sXD5KWR" %}
[Monaca Development Overview](/products_guide/monaca_intro)
{% endcontent-ref %}
{% content-ref url="/pages/-MfWeAfMLAckc-i0GLw-" %}
[Monaca Cloud IDE](/products_guide/monaca_ide)
{% endcontent-ref %}
{% content-ref url="/pages/-MfWeAfYZPjlv4iT1wwI" %}
[Monaca Localkit](/products_guide/monaca_localkit)
{% endcontent-ref %}
{% content-ref url="/pages/-MfWeAfkW6kqbrKqoDHK" %}
[Monaca CLI](/products_guide/monaca_cli)
{% endcontent-ref %}
{% content-ref url="/pages/-MfWeAfc32Jqz5zXq9Jp" %}
[Monaca Debugger](/products_guide/debugger)
{% endcontent-ref %}
{% content-ref url="/pages/-MfWeAgHVynpdn2VnEyw" %}
[Team Dashboard](/products_guide/team_dashboard)
{% endcontent-ref %}
{% content-ref url="/pages/-MfWeAfnxKlb5r5tMPq0" %}
[Migrating from Other Platforms](/products_guide/migration)
{% endcontent-ref %}
# Monaca Development Overview
## What is Monaca?
Monaca is a development environment for smartphone and tablet applications provided by Asial Corporation. Monaca does not only provide you with a development environment at your fingertips but also allows anyone to be able to develop smartphone applications easily.
Monaca makes HTML5 [hybrid mobile app](/products_guide/monaca_intro#characteristics-of-hybrid-apps) development with PhoneGap/Cordova simple and easy. Monaca is the most open hybrid app development platform available and ready to be immediately plugged into your existing workflow and development environment. With the Cloud IDE, CLI, debugger and remote online build, everything you need for developing hubrid apps is here.

## Why to use Monaca?
Monaca's top 3 benefits are:
* **Cloud-empowered development**: Our tools are designed to use the cloud to supercharge your app development in two ways. The complete cloud development environment gives you flexibility with no setup required. The cloud-synced local development enables you to use your own environment but enjoy features like device live-sync and remote build. It’s the best of both worlds.
* **Framework agnostic**: Our open source [Onsen Framework](http://onsen.io/) is tightly integrated with the Monaca tools. However, you can use Monaca with any JavaScript frameworks. We support Angular 1, 2+, React and Vue.js but you can also bring your own favorite framework. There are many templates ready to use, so you can get started immediately.
* **Mix-and-match as you like**: We’ve got you covered all the way from design, app development, backend development, testing and debugging to build and distribution. Monaca can be used as a whole or a piece, working with your favorite tools like Sublime Text or Git. Just pick what you need. We will seamlessly plug into your workflow.
## Monaca development tools
For your flexibility and convenience during the app development process, Monaca provides four different development environments as shown in the following subsections.

### Monaca Cloud IDE
Monaca Cloud IDE is a browser-based development environment. Right from your web browser, all your Cordova development can be done without any setup. With the Cordova IDE, debugger and remote build, we've got everything you need in one place.
Monaca Cloud IDE provides a browser-based development environment as a service. Right from your web browser, all your Cordova development can be done without any setup. Along with the [Monaca Debugger](/products_guide/debugger), Live Preview (built-in function in the Monaca Cloud IDE) allows you to easily check the progress of your app during development. Noticeably, there are neither Cordova plugins nor native work in the Live Preview. Therefore, an app that requires those plugins and functions can't be previewed properly.

### Monaca Localkit
Monaca Localkit is a local environment development support tool offered through our app development platform Monaca. You can achieve better security and peace of mind from your own app development environment by combining existing tools such as code editors and version management system with the versatile development support capabilities of Monaca. With the Monaca Localkit, Monaca users are able to setup their preferred development environment on a local PC. To learn more about the Monaca Localkit, check out its [documentation](/products_guide/monaca_localkit).

### Monaca CLI
Monaca CLI provides a command line interface to use the Monaca Cloud. It features the debugger connection, inspector integration, project creation and remote building. You can also import projects that exist in the cloud when you want to switch your environment to local. To learn more about the Monaca CLI, check out its [documentation](/products_guide/monaca_cli).
## Monaca Debugger
On top of the flexibility in the development environment, Monaca also provides high development efficiency by using the Monaca Debugger. Monaca Debugger is an application used to test and debug your Monaca applications on real devices without building the applications during the development. It needs to be installed on your mobile device. The app will automatically sync all your development projects and run them without the build process. To learn more about the Monaca Debugger, check out its [documentation](/products_guide/debugger).

Here is a table summarizing the debugging options between Monaca Debugger and Monaca development tools. For more information, please refer to [Debugging Monaca Apps](/products_guide/debugger/debug).
| | Monaca Cloud IDE | Monaca CLI/Monaca Localkit |
| ---------------------- | ----------------------------------------------------------------------------------------------------------------------------------------------------------------------------------------------------------------------------------------- | ------------------------------- |
| **Requirements** | Internet connection | Internet connection and pairing |
| **Monaca debug panel** | You can use this debug option whether you have a Mac/Windows and your device can either be an iOS or Android. | Not available |
| **USB Debugging** | If you have an iOS device, you need a Mac because Safari (Safari remote debugging) is only available on Mac. If you have an Android device, you can use either a Mac or a Windows as long as you have a Chrome Browser (Chrome DevTools). | |

## Monaca Power Plugins
Power up your Cordova app. The Resource Encryption Plugin provides extra protection for your app. In-App Updater makes it easy to update without redeployment to the App Store. Additionally, In-App-Purchase, Secure Storage and Secure SQL Plugin and more are available. To learn more about the Monaca Power Plugins, check out the [documentation](/reference/power_plugins).
## Monaca subscription plans
Monaca provides various account types to match with your needs ranging from free to enterprise plan. After registration, a 14-day free trial will start. For detailed information of Monaca account types and their usage, please refer to [Monaca Pricing](https://monaca.io/pricing.html).
### If you use an activation code:
* If you want to upgrade your plan or extend the expiration date, please
contact us with the preferred plan name and term of months.
* On the expiration date, your plan will be switched to free automatically.
## Characteristics of hybrid apps
* The apps consist of the web and native characteristics. (See the picture below)
* Regardless of the operating system, hybrid apps run on a browser component (cross-platform support). In other words, they can run on iOS, Android, and other supported platforms since they run on WebView component of those platforms. Therefore, one source code can run on multiple supported platforms.

Required knowledge for hybrid app development:
* HTML and CSS for UI (User Interface) design
* JavaScript for implementing the app
* Cordova plugins for accessing the native functions of a device and additional plugins
# Monaca Cloud IDE
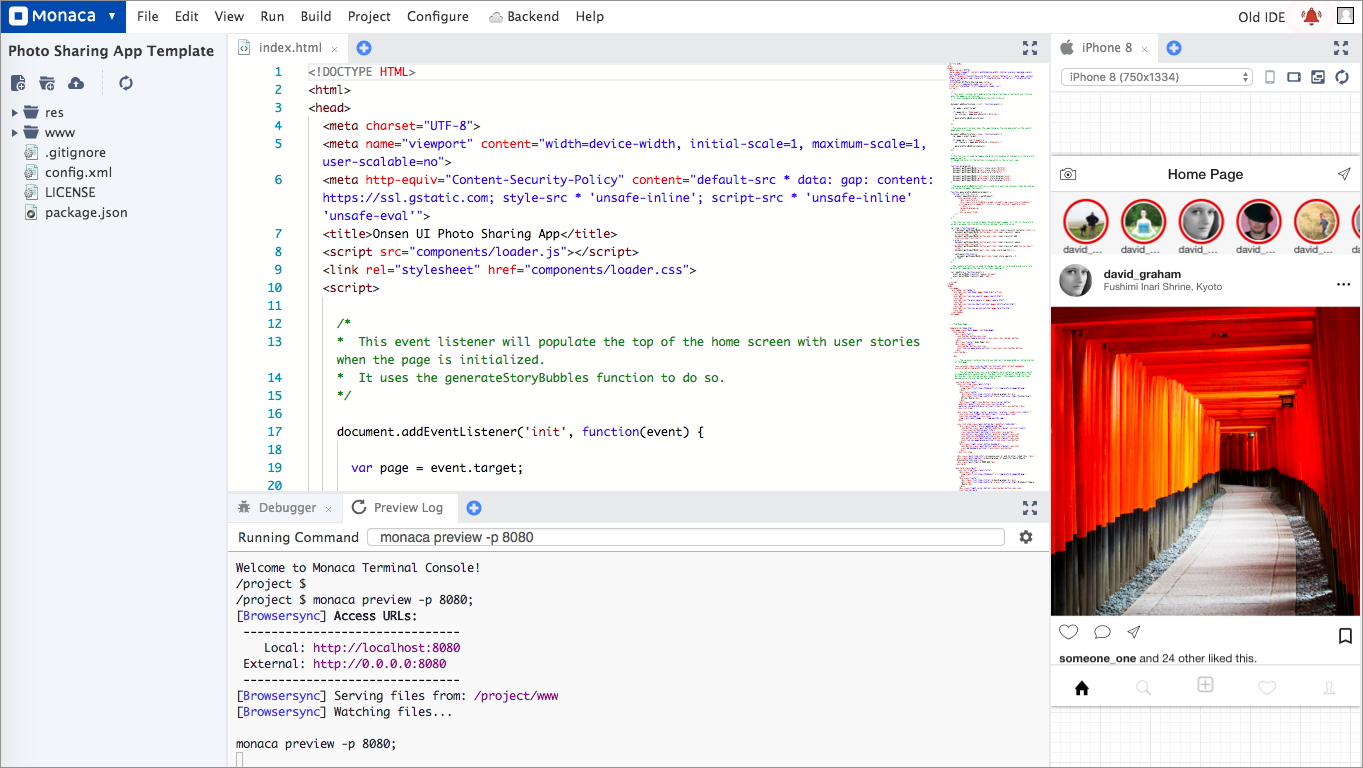
{% content-ref url="/pages/-MfWeAggCiw9WhEqraeb" %}
[Overview](/products_guide/monaca_ide/overview)
{% endcontent-ref %}
{% content-ref url="/pages/-MfWeAgAm\_rzcMcjS1nw" %}
[Features in the Monaca Cloud IDE](/products_guide/monaca_ide/changes)
{% endcontent-ref %}
{% content-ref url="/pages/-MfWeAgM28eQwbSEfivL" %}
[Integrated Terminal](/products_guide/monaca_ide/terminal)
{% endcontent-ref %}
{% content-ref url="/pages/-MfWeAimDgGyLMjE\_9EG" %}
[Editor Shortcuts](/products_guide/monaca_ide/editor)
{% endcontent-ref %}
{% content-ref url="/pages/-MfWeAg64XK3L1tVQXc3" %}
[Project Dependencies](/products_guide/monaca_ide/dependencies)
{% endcontent-ref %}
{% content-ref url="/pages/-MfWeAhanSU4nsQ4n3V7" %}
[Version Control](/products_guide/monaca_ide/version_control)
{% endcontent-ref %}
{% content-ref url="/pages/-MfWeAgwESyPec\_1tcVS" %}
[Monaca CI](/products_guide/monaca_ide/monaca_ci)
{% endcontent-ref %}
{% content-ref url="/pages/-MfWeAfLOtoGIk\_Jxl3Z" %}
[Build](/products_guide/monaca_ide/build)
{% endcontent-ref %}
{% content-ref url="/pages/-MfWeAfSF6N1JHuflArn" %}
[Distribution](/products_guide/monaca_ide/deploy)
{% endcontent-ref %}
{% content-ref url="/pages/-MfWeAfzfJKozqz1JqM0" %}
[Tutorial](/products_guide/monaca_ide/tutorial)
{% endcontent-ref %}
# Overview
Monaca Cloud IDE is a browser-based development environment. Right on your web browser, all your Cordova development can be done without any setup.
On this page, we will describe the Graphic User Interface (GUI) of the Monaca Cloud IDE.
## Menu bar

The main menu bar contains the following submenus:
| Menu Item | Description |
| ----------- | -------------------------------------------------------------------------------- |
| `File` | Shows the [File](/products_guide/monaca_ide/overview#file) sumbmenu. |
| `Edit` | Shows the [Edit](/products_guide/monaca_ide/overview#edit) submenu. |
| `View` | Shows the [View](/products_guide/monaca_ide/overview#view) submenu. |
| `Run` | Shows the [Run](/products_guide/monaca_ide/overview#run) submenu. |
| `Build` | Shows the [Build](/products_guide/monaca_ide/overview#build) submenu. |
| `Project` | Shows the [Project](/products_guide/monaca_ide/overview#project) submenu. |
| `Configure` | Shows the [Configure](/products_guide/monaca_ide/overview#configure) submenu. |
| `Backend` | Opens the [Monaca Backend](broken://pages/-MfWeAgCwPQFDDYJG4vc) in a new window. |
| `Help` | Shows how to find help during the development. |
### File
| Menu Item | Description |
| --------- | ---------------------------------------- |
| New File | Creates a new file. |
| Save | Saves the currently open file. |
| Save All | Saves all the currently open files. |
| Upload | Uploads the files in the current folder. |
### Edit
| Menu Item | Description |
| ---------------- | --------------------------------------------------- |
| Undo | Undoes the latest action. |
| Redo | Redoes the previous action. |
| Search | Searches for a string in the currently open file. |
| Replace | Replaces a found string in the currently open file. |
| Search All Files | Searches through all the project files. |
| Comment | Comments out/in the current line. |
### View
| Menu Item | Description |
| ------------ | --------------------------------------------------- |
| Debugger Tab | Shows/Hides the debugger tab |
| Reset Layout | Resets the IDE's layout to the default arrangement. |
### Run
| Menu Item | Description |
| --------------------- | -------------------------------------------- |
| Show Preview Tab | Opens the previewer. |
| Run on Device | Runs the project on the Monaca Debugger. |
| Setup Monaca Debugger | Installs the Monaca Debugger on your device. |
### Build
| Menu Item | Description |
| --------------------- | ---------------------------------------------------------------- |
| Build App for Android | Builds the app for an Android device. |
| Build App for iOS | Builds the app for an iOS device. |
| Build App for Windows | Builds the app for a Windows device. |
| Build History | Shows the build history of the current project. |
| CI History | Shows the continuous integration history of the current project. |
### Project
| Menu Item | Description |
| -------------------------------------------------- | -------------------------------------------------------------------------------------------------------------- |
| Commit | Commits the local changes. |
| Show Commit History | Shows the commits history from Monaca Cloud IDE. |
| Pull | Pulls the remote changes. |
| Push | Pushes the local changes to the remote server. |
| Show Remote History | Shows the commits history in the remote server. |
| VSC Configure | Configures the remote repository. |
| [Share](/products_guide/monaca_ide/overview#share) | Invites other Monaca users to join the project. |
| Export | Exports the project. |
| Publish | Makes the current project public (see [Publish Project](/products_guide/monaca_ide/overview#publish-project)). |
For more information to enable vision control on your project, please refer to [Version Control](/products_guide/monaca_ide/version_control).
### Configure
| Menu Item | Description |
| ---------------------------- | ------------------------------------------------------------------------------------------------------------------------------------------------------------------------------------------ |
| App Settings for Android | Configures Android app’s information (see [Configure Android App](/products_guide/monaca_ide/build/build_android#step-1-configure-an-android-app)). |
| App Settings for iOS | Configures iOS App’s information (see [Configure iOS App Settings](/products_guide/monaca_ide/build/ios/build_ios#configure-ios-app-settings)). |
| App Settings for Windows | Configures necessary information to build a Windows app (see [Configure Windows App Settings](/products_guide/monaca_ide/build/electron/build_electron_windows#step-1-configure-the-app)). |
| Cordova Plugin Settings | Enables/Disables Cordova plugins in the current project (see [Cordova Plugins](/products_guide/monaca_ide/dependencies/cordova_plugin)). |
| JS/CSS Component Settings | Adds/removes JavaScript and CSS libraries to/from the current project (see [JS/CSS Components](/products_guide/monaca_ide/dependencies/components)). |
| Service Integration Settings | Integrates services to Monaca projects in the form of plugins (see [Service Integration](/reference/service_integration)). |
| Continuous Integration | Automates building and deployment cycles (see [Monaca CI](/products_guide/monaca_ide/monaca_ci)). |
| Deploy Service | Adds/Removes deployment services for Monaca CI (see [Deployment Services](/products_guide/monaca_ide/monaca_ci/supported_services)). |
| Workspace Configuration | Configures the appearance of the code editor. |
## Publish a project
This feature allows you to make your project available to other users by sharing the link generated after publishing your project. By accessing the generated link, users can get a copy of their own on their account. All changes made in the copies are not transferred to the original, so there will be no fear of someone messing up the original.
Publishing your project is really easy and done by following these steps:
1. From the Monaca Cloud IDE menu, go to **Project → Publish**.
2. Click **Publish**.

3\. Use the generated link to share your project.
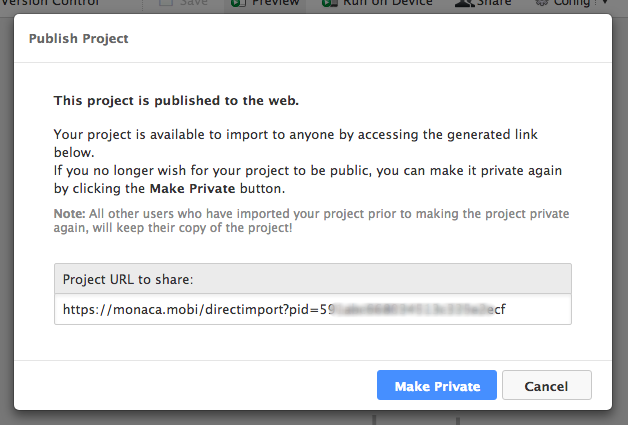
{% hint style="info" %}
If you no longer wish for your project to be available, you can make it private again by clicking the **Make Private** button that appears after publishing your project.
{% endhint %}
## Direct import
With this feature, we allow Monaca users to directly import published Monaca projects or projects from a given URL directly by just accessing a link. Upon accessing the link, the users will be forwarded to the following screen (if signed in), whereby just clicking the import button the project will be imported onto their account.

## Debugger tab
Once Monaca Debugger is connected with Monaca Cloud IDE, you can do console debugging as well DOM inspection in this panel. For more information, please refer to [Monaca Debugger with Monaca Cloud IDE](/products_guide/debugger/debug).

## Preview log tab
`Preview Log` tab is a terminal window for running a HTTP service to provide content in the previewer.

## Previewer
The previewer provides an overview of your app in real-time. You can also interact with the previewer as if it is running on an actual device with the limitation of executing the specific device’s functionality (such as camera, contact and so on) and cross-origin network AJAX request. Along with the Monaca Debugger, you will have effective and efficient experiences during the app development.
In this tab, you can:
* Refresh the previewer.
* Change the display of the device's screen in that tab. You will see a drop-down list of different devices such as iPad, iPhone, and Pixel. You can change the orientation of the screen as well.
* Detach/attach the previewer.

### Previewer limitations
When using the previewer, you should be aware of the following limitations:
* Cordova plugin APIs are not available.
* Ajax requests will fail because of the Cross-origin restriction. However, it can be done if server-side scripts return `Access-Control-Allow-Origin` header (i.e., Cross-Origin Ajax Request is permitted).
* Viewport appearance may differ from real devices.
## Share
{% hint style="info" %}
The usability of this function depends on your Monaca subscription plan. For more information, please refer to [Monaca Subscription Plans ](https://monaca.mobi/en/pricing).
{% endhint %}
The *Share* function allows you to:
* **Manage the team:** add/remove members to the shared project.
* **Share the source code with multiple people** (members are assigned as developers). There are 3 ways to do it:
1. The easiest way is to use Monaca Cloud's Team Management function. Then, two or more people can open the same project in different Monaca Cloud IDEs. However, if there is any conflict while updating the project, the previous version of the project will be overwritten.
2. Another way is to set up a version control system and do the
local development using [Monaca Localkit](/products_guide/monaca_localkit) or [Monaca CLI](/products_guide/monaca_cli). This requires a higher skillset, but it is more collaborative.
* **Let multiple people to test the project** (members are assigned as
testers).
{% hint style="info" %}
If you want to join a team and edit the project files, you need to subscribe to a valid plan. Otherwise, you can only join as a tester. Please refer to [Monaca Subscription Plans](https://monaca.mobi/en/pricing).
{% endhint %}
### Sharing a project
In order to share and manage the members of your project, please do as follows:
1. From the Monaca Cloud IDE, go to **Project → Share** .
2. The Share Project dialog will appear. To add a member, input the emails of your team members. Please enter one email address per line. You can also assign the role of each member as a developer or a tester by choosing from the drop-down menu. Then, click the **Add User** button to send the invitation to them.

3\. To remove a member from the project, just click the :heavy\_multiplication\_x: icon at the end of the row and then click **OK**.

## Code editor
Monaca uses the [Monaco editor](https://microsoft.github.io/monaco-editor/) because of various reasons such as:
* a robust auto-completion system that can be expanded with the use of a language server that provides support for TypeScript, HTML, JavaScript and [Onsen UI](https://onsen.io/). And more to come such as React and Vue.
* basic syntax colorization
* rich intelliSense & validation
{% hint style="info" %}
Please refer to [Editor Shortcuts ](/products_guide/monaca_ide/editor)for the list of all the shortcuts available in the Monaca code editor.
{% endhint %}

If you want to search within the current editor, press `Cmd+F` or `Ctrl+F`. The following dialog will appear:

# Features in the Monaca Cloud IDE
The Monaca Cloud IDE provides developers some special features that allow them to easily develop applications and improve the user experience. The main features are:
* **Integrated Terminal**: a transpiling feature in the Cloud IDE
* **Golden Layout**: adapts the cloud interface as you prefer
* **Multiple previewers**: speeds up testing efficiency
* **Monaco Editor**: better code editor to speed up your development process
* **New Backend**: better GUI for Monaca Backend
## Integrated terminal
The integrated terminal expands your ability to create, manage and develop transpilable projects such as React, VueJS and Angular. Not only does it transpile but the previewer is also launched from the embedded terminal. In other words, projects with hot-loading support are also available in the Cloud IDE. For more information about the integrated terminal and its usage, please refer to [Integrated Terminal](/products_guide/monaca_ide/terminal).

## GoldenLayout
Taking into the account the importance of developer experiences, we have been adding and changing many features and user interfaces in the IDE.
One of those features is the flexible layout. In the Monaca Cloud IDE, all panels can be dragged and placed on any positions. Each panel can also be easily maximized and minimized. As a result, you can arrange the layout as you prefer. This layout is made by [GoldenLayout](http://golden-layout.com/) which a multi-screen layout manager for web apps.

## Multiple previewers
The IDE also allows you to have multiple preview windows open at the same time. Because of this, developers that usually work on developing multiplatform and responsive applications get hooked on this feature. You will like it especially if you have never tried another cloud IDE that provides the user a real-time previewer for mobile apps.

## Monaco editor
The majority of the time spent on app development is spent on writing code. Because of this, Monaca Cloud IDE uses [Monaco](https://microsoft.github.io/monaco-editor/) editor that has:
* A more robust auto-completion system that can be expanded with the use of a language server. Some languages we provide right out of the box are TypeScript, HTML, JavaScript and Onsen UI. And more to come such as React and Vue.
* Basic syntax colorization
* Rich intelliSense & validation
For editor shortcuts, see [Editor Shortcuts](/products_guide/monaca_ide/editor).

## Monaca Backend
The Monaca Backend is on a separated window where all the backend components such as user, collection, push notification and mail template are easier to manage. The navigation between them is also becoming more user-friendly.

# Integrated Terminal
Monaca Cloud IDE is equipped with terminal consoles. This is mainly used for running a HTTP server for showing a preview of an application (previewer). It can also be used to provide access to the Linux container for your project.
In this section, we will guide you through how you can take advantages of the integrated terminal feature in Monaca Cloud IDE.
{% hint style="info" %}
Terminal feature can be used only with a paid plan.
{% endhint %}
## Overview
Integrated terminal is equipped with two console windows:
1. `Preview Log` tab: a terminal window for running HTTP service for providing content in the previewer
2. `Terminal` tab: a terminal window for executing arbitary commands (i.e. git, npm, cordova, monaca and most of the UNIX basic commands)
When the user starts the cloud IDE, a Linux container is created on demand. Containers are shared among multiple users, which means you cannot execute certain commands or operations that are restricted.
Container is destroyed soon after the user closes the cloud IDE. Be sure to read the following section to prevent important files to be deleted.
### Storage & directory
All files that are created in the container will be lost when the container is destroyed, except the files located in the following directories:
* `/home/terminaluser`: user's home directory. This directory is shared among all projects.
* `/project`: project root directory
## Using the integrated terminal
### Starting up
When the project is opened in the Monaca Cloud IDE for the first time, it will perform the necessary configuration for the project under certain circumstances:
* When the project is equipped with a `package.json` file, it will execute `npm install` to install the required NPM dependencies.
* When the `monaca:preview` script is missing from the `package.json` file, the update dialog is displayed and it will execute `monaca update` to update the project structure.
### Preview log and preview server
The preview log tab shows the output of the preview server of each project. The preview server runs the `monaca preview` command which executes the `monaca:preview` script of the `package.json` file. As you can see in this picture, the preview server is running `browser-sync` as it is defined in the script. Previewer will connect to the preview server once it is accepting HTTP request. The default port number is `8080` but you can change it by clicking the `gear` icon.

The port number can be set between `8080-8084` in the configuration dialog.

{% hint style="info" %}
When you change the port number in `the Preview Server Settings`dialog, you might as well need to change the port number in the `package.json` file and other config files manually.
{% endhint %}
### Open a new terminal
To open a new terminal, click the :heavy\_plus\_sign: icon next to your tabs and choose **New Terminal**.

{% hint style="warning" %}
This feature is not available for free plan users.
{% endhint %}
### Customizing the terminal
Terminal is actually hosted by the terminal multiplexer called [Tmux](https://github.com/tmux/tmux/wiki). You can override the default Tmux configuration by editing `~/.tmuxrc`.
Visual aspects of the terminal can be customized by going to **Configure → Workspace Configuration**.

### Scroll mode
You might notice that once you are scrolling inside the terminal console, a little message appeares at the top-right corner telling you the current scolling position of the pane. It indicates that you are in the `scroll mode`. When you scroll down to the bottom of the terminal pane, the `scroll mode` will be exited automatically. Otherwise, you can press `Ctrl-C` or `ESC` key to leave from the `scroll mode`.

## FAQ/Troubleshooting
There are some known issues and limitations:
### Browser with ad blocker settings
Integrated terminal feature is using third-party cookies. Therefore, some Chrome extensions (such as ad blockers) or browser's configuration might block the request to the terminal console. For this reason, please disable such extensions or configurations.
### Failure to connect in Safari
If you are receiving the error message regarding cross-site tracking or cookie, please disable them in the Safari's settings as follows:
1. From Safari, go to **Preferences → Privacy**.
2. The `Privacy` tab might look different in different OS versions. Please make sure that the cookies are unblocked and the cross-site tracking is allowed. Here is an example:


### Limitations
Certain commands and operations are restricted for security purpose. Please contact us if you find any issues.
# Editor Shortcuts
{% hint style="warning" %}
We cannot guarantee that the all of the shortcuts are working properly since the operations may differ depending on the version of OS and browsers.
{% endhint %}
## Shortcut list for the Monaca Cloud IDE
The Monaca Cloud IDE uses [Monaco Editor](https://microsoft.github.io/monaco-editor/).
| Description | Windows / Linux | Mac |
| ----------------------------------------------------- | ------------------------- | ---------------------------------- |
| Undo | Ctrl + Z | Command + Z |
| Redo | Ctrl + Y | Shift + Command + Z or Command + Y |
| Cut | Ctrl + X | Command + X |
| Copy | Ctrl + C | Command + C |
| Paste | Ctrl + V | Command + V |
| Format Document | Shift + Alt + F | Shift + Alt + F |
| Toggle Line Comment | Ctrl + / | Command + / |
| Search | Ctrl + F | Command + F |
| Replace | Shift + Ctrl + F | Command + Alt + F |
| Increase indent | Tab or Ctrl + ] | Tab or Command + ] |
| Decrease indent | Shift + Tab or Ctrl + \[ | Shift + Tab or Command + ] |
| Comment out | Ctrl + / | Command + / |
| Comment in | Ctrl + / | Command + / |
| Increase font size | Ctrl + . | Command + . |
| Decrease font size | Ctrl + , | Command + , |
| Move a line down | Alt + Down | Option + Down |
| Move a line up | Alt + Up | Option + Up |
| Select all | Ctrl + A | Command + A |
| Select downward | Shift + Down | Shift + Down |
| Select right | Shift + Right | Shift + Right |
| Select left | Shift + Left | Shift + Left |
| Select upward | Shift + Up | Shift + Up |
| Select to the end | Alt + Shift + Right | Alt + Shift + Right |
| Select to the start | Alt + Shift + Left | Alt + Shift + Left |
| Align text right | Ctrl + Shift + Right | Option + Right |
| Align text left | Ctrl + Shift + Left | Option + Left |
| Add multi-cursor above | Ctrl + Alt + Up | Command + Alt + Up |
| Add multi-cursor below | Ctrl + Alt + Down | Command + Alt + Down |
| Add multi-cursor above | Ctrl + Alt + Shift + Up | Command + Alt + Shift + Up |
| Move multi-cursor from current line to the line below | Ctrl + Alt + Shift + Down | Command + Alt + Shift + Down |
# Project Dependencies
{% content-ref url="/pages/-MfWeAkHnuoHa-MzIfx1" %}
[File and Folder Structure](/products_guide/monaca_ide/dependencies/file_dir)
{% endcontent-ref %}
{% content-ref url="/pages/-MfWeAgtw1KQtYPdpVBA" %}
[JS/CSS Components](/products_guide/monaca_ide/dependencies/components)
{% endcontent-ref %}
{% content-ref url="/pages/-MfWeAh-7zacwdLfONsa" %}
[Cordova Plugins](/products_guide/monaca_ide/dependencies/cordova_plugin)
{% endcontent-ref %}
{% content-ref url="/pages/-MfWeAg5Zy3I\_k9LoV2z" %}
[Custom Cordova Plugins](/products_guide/monaca_ide/dependencies/custom_cordova_plugin)
{% endcontent-ref %}
# File and Folder Structure
## Cordova version
With different Cordova versions, the file and folder structure of a Monaca project are configured differently.
### For Cordova 6.2 and 6.5
| File/Folder Name | Description |
| ------------------------------------------------------------------------------ | --------------------------------------------------- |
| [plugins/](/products_guide/monaca_ide/dependencies/file_dir#plugins-folder) | Storage folder for additional plugins |
| `res/` | Resources folder for Android, iOS and Winrt |
| [www/](/products_guide/monaca_ide/dependencies/file_dir#www-folder) | Storage folder for the main body of the application |
| [config.xml](/products_guide/monaca_ide/dependencies/file_dir#config-xml-file) | Application configuration file |
### For Cordova 7.1
| File/Folder Name | Description |
| ------------------------------------------------------------------------------ | --------------------------------------------------- |
| [plugins/](/products_guide/monaca_ide/dependencies/file_dir#plugins-folder) | Storage folder for additional plugins |
| `res/` | Resources folder for Android, iOS and Winrt |
| [www/](/products_guide/monaca_ide/dependencies/file_dir#www-folder) | Storage folder for the main body of the application |
| [config.xml](/products_guide/monaca_ide/dependencies/file_dir#config-xml-file) | Application configuration file |
| `package.json` | Cordova plugins management file |
## www folder
Files of the application’s main body are stored here. Files and folders can be arranged freely within the `www` folder, but the following parts have a special significance:
| File/Folder Name | Description |
| --------------------------------------------------------------------------------- | ----------------------------------------------------------------------------------------------- |
| `index.html` | The first page to be displayed when the application starts up. The startup file can be changed. |
| [components/](/products_guide/monaca_ide/dependencies/file_dir#components-folder) | The folder created by Monaca for all JS/CSS components used in the project. |
## Components folder
The folder `www/components/` is for all JS/CSS components used in the project. However, the following two files exist in the folder by default regardless of what kinds of components you have added to your project:
| File Name | Description |
| ------------ | ------------------------------------------------------------- |
| `loader.js` | A JavaScript file used by Monaca to load JavaScript libraries |
| `loader.css` | A style sheet file used by Monaca to load CSS libraries |
{% hint style="info" %}
The `loader.js` and `loader.css` files must be read from an HTML file.
{% endhint %}
Each component will create its own folder in the (one level below) `www/components/` folder.`loader.js` file also loads `cordova.js` file.
## Plugins folder
If you import a Cordova plugin using a ZIP file, it will be stored inside this folder. However, if you import the plugin using package URL/Plugin ID, the plugin file will be downloaded during build.
## config.xml file
The `config.xml` is a file that controls various settings of Cordova. Please refer to the following documentations regarding how to edit the `config.xml` file for Android and iOS:
* [config.xml for Android](/reference/config/android/config_xml)
* [config.xml for iOS](/reference/config/ios/config_xml)
{% hint style="info" %}
For Cordova 6.2 or higher, `config.xml` file is also used to configure either Android or iOS application settings. Please refer to [Cordova Custom Config Plugin](/reference/third_party_phonegap/custom_config).
{% endhint %}
See Also:
* [Third-party Cordova Plugins](/reference/third_party_phonegap)
* [Core Cordova Plugins](/reference/core-cordova-plugins)
# JS/CSS Components
JS/CSS components are JavaScript and CSS libraries you may need to include to your project such as jQuery, jQuery mobile and Onsen UI.
In order to add a JavaScript/CSS library, please do as follows:
1. From the Monaca Cloud IDE, go to **Configure → JS/CSS Component Settings**.
2. `JS/CSS Components` page will open. You can see several libraries listed there. If you can’t find the library you want, input the library’s name in a search box to find it.

3\. Assuming you are searching for Angular, a list of matched libraries will be shown after clicking the **Search** button.

4\. Click the **Add** button to include the library you prefer. Then, you can choose which version of the library to include in your project.

5\. Select which files of the library you want to include and click **Save**.

6\. After that, you will find your newly added library in the list. Click the **Configure** button when you want to change the library’s version or selected file(s).
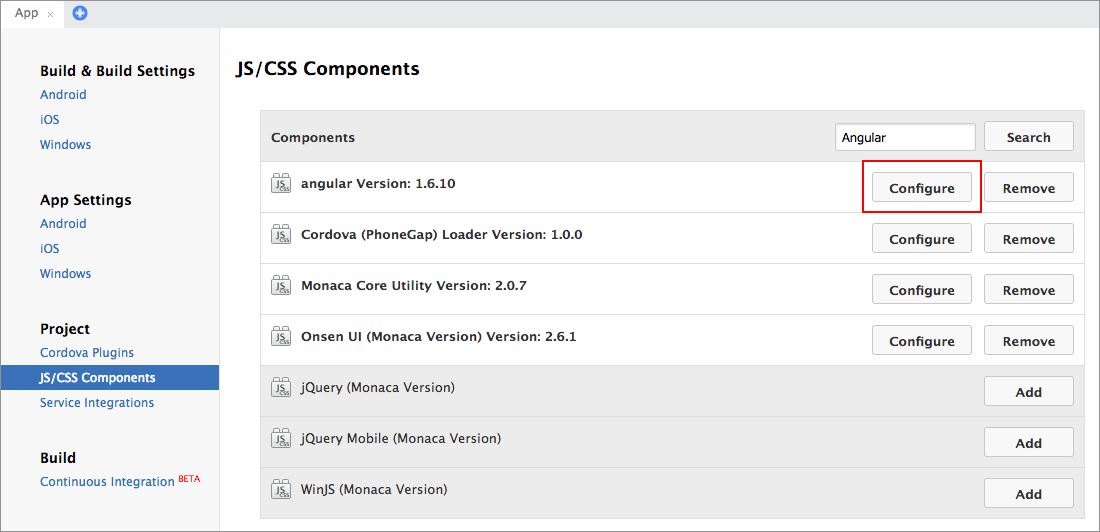
When a library is added, its files are added into the `www/components` folder. The following JavaScript and CSS files will also be automatically updated. These files will always be presented regardless of which libraries are added into your project:
| File Name | Description |
| ------------ | ------------------------------------------------------------- |
| `loader.js` | A JavaScript file used by Monaca to load JavaScript libraries |
| `loader.css` | A style sheet file used by Monaca to load CSS libraries |
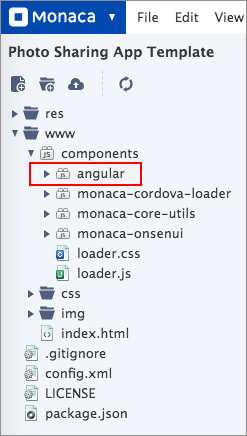
Therefore, libraries can be loaded by simply referencing the two files (as shown above) in the HMTL file. More specifically, all you need to do is to include the following descriptors within the `` tag of the HTML file.
```markup
```
{% hint style="info" %}
The `loader.js` file also loads the `cordova.js` file.
{% endhint %}
{% hint style="info" %}
If you would like to use images within your libraries, you can directly load the image files from the `components` folder.
{% endhint %}
# Cordova Plugins
Usually, you need native code (Java for Android, Objective-C for iOS, etc) to access native device functions such as camera, file system, storage, etc. However, you can access these native functions using JavaScript with Cordova.
Cordova is a set of device APIs that allow a mobile app developer to access native device functions such as the camera or accelerometer from JavaScript. Therefore, Monaca uses Cordova to enable hybrid apps to access native device functions from JavaScript.
For more information about Cordova, please refer to [here](https://cordova.apache.org/).
## Loading Cordova
You can’t use device APIs (Cordova plugins) before Cordova is fully loaded. The `deviceready` event fires once Cordova has fully loaded. Once the event fires, you can safely make calls to Cordova APIs. Applications typically attach an event listener with `document.addEventListener` once the HTML document’s DOM has loaded.
As an example, let’s start up the camera function by using the Camera API. Please copy and paste the code below to your project in the Monaca Cloud IDE. Then you can run it on the [Monaca Debugger](/products_guide/debugger).
{% hint style="info" %}
This code was written for Cordova 7.1. We apologize in advance in case the code may behave differently on different devices.
{% endhint %}
```markup
Camera Sample
```
## Upgrading the Cordova version
{% hint style="info" %}
The Cordova version in Monaca cannot be downgraded.
{% endhint %}
{% hint style="info" %}
When upgrading a Cordova version, a backup of the project is automatically created before the conversion.
{% endhint %}
When creating a new project, the latest Cordova version available in Monaca will be automatically applied.
In order to upgrade the Cordova version of your project, please do as following:
1. From Monaca Cloud IDE, go to **Configure → Cordova Plugin Settings**.
2. Click the **Upgrade** link.

## Built-in Cordova plugins in Monaca
Directly from Cordova Plugins page in Monaca Cloud IDE, you can easily enable Cordova plugins.
* Core Cordova plugins refer to a minimal set of Cordova APIs such as battery, camera, contacts, devices. For more information, please refer to [Core Cordova Plugins](/reference/core-cordova-plugins).
* Third-party Cordova plugins refer to other existing Cordova plugins. There are [some third-party Cordova plugins](/reference/third_party_phonegap) that you can add to your project right from the Cordova Plugins page.
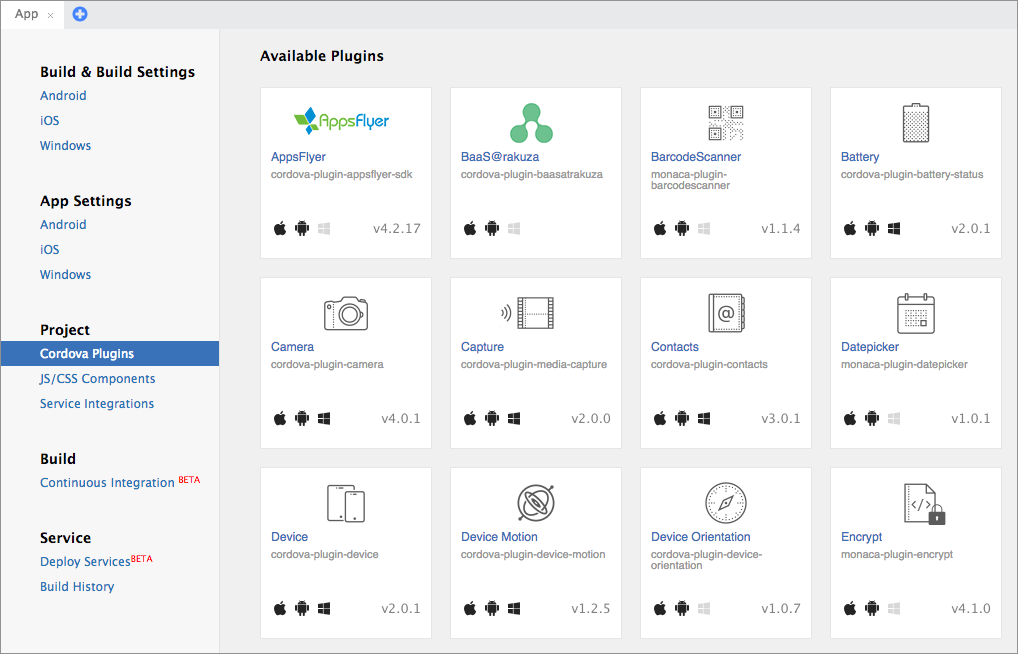
## Importing Cordova plugins
To import a Cordova plugin into your project, please do as follows:
1. From the Monaca Cloud IDE, go to **Configure → Cordova plugin Settings**.
2. The Cordova Plugins page will be shown. On this page, core and some third-party Cordova plugins are listed. Mouseover a plugin and click **Enable** to add the plugin. If you cannot find the plugin you want in the list, you can import other third-party Cordova plugins by using the **Import Cordova Plugin** button. A project containing external third-party Cordova plugins requires a custom built Monaca Debugger. Please refer to [Monaca Debugger with Custom Cordova Plugin](/products_guide/monaca_ide/dependencies/custom_cordova_plugin#monaca-debugger-with-custom-cordova-plugin).

3\. Once a plugin is enabled/imported, you might want to configure it. Mouseover a plugin you want to configure and click **Configure** to open the plugin’s settings dialog where you can change the plugin’s version and set the plugin’s parameters.
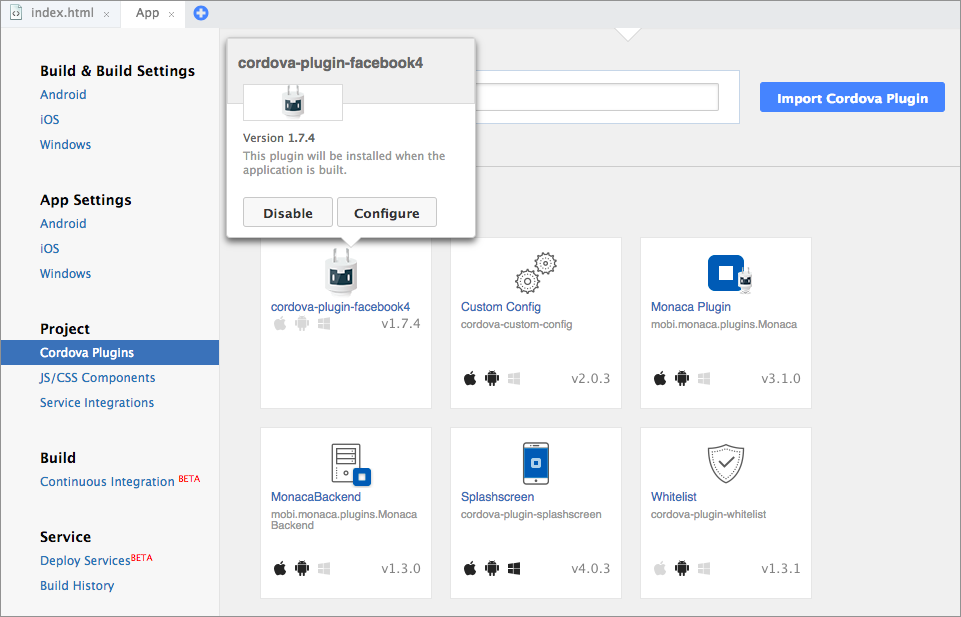

# Custom Cordova Plugins
Cordova Plugin provides a simple way to write native code to your program. On this page, we will describe how to create and add custom Cordova plugins to your Monaca project.
{% hint style="info" %}
You need to subscribe to a valid plan in order to use custom Cordova plugins. Please refer to [Monaca Subscription Plans](https://monaca.mobi/en/pricing).
{% endhint %}
Your custom Cordova plugin needs to follow these requirements:
* It should be compatible with Cordova 4.2 or higher.
* It must have a `plugin.xml` file and is installable with `plugman`
command line tool.
* It must support iOS and Android platforms.
You can find many Cordova plugins in the internet, but it is likely that they are either obsolete or their versions do not match. Therefore, how to create a custom Cordova plugin from scratch is covered in this page.
## Structure of a Cordova plugin
A typical structure of a Cordova plugin is as follows (directories are displayed in bold letters):
* *plugin\_name*
* *src*
* *ios*
* plugin\_name.h
* plugin\_name.h
* *www*
* plugin\_name.js
* plugin.xml
Before getting started, please download the following zip file containing sample plugin code.
{% file src="/files/HpzEyVYlqZTktBS9M4Nb" %}
When you extract the package, you will see the following files and folders:

### plugin.xml file
`plugin.xml` file is a plugin specification file containing plugin's definitions. For more details, please refer to [Cordova Plugin Specification](http://cordova.apache.org/docs/en/latest/plugin_ref/spec.html).
Below is a `plugin.xml` file from the downloaded sample plugin.
```markup
HelloWorldPluginHelloWorldPlugin DescriptionAsial CorporationApache 2.0 License
```
### hello\_world.js file
`hello_world.js` is defined as `js-module` in plugin spec. Therefore, it will be automatically loaded by `cordova.js`, which is included in `loader.js`.
```javascript
var HelloWorld = function() {};
HelloWorld.prototype.say = function(success, fail) {
cordova.exec(success, fail, "HelloWorldPlugin","say", []);
};
var helloWorld = new HelloWorld();
module.exports = helloWorld;
```
For more details about how to write Cordova callback function, please refer to the [Plugin Development Guide](http://cordova.apache.org/docs/en/latest/guide/hybrid/plugins/index.html).
### iOS and Android native code
Native code must be written in either Objective-C or Java, depending on the platform. It must have the same function as defined in the JavaScript file. Also, please be aware that all callbacks are asynchronous.
Here are the guides about native code development.
* [Android Plugin Development Guide](https://cordova.apache.org/docs/en/latest/guide/platforms/android/plugin.html)
* [iOS Plugin Development Guide](https://cordova.apache.org/docs/en/latest/guide/platforms/ios/plugin.html)
## Import a custom Cordova plugin
To import a custom Cordova plugin, please do as follows:
1. From the Monaca Cloud IDE, go to **Configure** **→** **Cordova plugin Settings**.
2. The Cordova Plugins page will open. Click the **Import Cordova Plugin** button.

3\. Then, browse your plugin file (zip file) and click **OK**.
## Monaca Debugger with custom Cordova plugin
The standard Monaca Debugger, which can be found in the store such as App Store or Google Play, includes the standard (core) and several third-party Cordova plugins (refer to [Third-party Cordova Plugins](/reference/third_party_phonegap) for the list of all third-party Cordova plugins pre-included in Monaca). For this reason, the standard Monaca Debugger cannot be used with Monaca projects containing custom or other external third-party Cordova plugins. In this case, custom built Monaca Debugger is required to run such projects properly.
Custom built Monaca Debugger is a debugger which is built within Monaca Cloud IDE inside a project containing custom or external third-party Cordova plugins. Please refer to the following links on how to build custom built debugger and the differences between the standard and custom built debugger:
* [Custom Monaca Debugger for iOS](/products_guide/debugger/installation/debugger_ios#how-to-build-custom-monaca-debugger)
* [Custom Monaca Debugger for Android](/products_guide/debugger/installation/debugger_android#build-and-install-custom-monaca-debugger)
Please make sure to import the custom or external third-party Cordova plugins before building the custom built debugger.
We also offer technical support (fee required) for developing your custom Cordova Plugin. Please contact our support team [here](https://monaca.io/service/index.html).
## Testing a custom Cordova plugin
1. Create a project in the Monaca Cloud IDE using the `Minimum Project Template`.
2. Import a sample custom Cordova plugin you downloaded earlier in [Structure of a Cordova plugin](/products_guide/monaca_ide/dependencies/custom_cordova_plugin#structure-of-a-cordova-plugin).
3. Add the following snippet in the `index.html` file. The code below shows just a simple message dialog using the sample custom Cordova plugin:
```javascript
```
4. Now, run the project in the standard Monaca Debugger. You will see that the message dialog will not be shown because the custom Cordova plugin doesn't exist in the standard debugger.
5. Build a custom built Monaca Debugger. Please refer to the following links on how to build a custom built Monaca Debugger:
* [Custom Monaca Debugger for iOS](/products_guide/debugger/installation/debugger_ios#how-to-build-custom-monaca-debugger)
* [Custom Monaca Debugger for Android](/products_guide/debugger/installation/debugger_android#build-and-install-custom-monaca-debugger)
6. Install the custom built Monaca Debugger.
7. Open the debugger and check the debugger's information by clicking the **About this debugger** button.

1. You should be able to find the custom Cordova plugin as shown in the screenshot below:

1. Login to the debugger and run the project containing the custom Cordova plugin. The message dialog should show if the project runs properly.

# Version Control
{% content-ref url="/pages/-MfWeAh\_piiKrpw-XudZ" %}
[Introduction](/products_guide/monaca_ide/version_control/introduction)
{% endcontent-ref %}
{% content-ref url="/pages/-MfWeAhl-15OPzfTfMVm" %}
[GitHub Integration](/products_guide/monaca_ide/version_control/github_integration)
{% endcontent-ref %}
{% content-ref url="/pages/-MfWeAhjrySP0IMhYYHT" %}
[Git SSH Integration](/products_guide/monaca_ide/version_control/git_ssh_integration)
{% endcontent-ref %}
# Introduction
Version control is a management tool that helps to manage the changes on your project's source code and other collections of information. Usually, the changes are determined by a revision code that consists of numbers and letters. With version control, the revision history can easily be tracked, compared, restored and merged to control the whole set of your source code. Additionally, version control systems provide the ability to allow multiple team members or individuals to collaborate and maintain tracking over the source code.
Version control is available within the Monaca Cloud IDE with a user-friendly interface. There are many version control systems. Currently the Monaca Cloud IDE supports the integration of [GitHub](https://github.com) and any Git services using SSH. If you integrate your Monaca project to your repository, you can simply manage your source code right away on the Monaca Cloud IDE.
In this section, we will guide you on how to integrate your Monaca project to GitHub or any Git services using SSH. Then, you will learn how to configure your Monaca project with a repository.
{% hint style="info" %}
Generally, you can connect only to public repositories. However, with a valid Monaca subscription plan, you can also connect to private repositories. Please refer to [Monaca Subscription Plan](https://monaca.io/pricing.html).
{% endhint %}
There are two ways to integrate your Monaca account with a Git service:
* [GitHub Integration](/products_guide/monaca_ide/version_control/github_integration)
* [Git SSH Integration](/products_guide/monaca_ide/version_control/git_ssh_integration)
# GitHub Integration
{% hint style="info" %}
Generally, you can connect only to public repositories. However, with a valid Monaca subscription plan, you can also connect to private repositories. Please refer to [Monaca Subscription Plan](https://monaca.io/pricing.html).
{% endhint %}
## Setup
In this section, you will learn how to link a Monaca account to your GitHub account. Please follow the instructions below:
1. Go to the [Link to GitHub](https://monaca.mobi/en/vcs) page.

2\. Click the **Link** button. You are required to login with your GitHub account before being redirected to the GitHub’s `Authorize Application` page.

3\. In the `Authorize Application` page, you will be asked to authorize the application in order to link your Monaca account to GitHub. Click **Authorize application** to proceed.

4\. Now your Monaca account is linked to your GitHub account.

{% hint style="warning" %}
Please note that you can only link one GitHub account to a Monaca account. If you try to link with multiple accounts, you will encounter an error.
{% endhint %}
## Connecting a Monaca project to a new GitHub repository
### Step 1: Creating a new empty repository
Go to your GitHub account and create a new empty repository (without a `readme` file).
### Step 2: Connecting a Monaca project with the repository
At this point you should have linked your Monaca account to GitHub. To connect a Monaca project to the new repository, you will need to do some configurations in the Monaca Cloud IDE:
1. From the Monaca Dashboard, open the project you want to connect to a repository.
2. From the Monaca Cloud IDE menu, go to **Project → VCS Configure** .
3. Select **GitHub**.

4\. Select your remote empty repository. Then, click **Initialize** to save the configuration.

{% hint style="warning" %}
The repository cannot be changed after configured.
{% endhint %}
5\. Your project is then uploaded to your new repository in GitHub. By default, your working branch will be configured as `master`. If you want to switch to another working branch, please go to **Project → VCS Configure** .

## Importing a project from a GitHub repository to Monaca
Once you have linked your Monaca account with GitHub, you can import any existing projects from the GitHub repositories to the Monaca Cloud IDE.
1. From the dashboard, click **Import**.
2. In the `Import Project` dialog, fill in the necessary information and choose **Import from GitHub Repository**. Then, select the repository and click the **Import** button.

3\. If the import is successful, the new project will be added to the dashboard. By default, your working branch will be configured as `master`. If you want to switch to another working branch, please go to **Project → VCS Configure**.

## Working with a remote repository
Once you have successfully connected your project with a repository, you can start working on the same project with your team members and keep it synchronized to the latest updates in the Monaca Cloud IDE.
Monaca Cloud IDE provides a very user-friendly interface supporting the version control of your code. Without learning how to use Git, you can still perform some basic Git commands directly from the IDE.
### Checkout from the current working branch
If you have more than one branch and want to change the current working branch, please do as follows:
1. From the Monaca Cloud IDE menu, go to **Project → VCS Configure**.
2. Choose the branch you want to switch to and click the **Clear Cache & Save** button.

{% hint style="info" %}
You will get an error message if you try to checkout to a new branch while you have not committed changes on the current working branch yet. Please push your changes to the current branch before checking out to another branch.
{% endhint %}
### Retrieve changes from a remote branch
If you are familiar with Git commands, retrieving changes from a remote branch refers here to the `git pull` command. To retrieve changes from a remote branch, go to **Project → Pull** in the Monaca Cloud IDE menu. If there are changes in your remote branch, you will receive those updates in your working branch.
{% hint style="info" %}
When you create a project in the IDE, Monaca keeps all the files in the `www` folder. Files outside of this folder are also synced even though they will not appear in the IDE.
{% endhint %}
### Commit changes to a remote repository
After making changes in the current working branch, you are able to commit them back to your remote repository. To commit your changes, please do as follows:
1. From the Monaca Cloud IDE menu, go to **Project → Commit** .
2. Fill in your commit message and check the files you want to commit. Then, click the **Commit** button.
3. Once you are ready to push the updates to the remote repository, select **Project → Push**. After the push, your remote repository will contain the latest changes made in the Monaca Cloud IDE.
### Show the remote commit history
In order to see the full history of your previous commits in the remote repository, go to **Project → Show Remote History**. You will be redirected to the remote Git service provider’s website showing the commit history of your current branch.
### Show the local commit history
Every commit you make in your Monaca Cloud IDE is called a local commit. You are able to view your local commit history through **Project → Show Commit History**. To view the changes of each commit, click the commit on the left panel.
## Unlink Monaca account from GitHub
To unlink your Monaca account from GitHub, please do as follows:
1. Go to the [Link to GitHub](https://monaca.mobi/en/vcs) page.
2. Click the **Unlink** button.

## Unable to relink to GitHub
If you accidentally unlink your Monaca account from Github, relinking it with the steps described in [Setup](/products_guide/monaca_ide/version_control/github_integration#setup) will not work. You will see the following error:

Therefore, to re-link your account, please do as follows:
1. Logout from the Monaca Cloud IDE.
2. Go to the [Monaca Login](https://monaca.mobi/en/login) page and choose **Sign in with GitHub**.

3\. Fill in your GitHub account information.
4\. Then, you will be redirected to the GitHub’s `Authorize application` page. Click **Authorize application** to proceed.

5\. After this, your Monaca account should be linked to your GitHub account. You can confirm this on the `Link to GitHub` page. It should look like this:

# Git SSH Integration
Monaca allows you to connect your project with any Git service repository through SSH authentication. GitHub is a Git service that supports SSH connection. Therefore, we will be using GitHub as an example in the following subsections.
{% hint style="info" %}
Generally, you can connect only to public repositories. However, with a valid Monaca subscription plan, you can also connect to private repositories. Please refer to [Monaca Subscription Plan](https://monaca.io/pricing.html).
{% endhint %}
## Prerequisites
In order to use version control in the Monaca Cloud IDE, you will need an account from a Git service with SSH support
## Setup
### Step 1: Generating a SSH key
1. Go to the [SSH Key Management](https://monaca.mobi/en/ssh) page.
2. Click the **Generate SSH Key** button.

3\. Copy the generated key. It will be used in the next section.
### Step 2: Adding the SSH key to a Git service
For proper authentication between Monaca and your Git service provider, the SSH key generated in the previous section needs to be added to your Git service account.
In this example, we are using GitHub. For other services, please review your Git service's documentation.
1. Go to the [SSH Keys](https://github.com/settings/keys) page.
2. Click the **New SSH key** button.
3. Fill in the following information:
* `Title`: The title of the key
* `Key`: The SSH key generated in the previous step
4. Then, click the **Add SSH key** button.
## Connecting a Monaca project to a new Git repository
### Step 1: Creating a new empty repository
You can create a new repository in any Git service. In this case, we are creating a new repository in GitHub as follows:
1. Go to your GitHub account and create a new empty repository (without
a `readme` file).
2. Click the **SSH** button.
3. Copy the SSH link (see the screenshot below). We will use this link in the next step.

### Step 2: Connecting a Monaca project with a repository
1. From the Monaca dashboard, open the project you want to connect to a repository.
2. From the Monaca Cloud IDE menu, go to **Project → VCS Configure**.
3. Select the **Git** option as shown below:

4\. Input the `Repository URL` (the link you found in the previous step) and the `Committer Name`. Please be aware that you cannot change to another repository after configuration.

5\. Click **Initialize**.
6\. Your project is uploaded to the new repository. By default, your working branch will be configured as `master`. If you want to switch to another working branch, please go to **Project → VCS Configure**.
## Importing a project from a Git repository to Monaca
1. Log into the [Monaca Cloud IDE](https://monaca.mobi/en/login) with your Monaca account.
2. From the dashboard, click **Import**.
3. Select **Import from Git**. Then, input the repository URL and click the **Import Project** button.

4\. If the import is successful, the new project is added to Monaca Dashboard. By default, your working branch will be configured as `master`. If you want to switch to another working branch, please go to **Project → VCS Configure**.
## Working with a remote repository
Once you have successfully connected your project with a repository, you can start working on the same project with your team members and keep it synchronized to the latest updates in Monaca Cloud IDE.
Monaca Cloud IDE provides a very user-friendly interface supporting the version control of your code. Without learning how to use Git, you can still perform some basic Git commands directly from the IDE.
### Checkout from the current working branch
If you have more than one branch and want to change the current working branch, please do as follows:
1. From the Monaca Cloud IDE menu, go to **Project → VCS Configure**.
2. Choose the branch you want to switch to and click the **Clear Cache & Save** button.

{% hint style="info" %}
You will get an error message if you try to checkout to a new branch while you have not committed changes on the current working branch yet. Please push your changes to the current branch before checking out to another branch.
{% endhint %}
### Retrieve changes from remotes
If you are familiar with Git commands, retrieving changes from a remote branch refers here to the `git pull` command. To retrieve changes from a remote branch, go to **Project → Pull** in the Monaca Cloud IDE menu. If there are changes in your remote branch, you will receive those updates in your working branch.
{% hint style="info" %}
When you create a project in the IDE, Monaca keeps all the files in the `www` folder. Files outside of this folder are also synced even though they will not appear in the IDE.
{% endhint %}
### Commit changes to a remote repository
After making changes in the current working branch, you are able to commit them back to your remote repository. To commit your changes, please do as follows:
1. From the Monaca Cloud IDE menu, go to **Project → Commit** .
2. Fill in your commit message and check the files you want to commit. Then, click the **Commit** button.
3. Once you are ready to push the updates to the remote repository, select **Project → Push**. After the push, your remote repository will contain the latest changes made in the Monaca Cloud IDE.
### Show remote commit history
{% hint style="warning" %}
Since there are numerous public and private Git services available to choose from and the URL to the remote commit history is not known for all the services, this option is not available for projects linked to a repository with SSH.
{% endhint %}
In order to see the full history of your previous commits in the remote repository, go to **Project → Show Remote History**. You will be redirected to the remote Git service provider’s website showing the commit history of your current branch.
### Show local commit history
Every commit you make in your Monaca Cloud IDE is called a local commit. You are able to view your local commit history through **Project → Show Commit History**. To view the changes of each commit, click the commit on the left panel.
# Monaca CI
{% content-ref url="/pages/-MfWeAgvi-Wthbu1MMmu" %}
[Overview](/products_guide/monaca_ide/monaca_ci/overview)
{% endcontent-ref %}
{% content-ref url="/pages/-MfWeAjFnO95416LfMHP" %}
[Deploy Services](/products_guide/monaca_ide/monaca_ci/supported_services)
{% endcontent-ref %}
{% content-ref url="/pages/-MfWeAmHGukK4OuBmEcx" %}
[Deploy to Firebase](/products_guide/monaca_ide/monaca_ci/firebase)
{% endcontent-ref %}
# Overview
Monaca CI (Continuous Integration & Deployment) is a service that has been integrated within the current Monaca development environment stack to automate building and deployment cycles.
This automation process is done by using webhooks. Webhooks allow you to build or set up integrations that subscribe to certain events (for example, code commit and branch/tag creation) on GitHub and many other Git services. For Monaca CI, every time you push your project code to the GitHub, GitHub will send a HTTP POST payload to the Monaca server. If the received information meets the Monaca CI configuration, the automation will begin.
Therefore, Monaca CI lets developers focus more on the code and less on the backend process of building, testing and deploying an app.
## Prerequisite
In order to use Monaca CI, you will need to integrate GitHub with your Monaca account. If you haven't done it, please follow the instructions below:
1. Link your Monaca account to GitHub. Please refer to [GitHub Integration](/products_guide/monaca_ide/version_control/github_integration).
2. Connect your project to your GitHub repository. Please refer to [Connecting a Monaca project to a new GitHub repository](/products_guide/monaca_ide/version_control/github_integration#connecting-a-monaca-project-to-a-new-github-repository).
## Getting started with Monaca CI
Assuming you have successfully linked a GitHub repository to your project, you are now ready to enable Monaca CI. Please do as follows:
1. From the Monaca Cloud IDE menu, go to **Configure → Continuous Integration**.
2. Monaca CI is disabled by default. To enable it, check the Triggers and then save it. That’s it! Now your Monaca CI is ready. You can start pushing your project code to the valid branch or tag as configured. Then, you should be able to find the built files under the `Build History` panel.
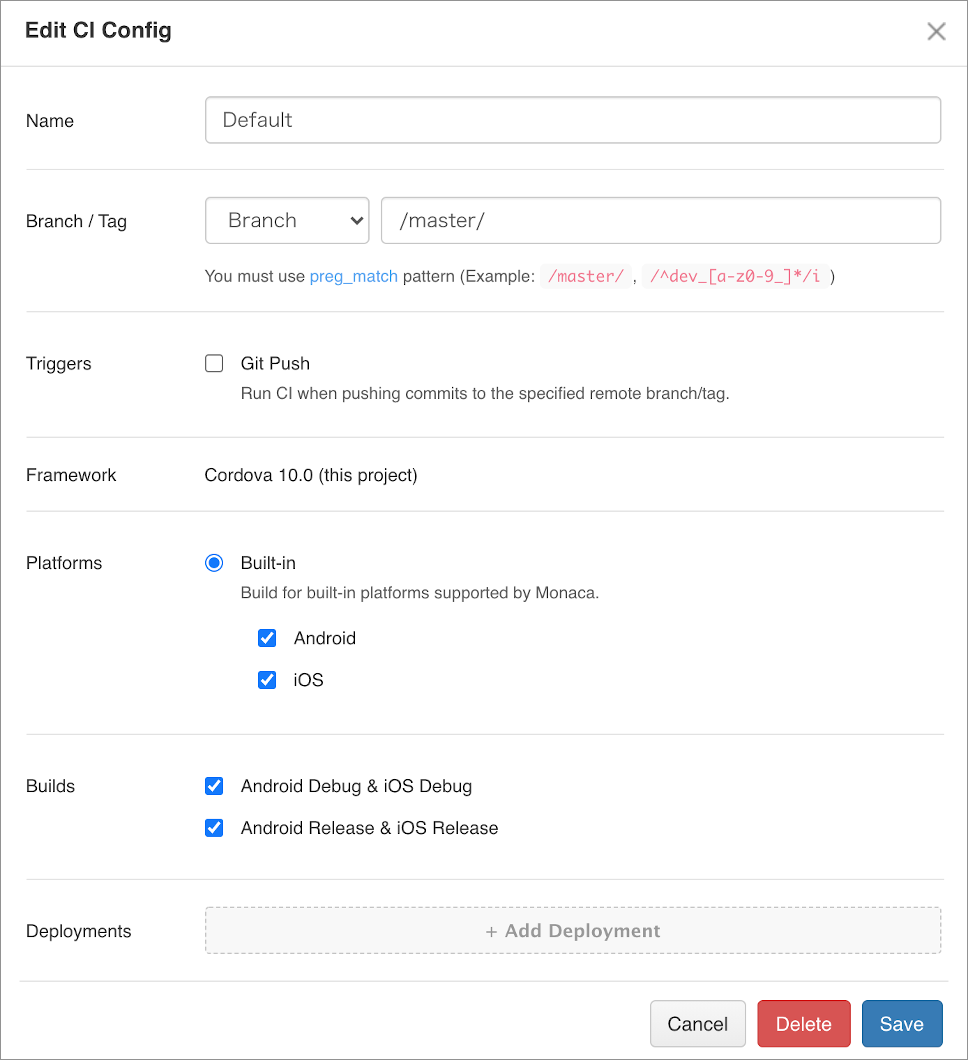
{% hint style="warning" %}
You have to start the build manually in the IDE (one time only) before the Monaca CI can start the automatic build later. This is because you will need to input a valid keystore (for Android) or upload the right provisioning profile (for iOS) for release build.
{% endhint %}
## Automating deploy services
You can also automate your app distribution process with Monaca CI. In order to do this, please do as follows:
1. From the Monaca Cloud IDE menu, go to **Configure → Deploy Services**.
2. Click **Add Deploy Service**.
3. Choose a deployment service and fill in the required information:
* `Config Alias`: a unique identifier for each service
* `Username (DeployGate only)`: app’s owner’s username or organization registered in DeployGate
* `API Key` (DeployGate) or `API Token` (HockeyApp/Appetize): API key provided by the deployment service provider. For more information on how to get the API key for each service, please refer to [Deploy Services](/products_guide/monaca_ide/monaca_ci/supported_services).
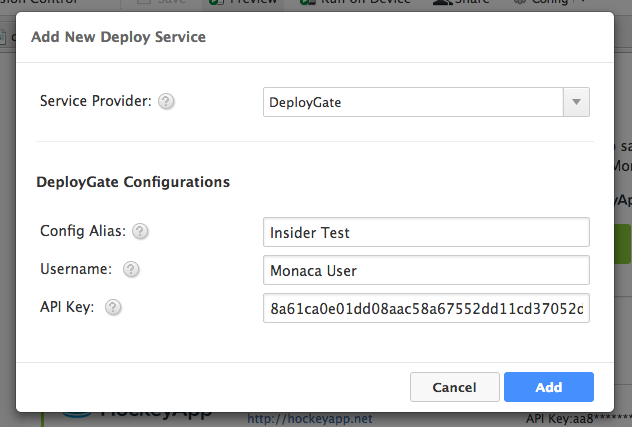
{% hint style="info" %}
You can have multiple deploy services configured in Monaca CI. You can also have multiple aliases for each deploy service. Please refer to [Deploy Services ](/products_guide/monaca_ide/monaca_ci/supported_services)regarding currently supported and upcoming deploy services.
{% endhint %}
## Monaca CI execution procedure
To use the Monaca CI to create a release build for iOS and Android when pushing the project code to a branch called `master`, read the following instructions. You can also use the Monaca CI to distribute the built files to two deployment services such as DeployGate and HockeyApp.
1. Push the code to GitHub.
2. If the code is pushed to a valid GitHub’s branch/tag, the Monaca server will start building your project. Please go to **Build → CI History** to see the live process of the Monaca CI. After the build is completed, you can find the built files in the `Build History` panel (**Build → Build History**).


3\. When the build process is successfully completed in the Monaca server, the build files will be sent to the configured deployment services.
# Deploy Services
You can distribute your applications by using following deploy services.
## Currently supported deploy services
* Appetize.io
* DeployGate
* Firebase
# Deploy to Appetize.io
[Appetize.io](https://appetize.io/) allows you to run Android and iOS apps on your browser. By using this service, it is possible to check the operations of the application without iOS certificates or provisioning profiles.
You can try experiencing Appetize.io’s services with [this demo](https://appetize.io/demo).

**How to get an API token**
1. Register and log into [Appetize.io](https://appetize.io/).
2. Open [account setting page](https://appetize.io/account) and click the **Request** button to acquire the API token.

#### Adding the service to Monaca
After getting the API Token, you are ready to add Appetize.io to Monaca. Please do as follows:
1. From Monaca Cloud IDE menu, go to **Configure → Deploy Services** .
2. Click **Add Deploy Service**.
3. Select `AppetizeIo` and fill in the required information:
* `Config Alias`: a unique identifier for each service
* `API Token`: the API Token provided by Appetize.io

4\. Then, click **Add**. That’s it. Now you can use Appetize’s simulator to install your build apps.
#### Parameters
You can use the following parameters in the JSON recipe script for Monaca CI. For more information, please refer to [Appetize.io documentation](https://appetize.io/docs#creating-apps).
| Parameter | Type | Description |
| ----------------------- | ----------- | ------------------------------------------------------------------------------------------------------------------------------------------------------------------------------------------------------------------------------------------------------------------------------------------------------------------------------------------------------------------------------------------------------------------------------------------------------------------------------------------------------------------------------------------------------------------------------------------------------------------------------------------------------ |
| `platform` | string | \[Required] Must be `ios` or `android`. |
| `timeout` | number | The number of seconds to wait until automatically ending the session due to user inactivity. Must be `30`, `60`, `90`, `120`, `180`, `300` or `600`. (Default is `120`) |
| `disableHome` | boolean | Disable the home button on the iOS simulator. |
| `disabled` | boolean | Disable the streaming of the app. |
| `useLastFrame` | boolean | Show the last image of the screen in the simulator after a session ends. |
| `buttonText` | string | Customize the message prompting the user to start the session. (Default is `Tap to play`) |
| `postSessionButtonText` | string | Customize the message prompting the user to restart the session. (Default is `Tap to play`) |
| `launchUrl` | string | Specify a deep link to bring your users to a specific location when your app is launched. |
| `note` | string | A note for your own purposes. It will appear on your management dashboard. |
| `appPermissions` | JSON object |
Values can be authenticated, public, or null to reset to default. The keys can be:
run: run the app
networkProxy: specify a network proxy when running the app
networkIntercept: use Appetize.io’s intercepting proxy when running the app
debugLog: view your app’s NSLog or Logcat output
adbConnect: debug the app by connecting the ADB to the hosted emulator
androidPackageManager: allow the installation of an additional APK’s while the app is running
|
# Deploy to DeployGate
[DeployGate](https://deploygate.com/) makes it easy to share your in-development iOS and Android apps, allowing developers to seamlessly progress through the prototyping, development, testing, and marketing stages of app distribution.
#### How to get an API key
1. Register and log into [DeployGate](https://deploygate.com/).
2. Go to **Account Settings**.

3\. Then, the profile page will open. You can find the API key at the end of the page.

#### Parameters
You can use the following parameters in the JSON recipe script for Monaca CI. For more information, please refer to [DeployGate API documentation](https://deploygate.com/docs/api).
| Param | Description | Remark |
| ------------------ | -------------------------------------------------------------------------------------------------------------------------------------------------------------------------------------------------------------------------------------------------------------------------- | ----------------------------------------------------------- |
| `token` | Your API key. If you are going to use the API for automated build in your organization, you can use the API key of the organization that is shown on the organization page to upload the app independent from the member/role management. | Stored in deploy service settings. Automatically populated. |
| `file` | App file binary | Automatically populated |
| `message` | \[Optional] Push message | |
| `distribution_key` | \[Optional] Target Distribution Key | |
| `release_note` | \[Optional] Distribution message | |
| `disable_notify` | \[Optional]\(iOS only) If you set yes as a value, disable notify via email. | |
| `visibility` | \[Optional] Set a new application’s privacy setting by specifying `private` (default) or `public`. If you are using a Personal Free account, you have to specify it to `public` to upload a new app since it doesn’t have a slot for private app. No effect when updating. | |
# Deploy to Firebase
{% hint style="warning" %}
Deploy to Firebase is available only for PWA-built applications.
{% endhint %}
## Preparation
For deployment, you need to prepare a `project ID` and`API token`.
### How to get a project ID
1. At [Firebase Console](https://console.firebase.google.com), click **Add project**.
2. The project ID is displayed in the red frame below.

### How to get an API token
1. Install Firebase CLI according to the [Firebase CLI Guide](https://firebase.google.com/docs/hosting/quickstart).
2. After installing the Firebase CLI, get the token with the following command.
```
firebase login:ci
```
## Register a deploy service
You are ready to add the Firebase infomation to Monaca. Please do as follows:
1. From the Monaca Cloud IDE menu, go to **Configure → Deploy Services**.
2. Click **Add Deploy Service**.
3. Select **Firebase** and fill in the required information:
* `Config Alias`: a unique identifier for each service.
* `API Token`: API Token provided by Firebase.
* `Project ID`: Project ID displayed on the Firebase console.
4. Then, click **Add**.
## Start deployment
Using the registered deployment service, we can start deploying the app to the Firebase.
1. Please refer to [Building for PWA](/products_guide/monaca_ide/build/build_pwa) for the build procedure.
2. After the build is completed, navigate to the build result page.
3. Execute the deployment from the build result page. Since the registered deployment services show up at the bottom of the page, click the services of your choice to start the distribution process.

See Also:
* [Building for PWA](/products_guide/monaca_ide/build/build_pwa)
# Build
## Build environment
| Cordova Version | Android | iOS |
| --------------- | ----------------------- | ------------------------------------------- |
| Cordova 12.0 | AndroidSDK version : 33 | Xcode version : 14.2.0 / 15.1.0 |
| Cordova 11.0 | AndroidSDK version : 30 | Xcode version : 13 / 14.2.0 |
| Cordova 10.0 | AndroidSDK version : 29 | Xcode version : 11.3 / 12.2 / 12.5.1 / 13 |
| Cordova 9.0 | AndroidSDK version : 28 | Xcode version : 10.1 / 10.2 / 10.2.1 / 11.3 |
{% content-ref url="/pages/-MfWeAhVekrTjsdGyZSy" %}
[Building for iOS](/products_guide/monaca_ide/build/ios)
{% endcontent-ref %}
{% content-ref url="/pages/-MfWeAgpDfiTBCQZU5Y2" %}
[Building for Android](/products_guide/monaca_ide/build/build_android)
{% endcontent-ref %}
{% content-ref url="/pages/-MfWeAgFQ4YlCifRqIzB" %}
[Building for Electron](/products_guide/monaca_ide/build/electron)
{% endcontent-ref %}
{% content-ref url="/pages/-MfWeAfKNljC5oG5edIj" %}
[Building for PWA](/products_guide/monaca_ide/build/build_pwa)
{% endcontent-ref %}
{% content-ref url="/pages/-MfWeAlSNzm562nB09iy" %}
[Building for Windows](/products_guide/monaca_ide/build/build_winrt)
{% endcontent-ref %}
{% content-ref url="/pages/-MfWeAlMB541hwceg34W" %}
[Build Environment Settings](/products_guide/monaca_ide/build/build_env_settings)
{% endcontent-ref %}
{% content-ref url="/pages/-MfWeAi5iCFQsfhLnZUK" %}
[Common Build and Application Upload Errors](/products_guide/monaca_ide/build/build_error)
{% endcontent-ref %}
{% content-ref url="/pages/-MfWeAgOdmAfdEJlIP8d" %}
[Build History](/products_guide/monaca_ide/build/build_history)
{% endcontent-ref %}
# Building for iOS
{% hint style="info" %}
Starting from April 2026, all iOS apps submitted to the App Store will need to be built with the iOS 26 SDK or later. For more information, see [Submitting iOS Apps to the App Store ](https://developer.apple.com/ios/submit/). Because of this, in order to publish Monaca apps to the App Store, you must use Cordova 13.0 or higher in your projects.
{% endhint %}
{% content-ref url="/pages/-MfWeAhT3q0u-tAjz4Cz" %}
[Building an iOS App](/products_guide/monaca_ide/build/ios/build_ios)
{% endcontent-ref %}
{% content-ref url="/pages/-MfWeAloulcjUSizbuTb" %}
[Build Settings between Monaca and Xcode](/products_guide/monaca_ide/build/ios/import_export)
{% endcontent-ref %}
# Building an iOS App
{% hint style="info" %}
Starting from April 2026, all iOS apps submitted to the App Store will need to be built with the iOS 26 SDK or later. For more information, see [Submitting iOS Apps to the App Store ](https://developer.apple.com/ios/submit/). Because of this, in order to publish Monaca apps to the App Store, you must use Cordova 13.0 or higher in your projects.
{% endhint %}
## Prerequisites
Before getting started, you should:
* subscribe to the [Apple Developer Program](https://developer.apple.com/programs/ios/).
* understand the [Types of Build](/products_guide/monaca_ide/build/ios/build_ios#types-of-build) and their requirements.
### Types of build
In Monaca, the iOS apps have three types of build: debug, test and release. The differences between these types of build are as follows:
| Type of Build | Description | Requirements | Installation |
| ------------------- | -------------------------------------------------------------- | ---------------------------------------------------------------------------------------------- | ----------------------------------------------------------------------------------------------------------------------------------- |
| **Debug Build** | Building the app for installing on development devices. |
|
{% hint style="info" %}
Ad hoc distribution is a way to distribute your applications without going through the App Store. Currently, up to **100** applications which are built by using ad hoc provisioning profile can be shared with other iOS devices through ad hoc distribution. However, the application distribution from the developer organization will be limited to the development stakeholders.
{% endhint %}
## Step 1: Configure an iOS app in Monaca
### Configure iOS app settings
1. From the Monaca Cloud IDE menu, go to **Configure → App Settings for iOS**.
2. Fill in the app information:
| Field | Description |
| ---------------- | ----------------------------------------------------------------------------------------------------------------------------------------------------------------------------------------------------------------------------------------------------- |
| Application name | The name representing your app in the App Store |
| App ID | A unique ID representing your app. It is recommended to use reverse-domain style (for example, `mobi.monaca.appname`). Only alphanumeric characters and periods (at least one period must be used) are allowed. |
| Version Number | The number representing the version of your app. It will be required when uploading your application via App Store Connect later (publishing process). It needs 3 numbers separated by dots (for example, 1.10.2). Each number should be in `[0-99]`. |

{% hint style="danger" %}
The app ID (set in the Monaca app settings) cannot contain asterisk (**`*`**) or the build will fail. The App ID must be the same as the explicit app ID you register (or have registered) in Apple Developer Program. Read more on [Register App ID](/products_guide/monaca_ide/build/ios/build_ios#register-app-id).
{% endhint %}
3\. After finishing the configurations, click **Save**.
{% hint style="info" %}
Currently, when you update either iOS’s App ID or Android’s package name, both of them will change. In other words, they are configured to be the same. However, it is possible to make them different. Please refer to [Can the iOS' App ID and Android's package name be different?](/faq/application#can-the-ios-app-id-and-androids-package-name-be-different).
{% endhint %}
### Configure iOS build settings
1. From the Monaca Cloud IDE menu, go to **Configure → iOS Build Settings** .

2\. Create a new private key or import an existing one. To create a new private key, click the **Generate Key and CSR** button and fill in the username (a name representing this new private key), email address (Apple ID) and your country.

{% hint style="info" %}
If you import an existing private key, you will also need to upload the certificate associated with this private key to Monaca. Please refer to [Import private key and certificate into Monaca](/products_guide/monaca_ide/build/ios/import_export#step-2-import-a-private-key-and-a-certificate-to-monaca).
{% endhint %}
3\. After creating a new private key, a CRS file associated with the private key is also created. Download the CRS file by clicking the **Export** button. It will be used to issue the certificates later in the Apple Developer Program.
4\. [Issue certificates in Apple Developer Program](/products_guide/monaca_ide/build/ios/build_ios#generate-a-certificate) and download them.
5\. [Create provisioning profiles in Apple Developer Program](/products_guide/monaca_ide/build/ios/build_ios#create-a-provisioning-profile) and download them.
6\. Upload the certificates and corresponding provisioning profiles to the Monaca Cloud.
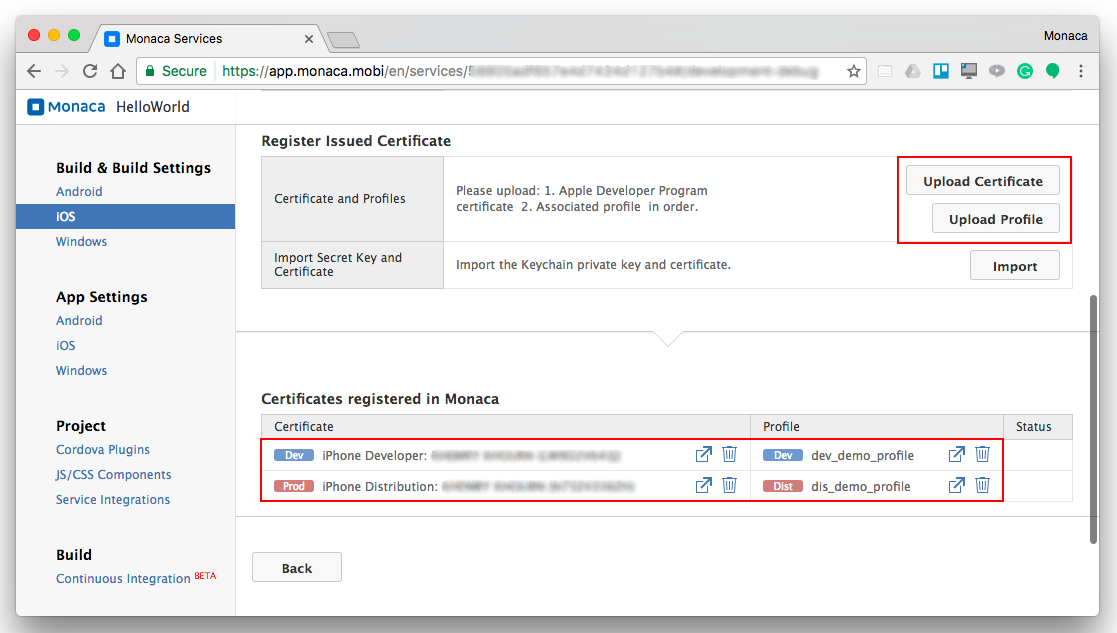
{% hint style="info" %}
You can upload multiple certificates and multiple corresponding provisioning profiles with the Monaca build interface.
{% endhint %}
## Step 2: Configure iOS app in Apple Developer Program
1. From [Apple Developer page](https://developer.apple.com/), go to `Account`.
2. Sign in using the Apple ID and password you used to enroll in the Apple Developer Program. If you haven’t enrolled in the program yet, please subscribe [here](https://developer.apple.com/programs/).
3. Go to `Certificates, Identifiers & Profiles`. The following page will open:

4\. On this page, we are going to do 4 important things:
* [Generate a certificate](/products_guide/monaca_ide/build/ios/build_ios#generate-a-certificate)
* [Register an App ID](/products_guide/monaca_ide/build/ios/build_ios#register-an-app-id)
* [Register a development device](/products_guide/monaca_ide/build/ios/build_ios#register-a-development-device)
* [Create a provisioning profile](/products_guide/monaca_ide/build/ios/build_ios#create-a-provisioning-profile)
### Generate a certificate
There are two types of certificates that can be issued in the Apple Developer Program:
* Development: required for a debug build
* Production: required for either an Ad hoc or a release build
After downloading the CSR file (refer to [Configure iOS build settings](/products_guide/monaca_ide/build/ios/build_ios#configure-ios-build-settings)), you can issue and download certificates in the Apple Developer Program.
In the following example, we will show you how to issue and download a development certificate:
1. Select the `Certificates` item.
2. Click the :heavy\_plus\_sign: button:

3\. Choose **iOS App Development** and click **Continue**.
{% hint style="info" %}
Choose **App Store** and **Ad hoc** if you want to issue a production certificate.
{% endhint %}
4\. Click **Continue** again and upload the CSR file that you’ve downloaded from Monaca Cloud IDE earlier. Then, click **Generate**.
5\. Now, your development certificate has been issued. Download it as you will need to upload it to the Monaca Cloud IDE later.
{% hint style="info" %}
Follow the same instructions in order to create a production certificate.
{% endhint %}
### Register an App ID
1. Select the `Identifiers` item.
2. Click the :heavy\_plus\_sign: button:

3\. The App ID string contains two parts (prefix and suffix) separated by a period. Fill in the information of your App ID:
* `App ID Description`: Description of your App ID. You cannot use special characters such as `@`, `&`, `*`, `'` or `"`.
* `App ID Prefix`: It is defined as your Team ID by default.
* `App ID Suffix`: It is defined as a Bundle ID search string. There are two types of App ID Suffixes:
| Suffix | Description |
| --------------- | ------------------------------------------------------------------------------------------------------------------------------------------------------------------------------------------------------------------------------------------------------------------------------------------------------------------------------------------------------------------------------------------------------------------------------------------------------------------------------------------------ |
| Explicit App ID | Register an explicit App ID if you plan to incorporate app services such as a Game Center, In-App Purchase, Data Protection, and iCloud, or just want a provisioning profile for a single app. Enter a unique string in the Bundle ID field of Explicit App ID which should match with the Bundle ID of your app. The App ID must match the one you set in Monaca Cloud IDE as shown in [Configure iOS App Settings](/products_guide/monaca_ide/build/ios/build_ios#configure-ios-app-settings). |
| Wildcard App ID | Register a wildcard App ID if you want to use a single App ID for building and installing multiple applications. Enter an asterisk (`*`) as the last digit in the Bundle ID field of wildcard App ID. |
* `App Services`: Select the services you want to enable in your app.
4\. Then, click **Continue**. After reviewing your App ID’s info, click **Submit**. Now you have completed your App ID registration to the Apple Developer Program.
### Register a development device
You are required to register your development device before creating a development or a distribution provisioning profile.
In order to register a device that you will be using during your app development, please follow the instructions below:
1. Select the `Devices` item.
2. Click the :heavy\_plus\_sign: button:

3\. Fill in the information of your device.
* `Name`: a name representing your device (Example: MyiPhone)
* `UDID`: the unique device identifier of your device. You can find this identifier by connecting your iOS device to your computer. For macOS, you can check it from the `serial number` of the system information. For Windows, you can check it from the `device instance path` of Device Manager.
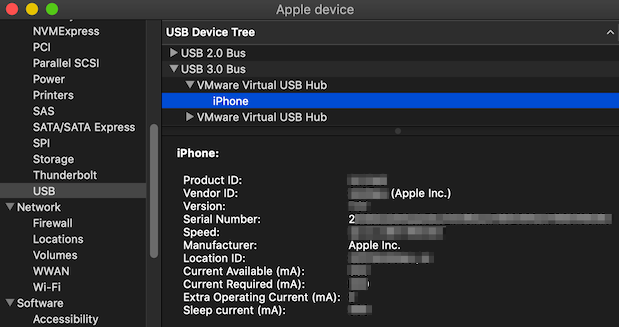

4\. Then, press **Continue**. After reviewing your device’s info, click **Register**. Now you have completed your device registration into Apple Developer Program.
### Create a provisioning profile
One last step before building your iOS app is creating a provisioning profile. There are two types of provisioning profiles:
* Development: used with a development certificate for a debug build
* Distribution: used with a production certificate for Ad hoc and
release builds
In the following example, we will show you how to create a development provisioning profile:
1. Select the `Profiles` item.
2. Click the :heavy\_plus\_sign: button.

3\. Choose `iOS App Development` and click **Continue**.
{% hint style="info" %}
* Choose `Ad hoc` if you want to create a distribution provisioning profile for an Ad hoc build.
* Choose `App Store` if you want to create a distribution provisioning profile for a release build.
{% endhint %}
4\. Select your App ID and click **Continue**.
5\. Select the certificate(s) you want to include in this profile and click **Continue**.
6\. Select the device you have previously registered for development and click **Continue**.
7\. Input a name for the provisioning profile and click **Generate**.
8\. Now your development provisioning profile is ready. Download it as you will need it when building your iOS app in Monaca later.
{% hint style="info" %}
Follow the same instructions in order to create a distribution provisioning profile.
{% endhint %}
## Step 3: Build an app
1. From the Monaca Cloud IDE menu, go to **Build → Build App for iOS** .
2. Select the type of build you want and click **Start Build**.

3\. It may take several minutes for the build to complete. Once the build is completed, your built app is ready to be installed/downloaded. See the below screenshot as an example:
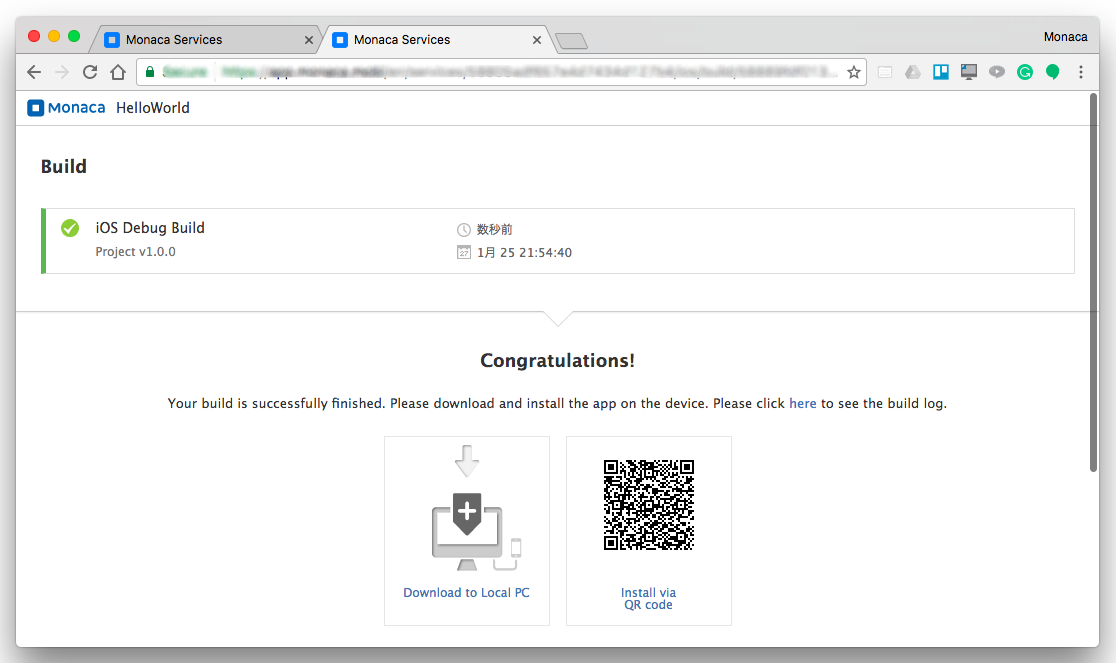
{% hint style="info" %}
If you are using a simulator with macOS Catalina 10.15 or later, you need to run the following command in the terminal before running the app. It enables all the applications.
`sudo spctl --master-disable` \
\
To restore the setting, run the following command:
`sudo spctl --master-enable`
{% endhint %}
See Also:
* [Building for Android](/products_guide/monaca_ide/build/build_android)
* [Building for Windows](/products_guide/monaca_ide/build/build_winrt)
* [App Store Distribution](/products_guide/monaca_ide/deploy/appstore)
* [Build History](/products_guide/monaca_ide/build/build_history)
# Build Settings between Monaca and Xcode
If you want to develop your Monaca app in both Monaca Cloud IDE and Xcode on your Mac OS X, you will need to synchronize the build settings (private keys and certificates) of the app you use in these two environments.
In this page, we will show you how to:
* [Export the Build Settings from Xcode to Monaca Cloud IDE](/products_guide/monaca_ide/build/ios/import_export#export-the-build-settings-from-xcode-to-monaca-cloud-ide)
* [Export the Build Settings from the Monaca Cloud IDE to Xcode](/products_guide/monaca_ide/build/ios/import_export#export-the-build-settings-from-the-monaca-cloud-ide-to-xcode)
## Export the build settings from Xcode to Monaca Cloud IDE
In case you've already configured your build settings (private keys and certificates) in your Mac OS X (Xcode) and you want to export them to the Monaca Cloud IDE, follow these instructions:
### Step 1: Export a private key and a certificate in Keychain Access
In order to export the private key in Keychain Access, please follow the instruction below:
1. In your Mac OS X, go to **Applications → Utilities → Keychain Access**.
2. Select `Certificates` on the left panel of the Keychain Access window.

3\. Right-click on the certificate you want to export and select **Export “**`CERTIFICATE NAME`**”**. Please make sure to choose a certificate that has a private key. Only a certificate that has a private key can be imported to Monaca.

4\. The export screen will be displayed. Save it as a private key by selecting the file format as`Personal Information Exchange (.p12)`. Then, click **Save**.

5\. Enter a password of the private key and click OK. By doing so, a private key file with extension `.p12` will be created. Please remember this password as you will need it when importing this file in the Monaca Cloud IDE later.
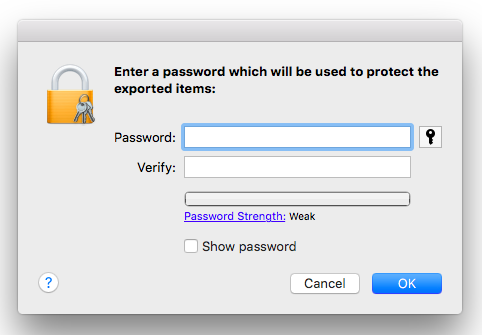
6\. Now, right-click on the certificate you want to export again and select **Export “**`CERTIFICATE NAME`**”**. This time, save it as a certificate by selecting the file format as `Certificate (.cer)` and then click **Save**.

### Step 2: Import a private key and a certificate to Monaca
{% hint style="info" %}
In Monaca, you can register only one private key. If you are using different private keys for the developer and the distribution certificates, you will need to re-import the private key that is related to the certificate you are going to use.
{% endhint %}
To import the private key and certificate in Monaca Cloud IDE, follow the instructions below:
1. From the Monaca Cloud IDE menu, go to **Configure → iOS Build Settings**. Then, click **Import**.

2\. Browse the private key file (`.p12` file) and enter the password of that key. Then click **Import**.

3\. In the `Register Issued Certificate` section, click the **Upload Certificate** button to upload either developer or distribution certificates corresponding to the imported private key.
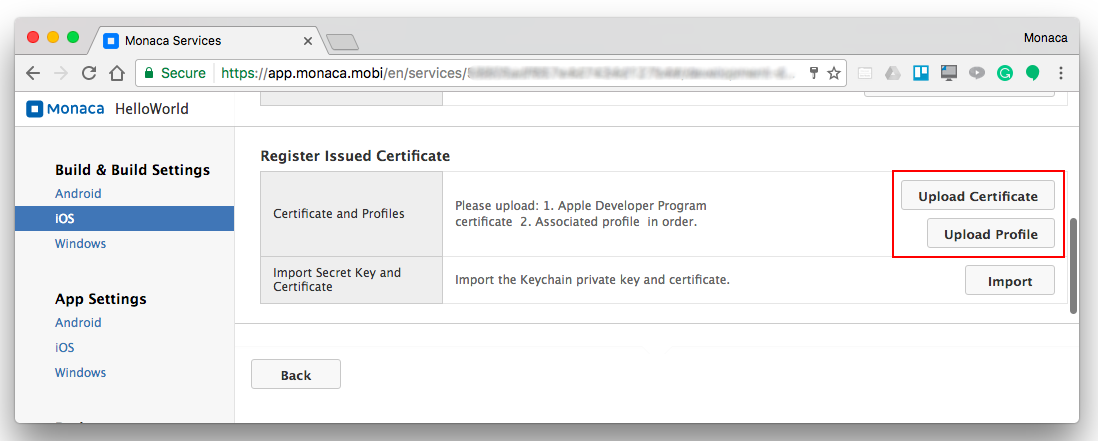
4\. Browse the certificate file (`.cer` file) and upload it.
## Export the build settings from the Monaca Cloud IDE to Xcode
{% hint style="info" %}
From Monaca Cloud IDE, the private key and certificate are exported as one file.
{% endhint %}
To export a private key and a certificate from the Monaca Cloud IDE, please follow the instructions below:
1. From the Monaca Cloud IDE menu, select **Configure → iOS Build Settings**.
2. In the `Certificates registered in Monaca` section, click the `Export` icon of the certificate you want export.

3\. Then, you will be asked to input a password before exporting. Remember this password as it is required when importing this certificate later.
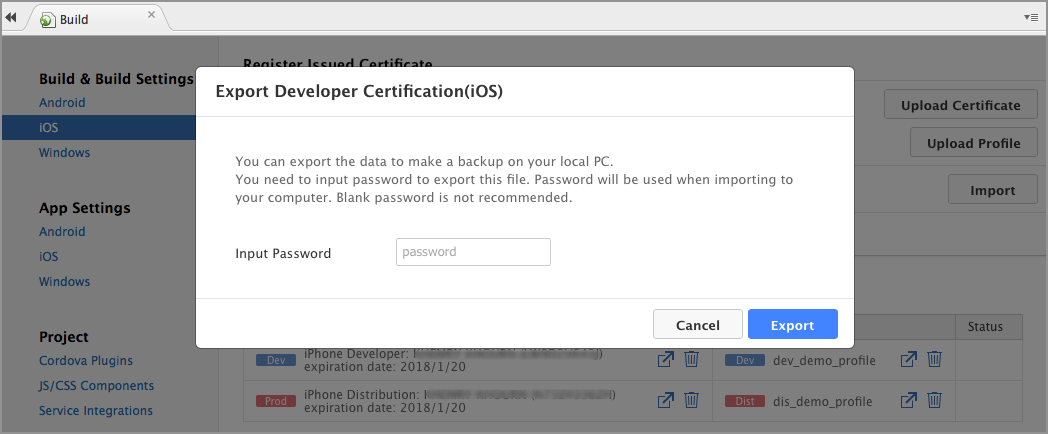
4\. After clicking the **Export** button, you will then be able to download a file with `.p12` extension (Ex: `dev_certification_ios.p12`). This file consists of a private key and a certificate.
5\. Double-click the downloaded file. Input the password of the file and click **OK**. After that, you can use the private key and certificate in Xcode.

# Building for Android
## Types of build
In Monaca, an Android app has two types of build: debug and release. The differences between these types of build are as follows:
| Type of Build | Description | Installation |
| ----------------- | ------------------------------------------------------------------------------------- | ------------------------------------------------------------------------------------------------------------------------------- |
| **Debug build** | An unsigned package that cannot be distributed in the market |
|
| **Release build** | A signed package with the developer’s code sign that can be distributed in the market |
Sideloading
Google Play Store and other eligible markets
|
{% hint style="info" %}
Sideloading typically refers to media file transfer to a mobile device via USB, Bluetooth, WiFi or a memory card. When referring to Android apps, "sideloading" typically means installing an application package in APK format to an Android device without going through the market.
{% endhint %}
## Step 1: Configure an Android app
1. From the Monaca Cloud IDE menu, go to **Configure → App Settings for Android** .
2. Fill in the app information:
General settings:
| Setting | Description |
| ------------------------------------------ | --------------------------------------------------------------------------------------------------------------------------------------------------------------------------------------------------------------------------------------------------------------------------------------------------------------------------------------------------------------------------------------------------------------------- |
| Application Name | The name representing your app in the Market |
| Package Name | A unique name that will be used when uploading to the Android Market. It is recommended to use the reverse-domain style (for example, `io.monaca.app_name`) for app ID. Only alphanumeric characters, periods (at least one period must be used) and underscore are allowed. Each segment should be separated by a period and started with an alphabetic character. |
| Use Different Package Name for Debug Build | If enabled, the package name of a release built and a debug built apps are different. The package name of a debug built app will have `.debug` extension, and the one for a project debugger will have `.debugger` extension. However, this option is disabled by default because it made some plugins impossible to be debugged due to the fact that they are tied to the exact package names (eg. in-app purchase). |
| Version | The version number of your app. A version number consist of numbers separated by dots (for example, 1.0.0). |
| Version Code | The internal version number of your app, relative to other versions. The value must be an integer, so that the applications can programmatically evaluate it for an upgrade. |
| Fullscreen | This option is only available with the Cordova 3.5 and later. If enabled, your app will run in a fullscreen mode which hide the status bar. |

Misc: settings regarding your Android app:
| Setting | | Description |
| ------------------- | ------- | ------------------------------------------------------------------------------------------------------------- |
| Allowed URL | `*` | Specify the URLs that can be accessed from your app. If set to `*`, you can access all domains from your app. |
| Keep Running | Enable | Enable this if you want Cordova to keep running in the background. |
| Disallow Overscroll | Enable | Enable this if you want to disable the glow when a user scrolls beyond the edge of the webview. |
| Screen Orientation | Default | You can also set the device’s screen orientation when running your app as a landscape or a portrait. |
After finishing the configurations, click **Save**.
{% hint style="info" %}
Currently, when you update either iOS's app ID or Android's package name, both of them will change as they are configured to be the same. However, it is possible to make them different from each other. Please refer to [Can the iOS' App ID and Android's package name be different?](/faq/application#can-the-ios-app-id-and-androids-package-name-be-different).
{% endhint %}
3\. Set of adaptive icons
If you are using a Monaca project with Cordova 9.0 or later, you can set an adaptive icon for Android 8.0 or later.
To set an adaptive icon, upload an image file under the `res` folder and add a `background` attribute and a `foreground` attribute to the `icon` tag of the `config.xml` file. If the previous src attribute is set, the value of the src attribute is not used.
If the OS version does not support adaptive icons, the image set in the `foreground` attribute will be displayed. If the previous `src` attribute is set, the value of the src attribute takes precedence.
An example of placing an image under `/res/android/icon/`:
```markup
```
An example of setting the `src` attribute:
```markup
```
{% hint style="info" %}
Currently, it is not possible to see or upload adaptive icons from the App settings of Android. Follow the manual above and update your `config.xml` yourself.
{% endhint %}
## Step 2: Configure Android KeyStore
A KeyStore is a binary file that contains a set of private keys. A private key represents the entity to be identified with the app, such as a person or a company. A KeyStore is encrypted with a password and it cannot be restored if the password is lost. When a KeyStore is lost or it overwrites another KeyStore, it is impossible to use the same key to re-sign the signed package.
A KeyStore is required for building a release version of your Android app. In Monaca, you can either create a new KeyStore or import an existing one. In order to create a new KeyStore, please do as follows:
1. From the Monaca Cloud IDE menu, go to **Configure → Android KeyStore Settings** .
2. `Manage KeyStore and Alias` page will open.

3\. Click the **Clear and Generate New** button. The following screen will open:
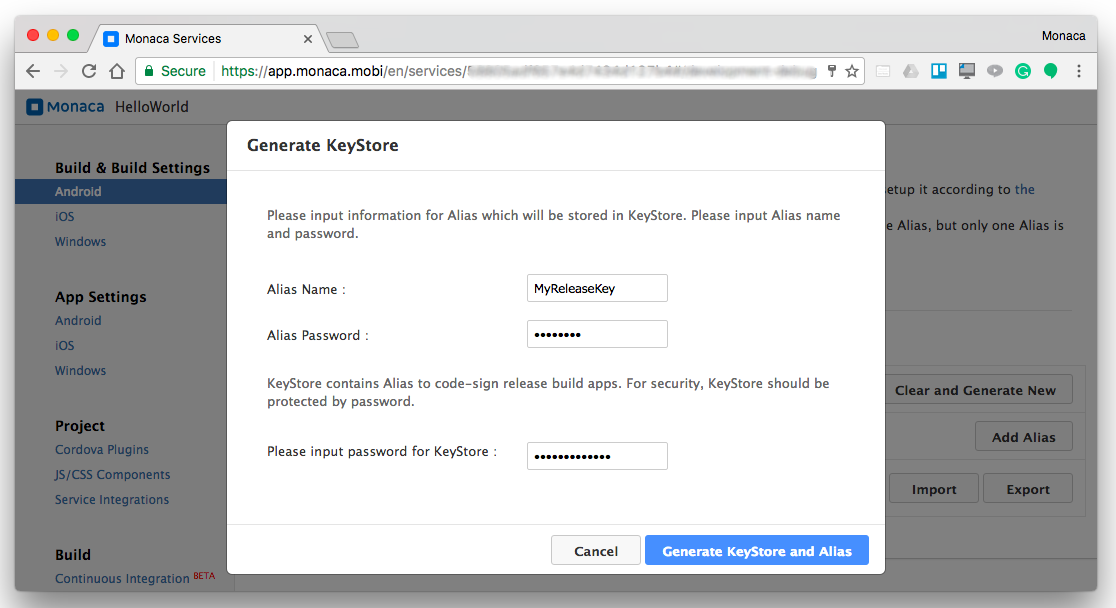
4\. Fill in the necessary information as shown in the above screen:
* `Alias`: the name representing the private key that you will use later when signing your app. Multiple aliases can be stored within one KeyStore.
* `Password`: the password for the private key (alias).
* `Password of the keystore`: the password for the KeyStore. You will need this password when importing the KeyStore.
5\. Then, click the **Generate KeyStore and Alias** button to generate the KeyStore.
{% hint style="danger" %}
When a keystore is lost, it is impossible to use the same key to re-sign the signed package. Therefore, always back up and keep the KeyStore that is used to sign application(s). Use the **Export** button to download your KeyStore.
{% endhint %}
## Step 3: Build the app
1. From the Monaca Cloud IDE menu, go to **Build → Build App for Android**.
2. Select the type of build you want and click **Start Build**.

3\. If you choose `Release Build`, you will also need to select an alias to sign your package before starting the build.
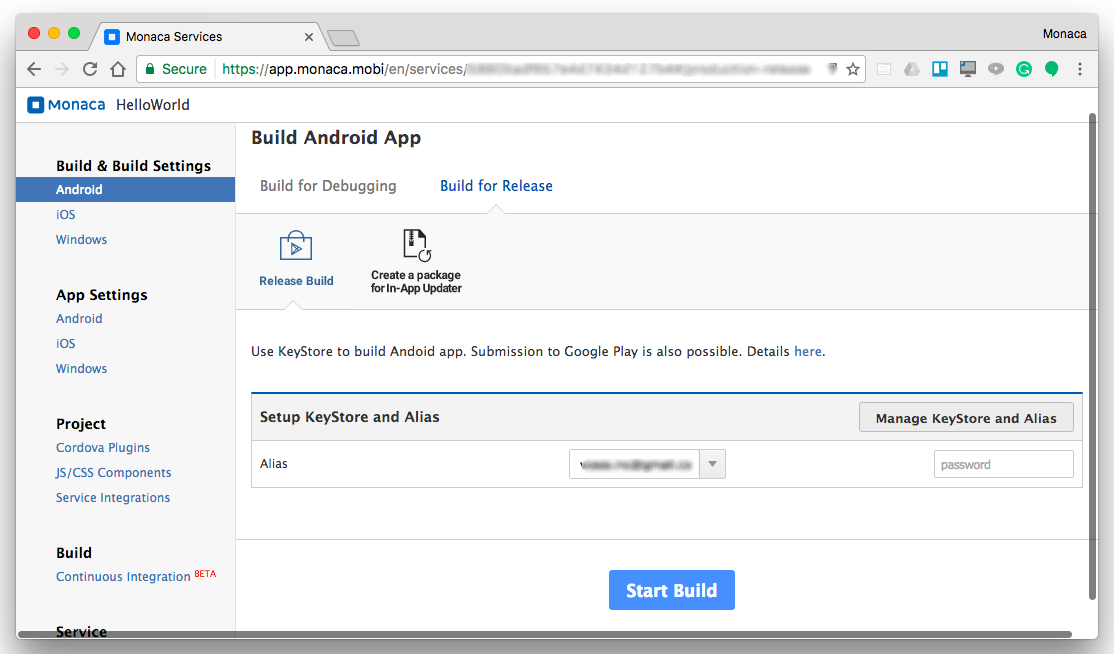
4\. It may take several minutes for the build to complete. Once the build is completed, your app is ready to be installed/downloaded. See the screenshot below as an example:
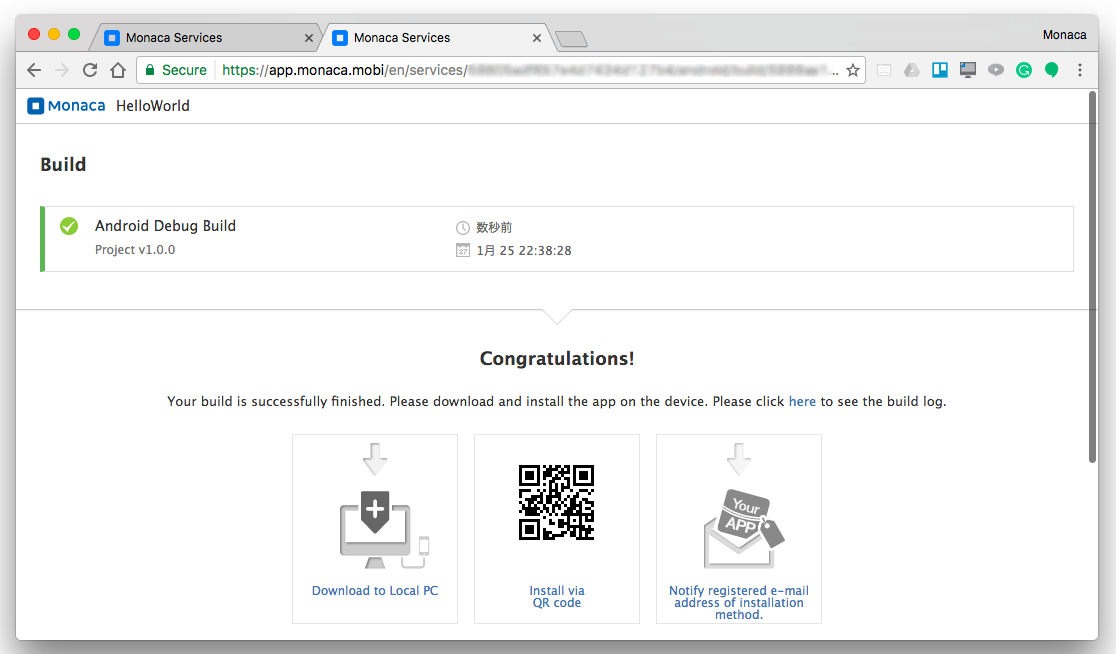
See Also:
* [Building for iOS](/products_guide/monaca_ide/build/ios)
* [Building for Windows](/products_guide/monaca_ide/build/build_winrt)
* [Google Play Distribution](/products_guide/monaca_ide/deploy/google_play)
* [Build History](/products_guide/monaca_ide/build/build_history)
# Building for Electron
{% content-ref url="/pages/-MfWeAgEmIxs0bb93IPW" %}
[Building on Windows](/products_guide/monaca_ide/build/electron/build_electron_windows)
{% endcontent-ref %}
# Building on Windows
## Types of build
In Monaca, Electron applications have two types of build: debug and release. The differences between these types of build are as follows:
| Type of Build | Description |
| ----------------- | ---------------------------------------------------------------------------------------------------- |
| **Debug Build** | DevTools are shown by default when the application is launched. It can be closed or opened manually. |
| **Release Build** | There are no DevTools. |
{% hint style="info" %}
The built package is unsigned. You might need to [manually sign ](/products_guide/monaca_ide/build/electron/build_electron_windows#sign-the-executable-file)the package after downloading.
{% endhint %}
## Step 1: Configure the app
1. From the Monaca Cloud IDE menu, go to **Configure → App Settings for Windows**.
2. Fill in the app information:
* Application information:
| Setting | Description |
| ----------------------- | ----------------------------------------------------------------------------------------------------------------------------------------------------------------------------------------------------------------------------------------------------------------------------------------------------------------------------------------------------------- |
| Application Name | The application name |
| App ID | A unique name which will be used when uploading to the Store. It is recommended to use the reverse-domain style (for example, `io.monaca.app_name`) for app ID. Only alphanumeric characters, periods (at least one period must be used) and underscore are allowed. Each segment should be separated by a period and started with an alphabetic character. |
| Version Number | The version number of your app. A version number consist of numbers separated by dots (for example, `1.0.0`) |
| Application Description | The description of your application |
* Application Icon
Set an application icon as a PNG. The icon should be at least `512x512` pixels to work across all operating systems.
3. After finishing the configurations, click **Save**.
## Step 2: Build the app
1. From the Monaca Cloud IDE menu, go to **Build → Build App for Windows**.
2. Select the type of build you want and click the **Start Build** button. The windows release build supports the following build packages:
| Package | Description |
| -------- | ---------------------------------- |
| **nsis** | Generates an NSIS (EXE) installer. |
| **zip** | Packs everything into a zip file. |

{% hint style="info" %}
There is no build package option for the Windows debug build. The default package is zip.
{% endhint %}

3\. It may take several minutes for the build to complete. Once the build is completed, your application is ready to be downloaded.
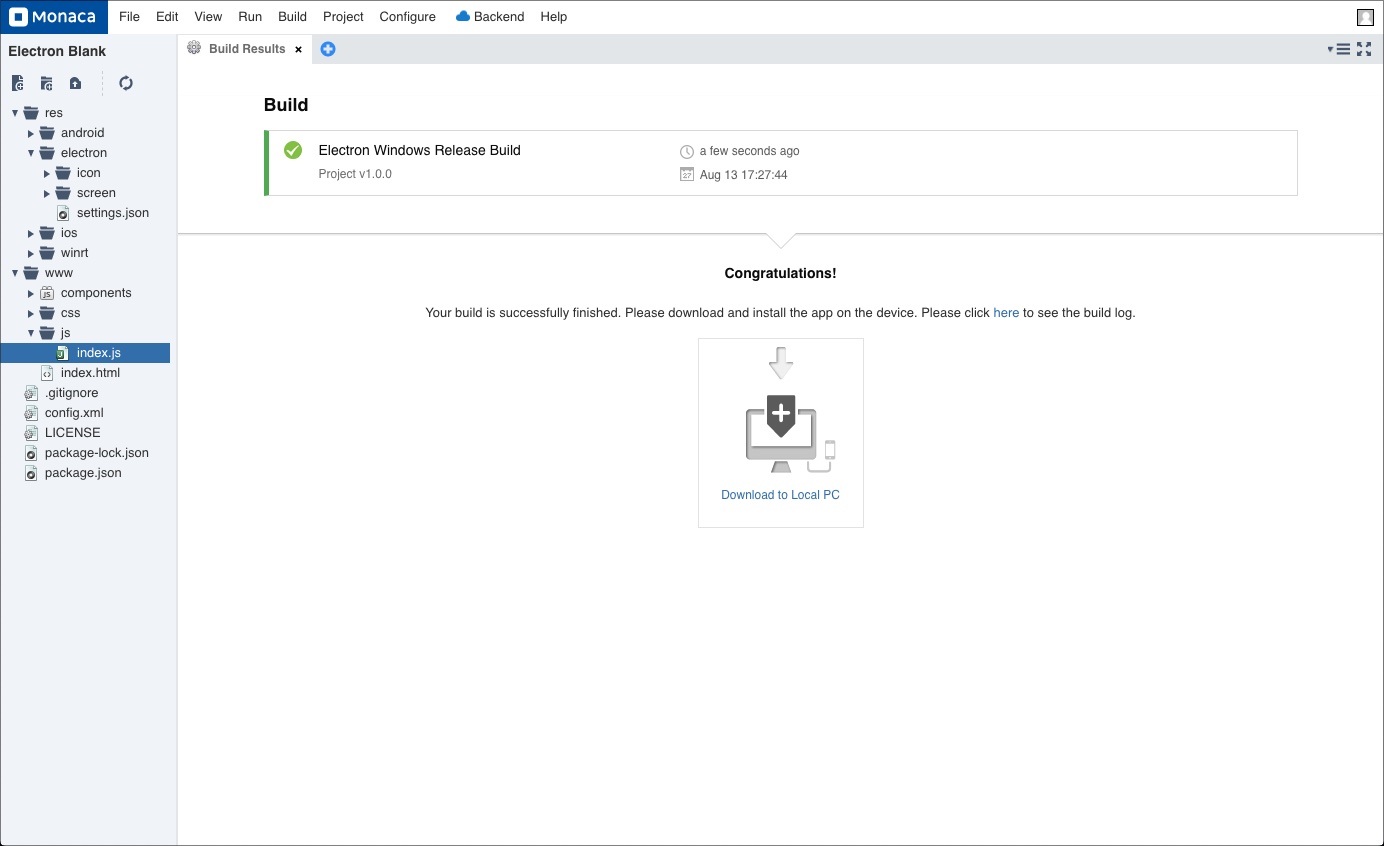
## Step 3: Install the app
### ZIP package
#### Run the executable file
1. Extract the downloaded zip file.
2. Double click on the executable file. There might be a dialog asking for confirmation before running the application. If so, click **More info**.

3\. Click **Run anyway**.
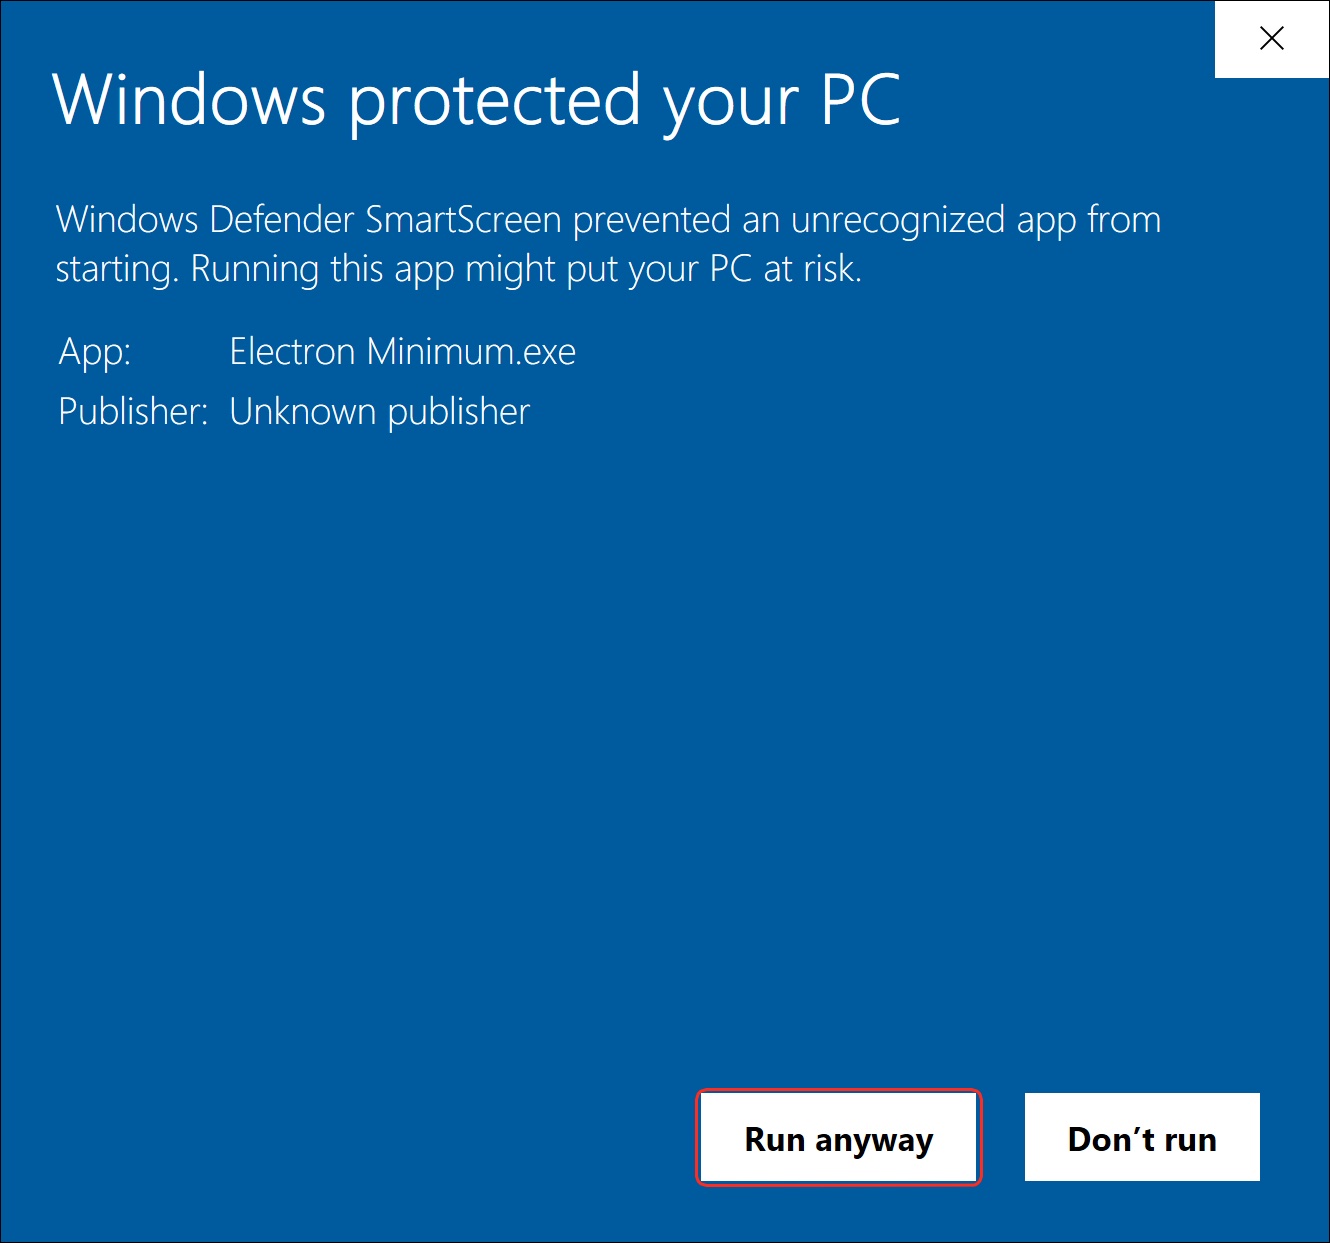
#### Sign the executable file
Before proceeding, make sure you have the following prerequisites.
1. Windows Software Develoment Kit (Windows SDK). Please download it from the Microsoft official page. If you are using Windows 10, you can download from this [link.](https://developer.microsoft.com/en-us/windows/downloads/windows-10-sdk)
2. Signing Certificate.
We will be using the `SignTool` command to sign the executable file (`exe`). `SignTool` is included when you install Windows SDK. To sign a file, you just need to open the `Command Prompt` and run:
```
signtool sign /f MyCert.pfx /p "MyPassword" "MyApp.exe"
```
For more information of how to use the `SignTool` command, please refer to the official documentation [here](https://docs.microsoft.com/en-us/windows/win32/seccrypto/using-signtool-to-sign-a-file).

To verify whether a file is signed, you can run:
```
signtool verify /pa /v "MyApp.exe"
```

### NSIS (EXE) Installer
#### Install the application
1. Download the NSIS (EXE) file.
2. Double click on the executable file. There might be a dialog asking for confirmation before running the appliation. If so, click **More info** and then **Run anyway**.

3\. The application is installed to your default installation path.

#### Create an MSIX package
Before proceeding, please make sure you have the following prerequisites.
1. MSIX Packaging Tool. You can download it from the Microsoft official page. If you are on Windows 10, you can download from this [link](https://www.microsoft.com/en-us/p/msix-packaging-tool/9n5lw3jbcxkf).
2. Signing Certificate
You can use the `MSIX Packaging Tool` to create an MSIX application package from an existing EXE installer. You can refer to the official Microsoft [guideline](https://docs.microsoft.com/en-us/windows/msix/packaging-tool/create-app-package). To use the tool, follow the instructions below:
1. Open the `MSIX Packaging Tool` and choose **Application Package**.

2\. Browse and choose the downloaded NSIS (EXE) file and check the box under `Sign package` and browse and select your `.pfx` certificate file. If the certificate is protected, type the password in the password field.

3\. Choose the first option **Create package on this computer**.
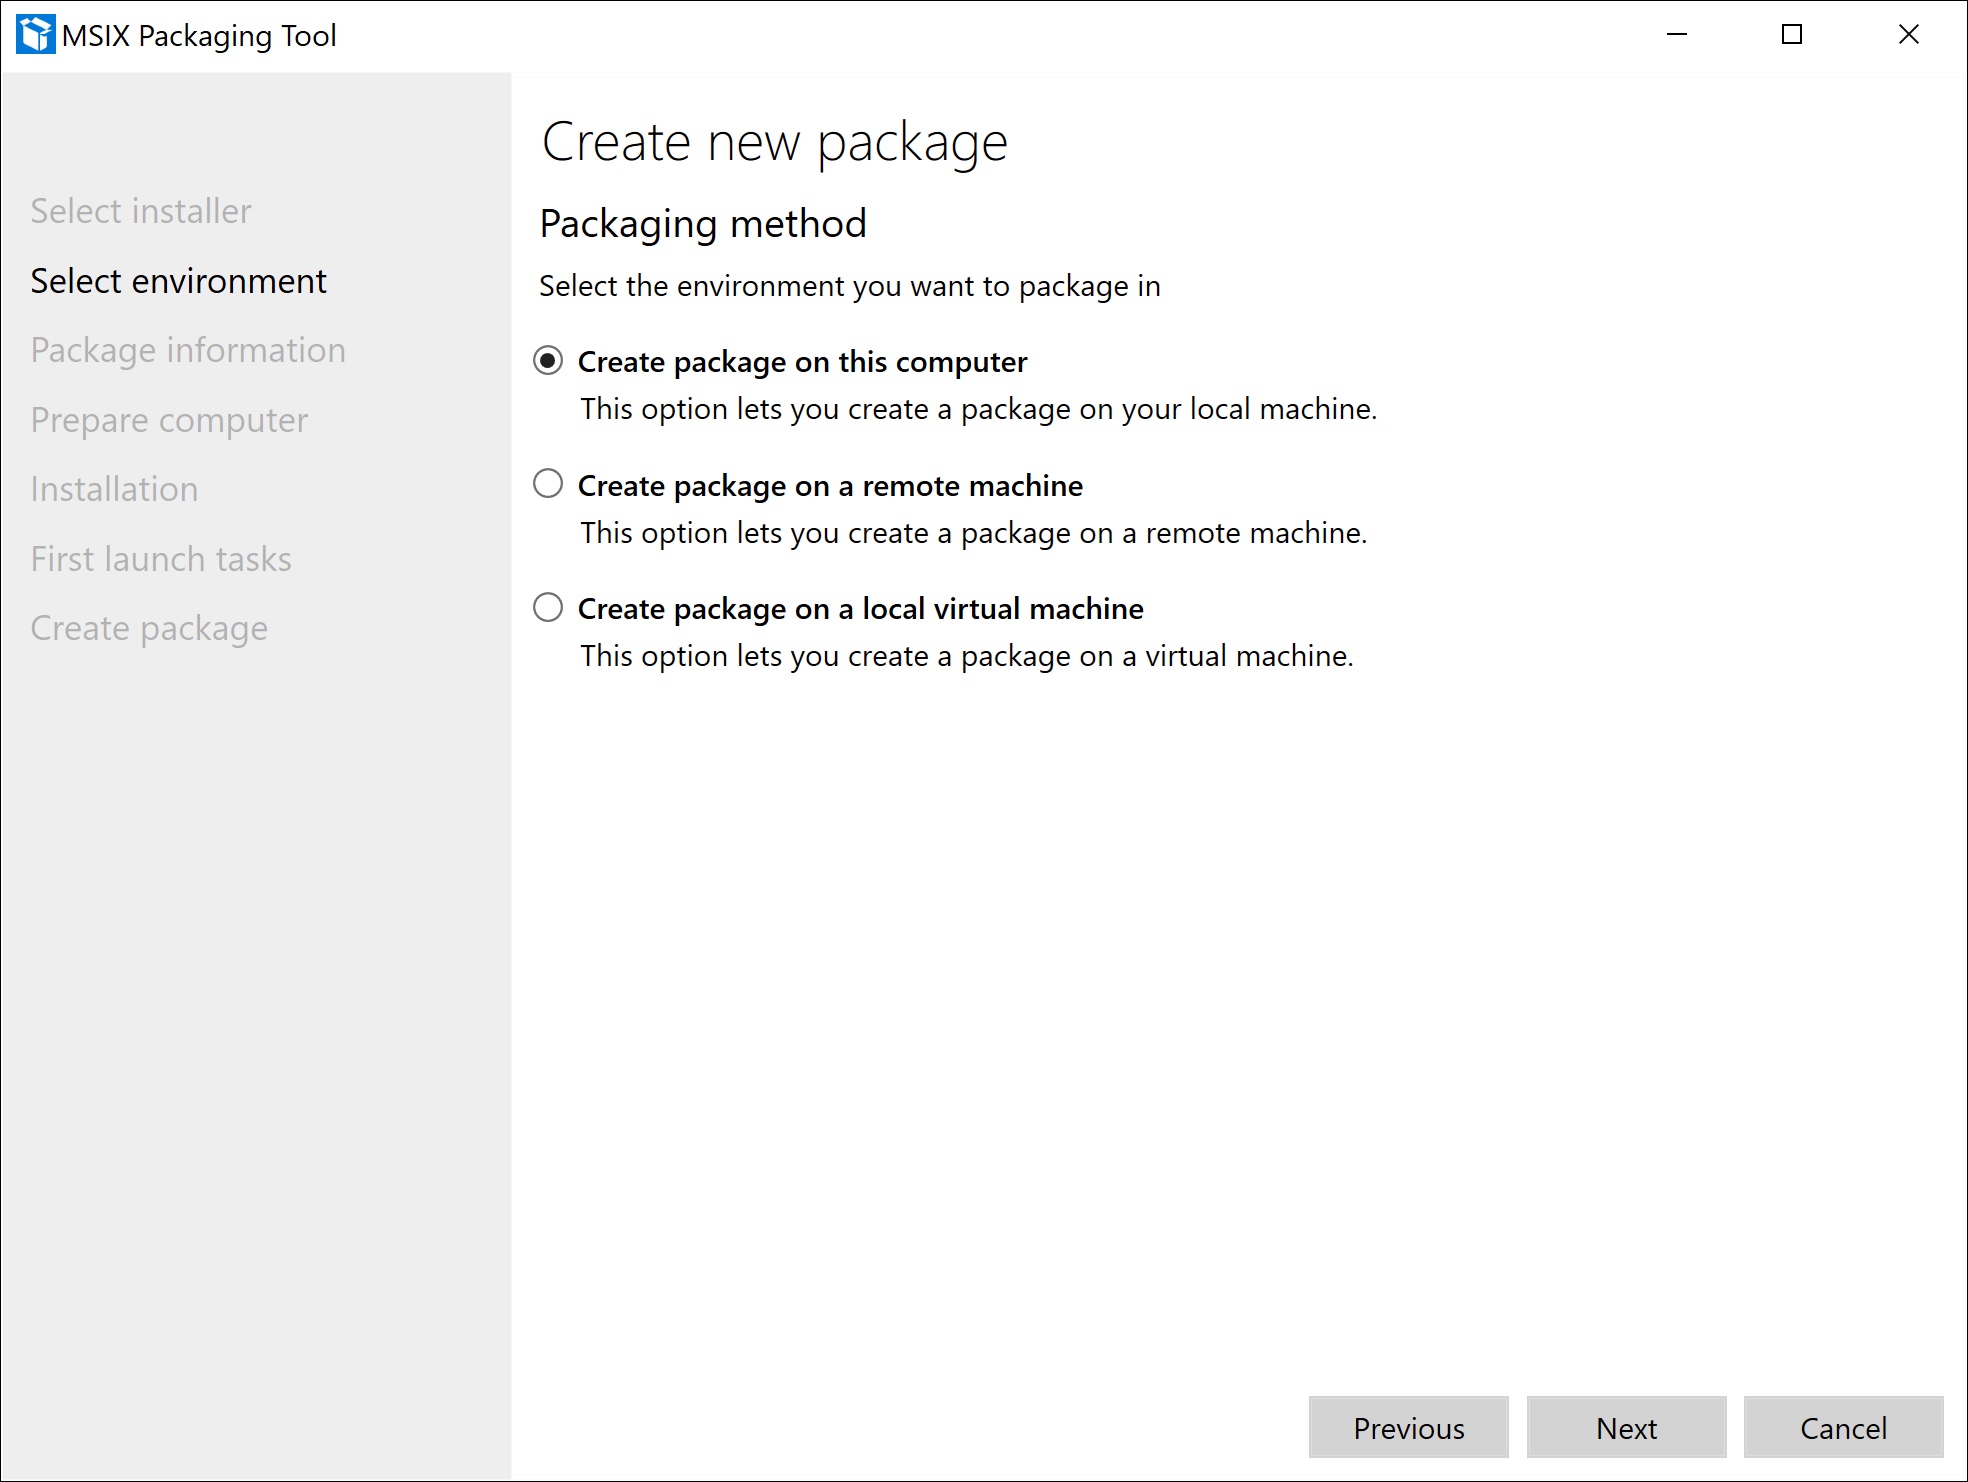
4\. Fill in the required information. The `Publisher name` will be automatically filled from the uploaded certificate.

5\. Next, go to the `Prepare computer` page that provides options to prepare the computer for packaging. The `MSIX Packaging Tool Driver` is required and the tool will automatically try to enable it.

6\. In the `Installation` page, the tool will test the installer by trying to install the application on your computer.

7\. On the `First launch tasks` page, the entry point should be automatically populated in the list. If it is not, please click the **Browse** button and select the entry point executable file.

8\. Specify the location you would like to save the `MSIX` package.

9\. It might take up to several minutes to create the package. After it is done, it should display something like this:

**Tested environments**
* Windows 10 Pro, Version 1803, OS build 17134.885
* Windows Software Development Kit - Windows 10.0.18362.1
* MSIX Packaging Tool - Version 1.2019.701.0
# Building for PWA
## Step 1: Configure an application
1. From the Monaca Cloud IDE menu, go to **Configure → App Settings for PWA**.
2\. Fill in your application information:
* | Field | Description |
| -------------- | ----------------------------------------------------------------------------------------------------------------------------------------------------------------------------------------------------------- |
| Name | The application name |
| Short Name | The name used in places where there is not enough space to display the full name (such as home screen). |
| Description | General description of the application. |
| Language | The language to used for `name` members and `short_name` members. |
| Text Direction | The writing direction of the text. |
| Scope | Defines the navigation range of the website. With this setting you can restrict which web pages can be displayed. If the user tries to access outside the range, it will transition to the normal web page. |
| Start URL | The URL to be loaded when launching the application |

* Application Display Preference
| Field | Description |
| ---------------- | ---------------------------------------------------------------------------------------------- |
| Display | The display mode of the application. The default is `standalone` to display like a native app. |
| Orientation | The display orientation of the screen. |
| Background Color | The background color of the splash screen. |
| Theme Color | The color of the status bar. |
* App Icon
You can set the application icon. Each size icons are automatically generated from one image. The icons are displayed on the home screen or as a splash image.
3\. After finishing the configurations, click **Save**.
## Step 2: Build an application
1. From the Monaca Cloud IDE menu, go to `Build` → `Build App for PWA`.
2. Select the type of build you want and click **Start Build**.

3\. It may take several minutes for the build to complete. Once the build is completed, your app is ready to be downloaded or distributed. See the screenshot below as an example:
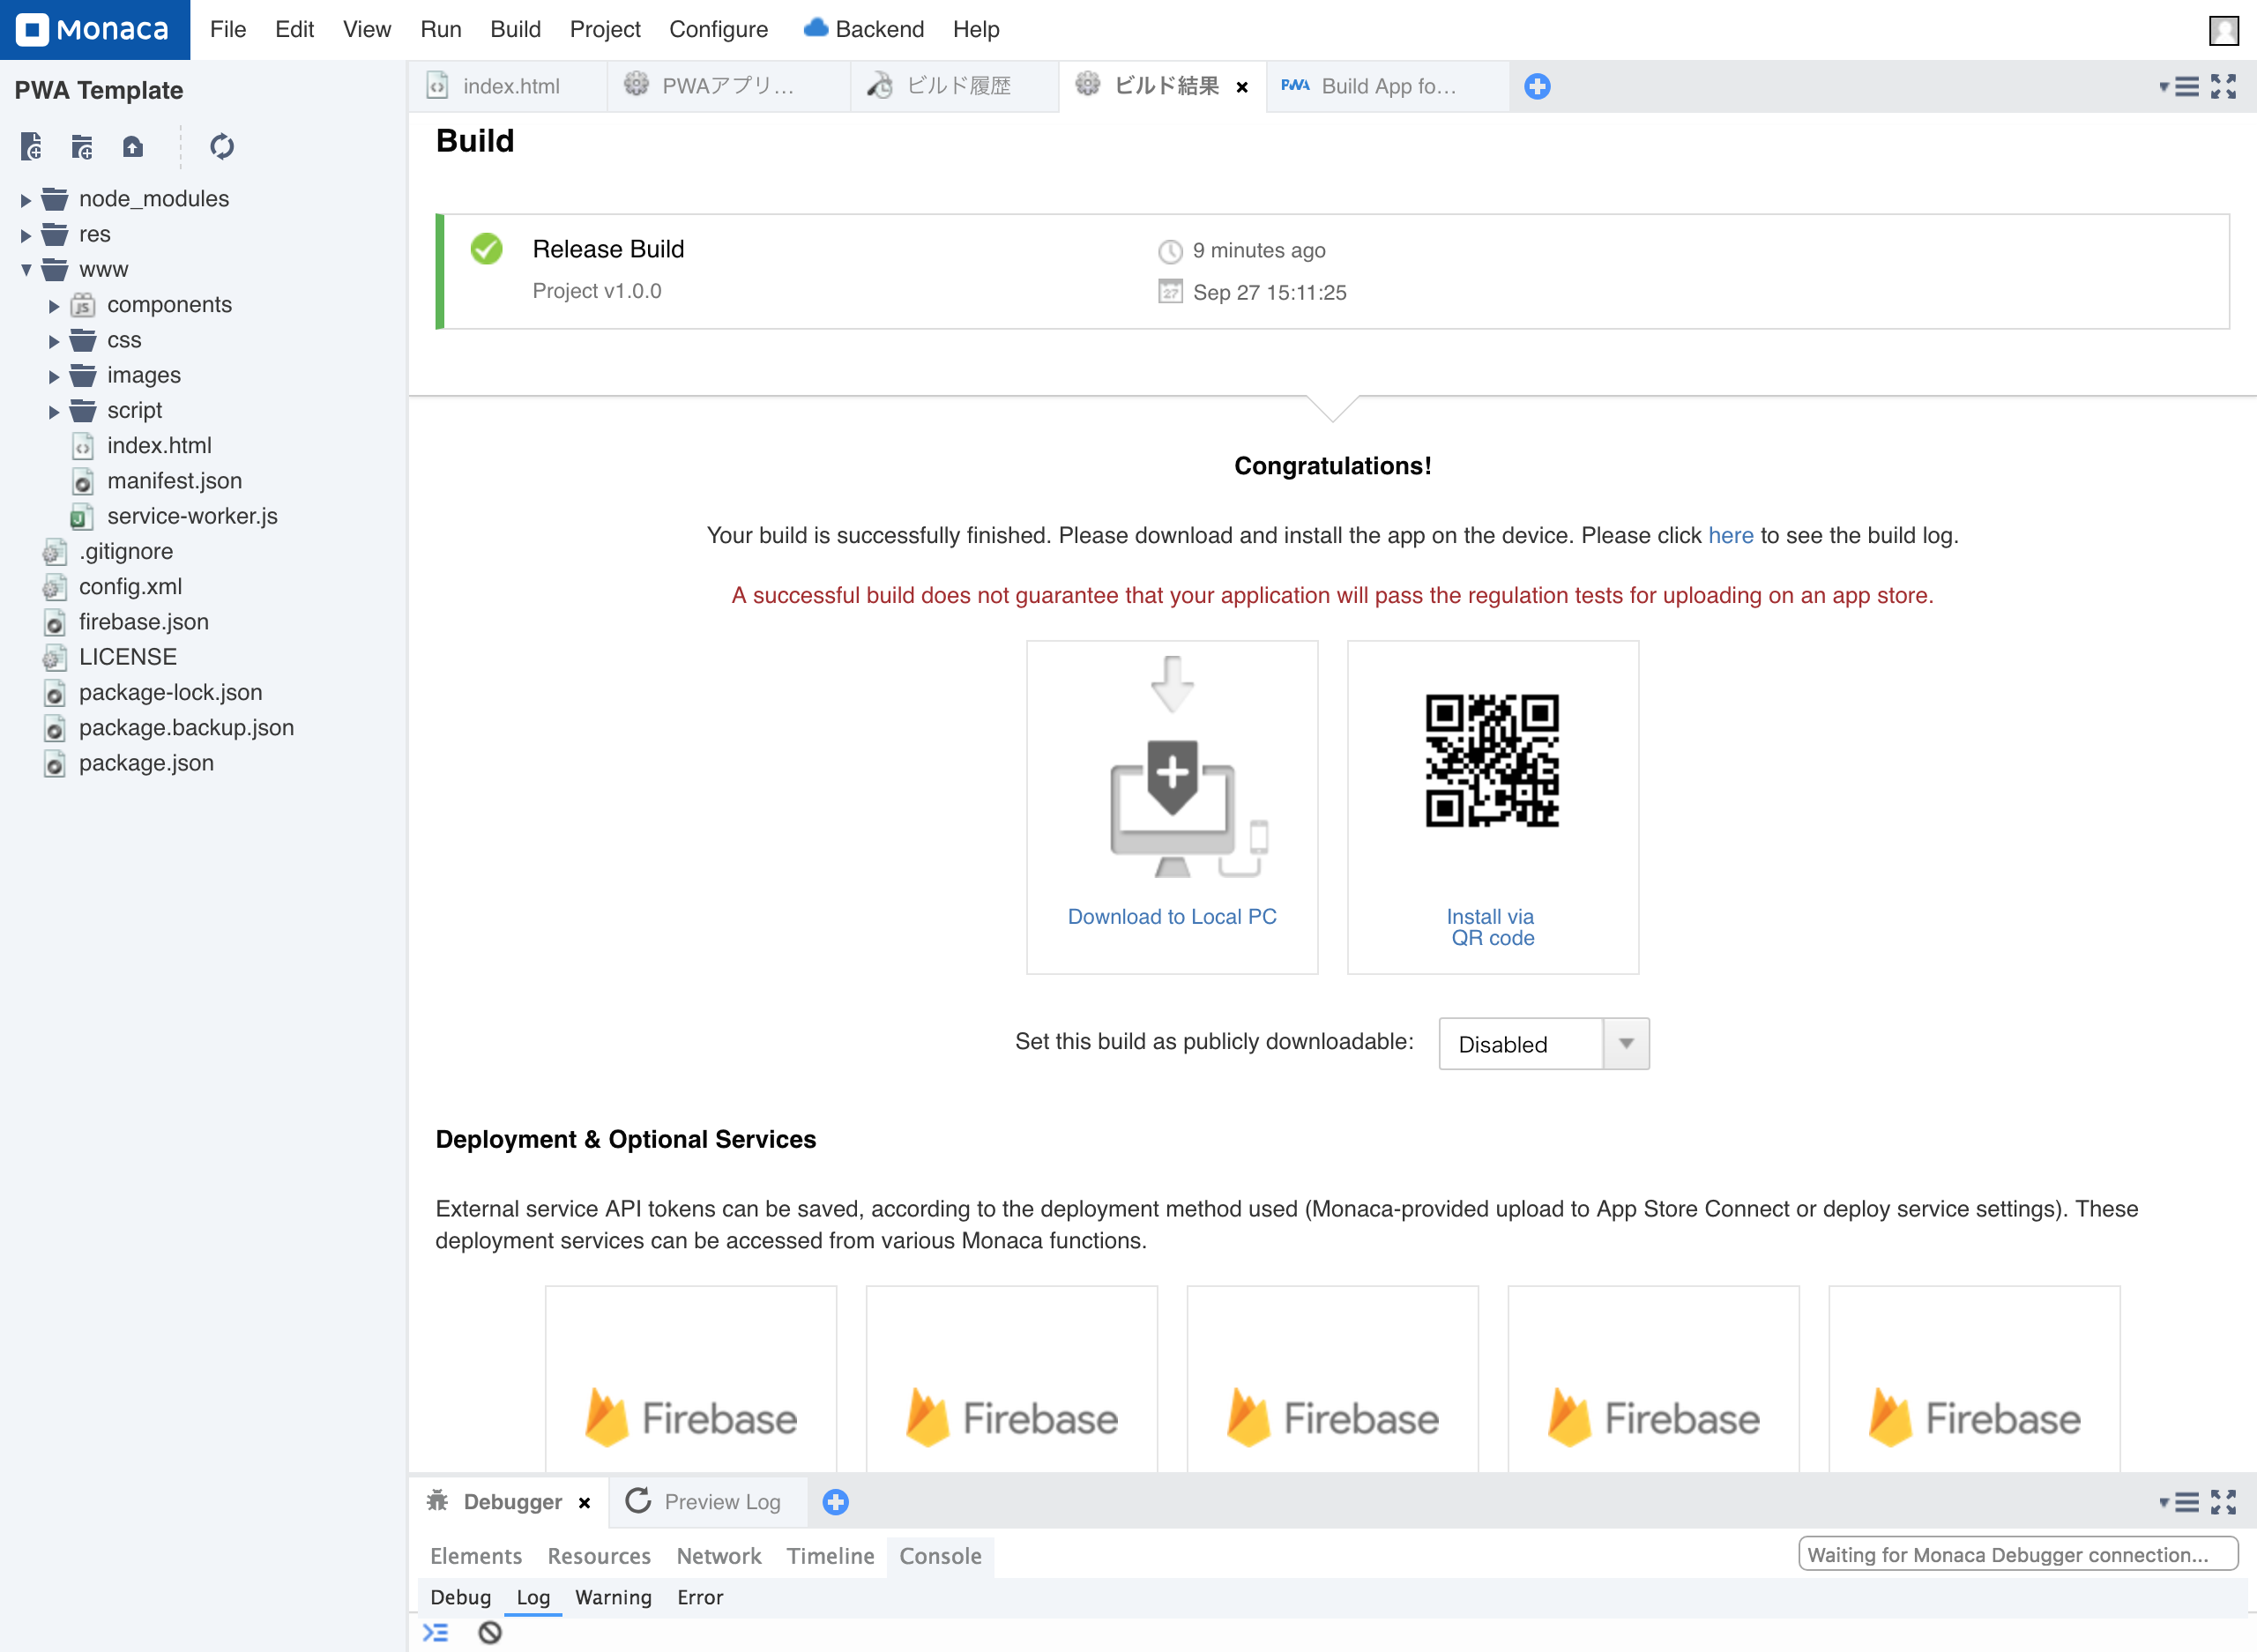
See Also:
* [Deploy to Firebase](/products_guide/monaca_ide/monaca_ci/firebase)
# Building for Windows
{% hint style="danger" %}
Windows builds of Cordova 9.0 or higher are supported by electron apps. See [here](/products_guide/monaca_ide/build/electron/build_electron_windows) for building an electron app on Windows. Windows builds are available for Cordova 7.1 projects.
{% endhint %}
## Windows Store apps
Windows Store apps are created by using HTML5 and JavaScript, and they run natively on the WinRT architecture. Therefore, applications created by using Monaca are equipped with the same functionalities as the ones created by development tools such as Visual Studio and can use all native features including WinJS.
Windows Store apps run on PCs and tablets installed with Windows and Windows RT. However, if you want to publish an app to the Windows Store, you will need to rebuild it separately by using Visual Studio or other development tools since the release build from Monaca is not supported yet.
On the other hand, Windows Store apps have some constraints that are not found on Android or iOS such as:
* There are some methods or features that are not supported since
HTML5 and JavaScript run in the Trident/Chakra application mode. For
more details, please refer to [HTML, CSS, and JavaScript features and](http://msdn.microsoft.com/en-us/library/windows/apps/hh465380.aspx)
[differences](http://msdn.microsoft.com/en-us/library/windows/apps/hh465380.aspx).
## Prerequisite
You are required to have a valid Microsoft Developer License in order to build Windows apps. It's free but you need to have a Microsoft account. If you don't have a license, please register [here](https://dev.windows.com/en-us/programs/join).
## Step 1: Configure the app settings
1. From the Monaca Cloud IDE menu, go to **Configure → App Settings for Windows**.
2. Fill in the app information:
| Field | Description |
| ----------------------- | ---------------------------------------------------------------------------------------------------------------------------------------------------------------------------------------------------------------------------------------------------------------------------------------------------------------------------------------------- |
| Package Certificate Key | This certificate is used when Monaca compiles a Windows app. It will also be used when doing sideloading or submitting to the Windows Store. It will be generated automatically in the first Windows build if it does not yet exist. If you want to upload an existing certificate file, it should be in the `PKCS#7` format without password. |
| App Display Name | The application name. It will appear on the start screen. |
| Package Display Name | The package name. |
| Short Name | The name to be displayed on the taskbar. |
| Show Name | Define the default setting of the logo displayed in the start menu of Windows 8 or higher. |
| Version | The version number of your app. A version number consist of numbers separated by dots (for example, `0.0.1.0`). |
| App Description | A short summary of your app. |
| Package Publisher Name | Your name, group name, company name, etc. |
| Architecture | Select a CPU Architecture. Available options are `AnyCPU`, `x86`, `x64` and `Arm`. |

3\. After setting the configurations, click **Save**.
## Step 2: Build the app
1. From the Monaca Cloud IDE menu, go to **Build → Build App for Windows**.
2. Click **Start Build**.

3\. After the build is completed, download the zip file of the built app.
## Step 3: Install the app
1. Extract the downloaded zip file.
2. In the extracted folder, right-click on the **Add-AppDevPackage.ps1** file and click **Run with PowerShell**. The installation will begin.

3\. You might be asked to confirm the opening of the selected file. Click **Open**.

4\. Press **Enter** to continue.

5\. The UAC (User Account Control) prompt will appear asking you to grant the Administrative privilege. Click **Yes**.
6\. Confirm the running of the app by typing `R` in the PowerShell windows.
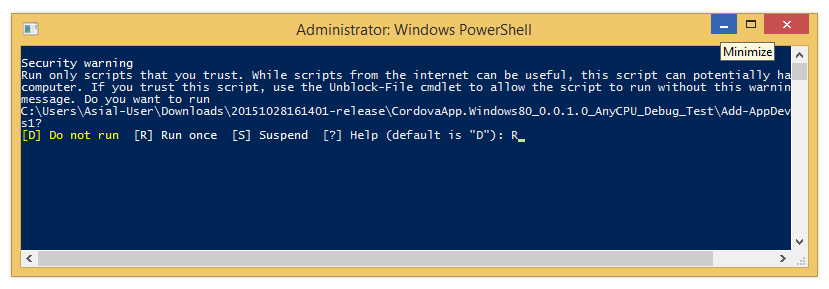
7\. Then, type `Y`.
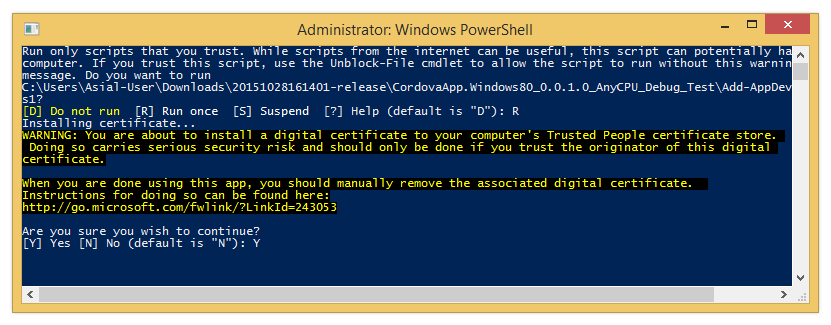
8\. Once the installation is completed, press **Enter**.
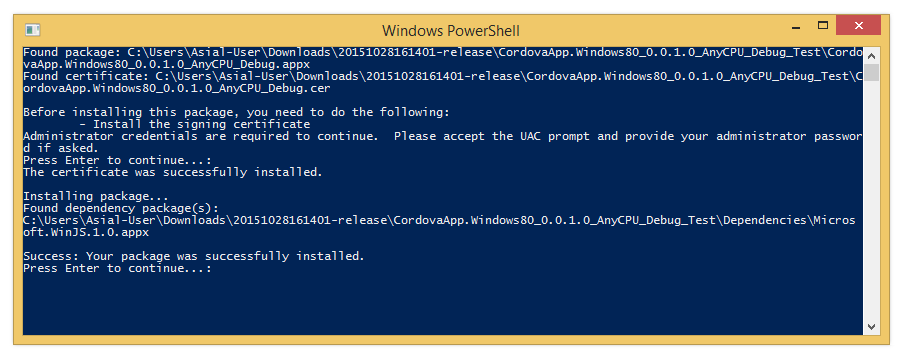
9\. Now, your app should be installed. You can find your app in the Apps.
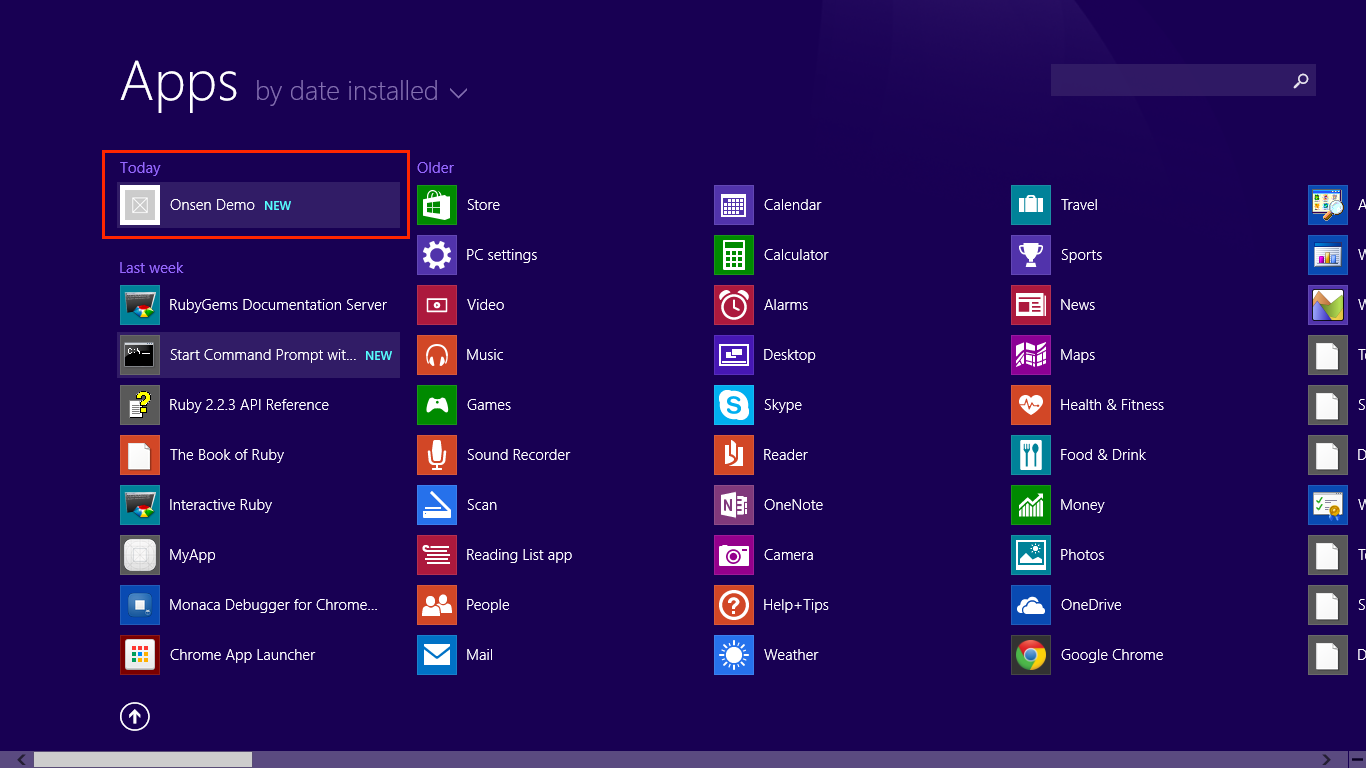
10\. Click on it to launch the app. Then, your app should be running.
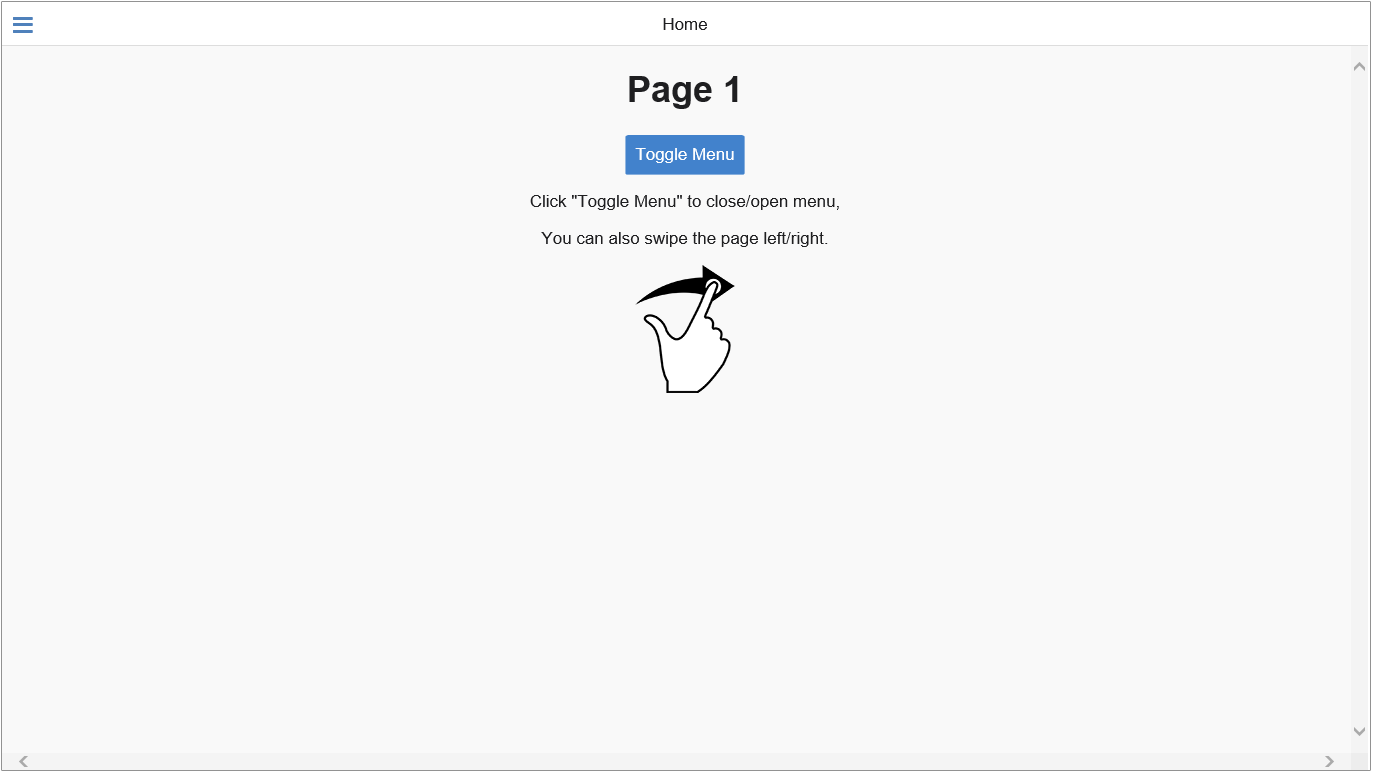
See Also:
* [Building for iOS](/products_guide/monaca_ide/build/ios)
* [Building for Android](/products_guide/monaca_ide/build/build_android)
* [Google Play Distribution](/products_guide/monaca_ide/deploy/google_play)
* [Build History](/products_guide/monaca_ide/build/build_history)
# Build Environment Settings
You can set the environment settings for building applications. The settings are project-specific.
## Configure the build environment
1. From the Monaca Cloud IDE menu, go to **Build → Build Environment Settings** .
2. Set the environment information that will be used for building applications.

3\. After finishing the configurations, click **Save**.
{% hint style="info" %}
The build environment settings can be used on Cordova 7.1 or later.
{% endhint %}
# Common Build and Application Upload Errors
Here is a list of common errors you may face when building or uploading an application to App Store Connect:
## minSdkVersion
```bash
minSdkVersion 14 cannot be smaller than version 16 declared in library ["library name"]
```
Sometimes you may use a Cordova plugin which requires a different API level configuration from your project's default settings. For example, in this case, your default setting for minimum API level is 14 (`minSdkVersion=14`). However, one of your plugins requires an API level of at least 16. In other words, the `minSdkVersion` value is lower than the one required by the plugin.
In order to solve this error, you can just correct the value of `minSdkVersion` in the `config.xml` file as follows:
```markup
```
## Provisioning profile
```bash
Provisioning profile "For Debug Build" doesn't include the aps-environment entitlement.
```
When you are using `MonacaBackend` or `NIFCloudMB` plugins for Cordova 6.5 or later in your project, this error will occur if your current provisioning profile doesn't have the right configuration for push notification in iOS.
To fix this error, use the right configuration for push notification as follows:
* use an app ID for push notification
* get a push notification certificate
* get a push notification provisioning profile
```bash
Provisioning profile "profile_xxx" has app ID "com.example.xxx", which does not match the bundle ID "com.example.zzz".
```
The app ID set for the target project does not match the bundle ID. Please make sure that your app ID setting matches the one in your provisioning profile.
```bash
Code Sign error: No matching provisioning profiles found
```
This might be caused by a mismatch/inconsistency in the iOS Build configuration. Please make sure to use the correct app ID with a corresponding certificate and provisioning profile.
```bash
Error code 65 for command: xcodebuild
```
This might be caused by a mismatch/inconsistency in the iOS build configuration. For example: the app ID in the provisioning profile not matching with the bundle identifier. Make sure to use the correct app ID with a corresponding certificate and provisioning profile.
## Application name
```bash
CordovaError: Error validating project name. Project name must not begin with a number
```
A number is set at the beginning of the application name. Check the application name on the app settings screen.
## Splash screen
```bash
AAPT: libpng error: Not a PNG file
```
This is an error related to the splash screen image files:
* You might be using a different file format rather than PNG. Currently, only
PNG files are supported as splash screen images in Monaca.
* Splash image files might be corrupted.
* If you are using 9-patch format images, please make sure the format
is correct.
## OutOfMemory
If your Android build fails with the following error, the memory usage may have exceeded the limit. Please use [this plugin](/reference/power_plugins/android_build_mem) to change the Android build memory size.
```
java.lang.OutOfMemoryError (no error message)
```
## Project files
```bash
Process 'command '/data/android-sdk/build-tools/23.0.3/aapt'' finished with non-zero exit value 1
```
This might be caused by an invalid file name in the project files. Please make sure that any double-byte characters or special characters are not used in the file names of the project.
## Android KeyStore
```bash
Failed to read key keyname from store "/tmp/monaca/xxxxxxxxxxx/output/etc/keystore.private": Cannot recover key
```
Failed to read the key name of a KeyStore file. Please make sure to:
* use the correct KeyStore in the Android build settings.
* enter the right password for the corresponded KeyStore before starting
the build.
## Crosswalk plugin
```bash
Build Error: Error: App File not found. null
```
This might occur when the `Crosswalk WebView Engine` plugin v2.2.0 or higher is enabled in a Cordova 6.2 project. If you are using the `Crosswalk WebView Engine` plugin in a Cordova 6.2 project, please use `v2.1.0` or lower.
For Cordova 6.2 projects, the following configurations for the`Crosswalk WebView Engine` plugin are confirmed to build successfully:
1. Plug-in version: `1.7.2` with Crosswalk version: `18.48.477.13` (default
configuration)
2. Plug-in version: `2.1.0` with Crosswalk version: `21.51.546.7`
## App Store Connect
```bash
Unable to validate your application. Your Apple ID or password was entered incorrectly.
```
The `Apple ID` or `Password` used when uploading the app to App Store Connect has not been entered correctly. Please make sure to use the right `Apple ID` and corresponded `Password`.
```bash
Unable to validate your application. Please sign in with an app-specific password. You can create one at appleid.apple.com.
```
If the `Apple ID` used when uploading the app to App Store Connect is using 2-factor authentication, please try using the app-specific password. For more information, please refer to [App-specific Password](https://support.apple.com/en-us/HT204397).
```bash
No suitable application records were found. Verify your bundle identifier 'com.example.xxx' is correct.
```
Please make sure '`com.example.xxx`' is registered in App Store Connect.
```bash
There already exists a binary upload with build version '1.0.0' for train '1.0.0'
```
There is an application with the same build version in App Store Connect. Please build the app again with a different version number.
```bash
The value for key CFBundleShortVersionString [0.0.1] in the Info.plist file must contain a higher version than that of the previously approved version [1.0.0]
```
The version number in the current app build is lower than the last certified app build. Please build the app again with a higher version number.
```bash
This bundle does not support one or more of the devices supported by the previous app. This bundle does not support one or more of the devices supported by the previous app version. Your app update must continue to support all devices previously supported. You declare supported devices in Xcode with the Targeted Device Family build setting.
```
When updating an application, it is not possible to reduce the number of supporting devices. Please check the settings of the target device in the iOS application settings.
```bash
Invalid App Store Icon. The App Store Icon in the asset catalog in 'xxx.app' can't be transparent nor contain an alpha channel.
```
There is a possibility that the App Store icon is transparent or contains an alpha channel. Please check the App Store icon.
```bash
SDK Version Issue. This app was built with the iOS 10.3 SDK. All iOS apps submitted to the App Store must be built with the iOS 11 SDK or later, included in Xcode 9 or later. Further, starting March 2019, all iOS apps submitted to the App Store must be built with the iOS 12.1 SDK or later, included in Xcode 10.1 or later.
```
The target project is not built with Xcode 9 or later. If the target project is using a lower version than Cordova 7.1, you need to upgrade to Cordova 7.1. From March 2019, you need to build with Xcode 10.1. To set the target project to Xcode 10.1, see [Build Environment Settings](/products_guide/monaca_ide/build/build_env_settings).
# Build History
Every time you build your app in the Monaca IDE, Monaca saves your build history where you can see your build details and error logs.
## View build history
Follow these instructions to see your build history and to modify it:
1. From the Monaca Cloud IDE menu, go to **Build → Build History** .
2. You can see the build history:

3\. Click a **Delete** button to remove particular item from your history or a **Download** button to download a built app. Once an item is removed, it cannot be restored.
# Distribution
{% content-ref url="/pages/-MfWeAfRTL1LyPR7uAZu" %}
[App Store Distribution](/products_guide/monaca_ide/deploy/appstore)
{% endcontent-ref %}
{% content-ref url="/pages/-MfWeAhgruzTox4oN-Mx" %}
[Google Play Distribution](/products_guide/monaca_ide/deploy/google_play)
{% endcontent-ref %}
{% content-ref url="/pages/-MfWeAkdlraQzMam5Pp\_" %}
[Amazon Appstore Distribution](/products_guide/monaca_ide/deploy/amazon_store)
{% endcontent-ref %}
{% content-ref url="/pages/-MfWeAi-VpuO9JnIWN5l" %}
[Non-market App Distribution](/products_guide/monaca_ide/deploy/non_market_deploy)
{% endcontent-ref %}
# App Store Distribution
Before publishing iOS apps to the App Store, your app needs to be reviewed and accepted by Apple. You can upload your app to the App store Connect, where you can also edit your app's description and metadata and view the money it has earned. Once your app is submitted, you will need to wait for the review from Apple. Apple will check if your app is eligible or qualified to be in the App Store. Usually the review takes about two weeks.
{% content-ref url="/pages/-MfWeAfQSc6JQ--f937t" %}
[App Store Connect Guide](/products_guide/monaca_ide/deploy/appstore/app_store_connect)
{% endcontent-ref %}
{% content-ref url="/pages/-MfWeAhr8JR-51pd3SQD" %}
[iOS App Upload Feature](/products_guide/monaca_ide/deploy/appstore/app_submission)
{% endcontent-ref %}
# App Store Connect Guide
This document describes how to use App Store Connect to submit an app for distribution through the App Store.
## Prerequisite
You are required to have a [Team Agent account](https://developer.apple.com/support/roles/) under [Apple Developer Program](https://developer.apple.com/programs/ios/).
## Registering the app
In order to register your app in App Store Connect, please do as follows:
1. Login to [App Store Connect](https://developer.apple.com/app-store-connect/) with your Team Agent account.
2. Go to `My Apps`.
3. Select :heavy\_plus\_sign:**→ New App**.
4. Enter the app information on the form:
| Data | Description |
| ---------------- | -------------------------------------------------------------------------------------------------------------------------------------------------------------------------------------------------------------------------------------------------------- |
| Platforms | Choose a platform for your app. |
| Name | Enter your app’s name as it will appear on the App Store. It can’t be longer than 255 characters. |
| Primary Language | Choose a default language for your app. |
| Bundle ID | Enter a Bundle ID which can be an explicit App ID or a wildcard App ID. If it’s a wildcard App ID, you also need to specify a bundle ID suffix. If it’s an explicit App ID, it must exactly match the bundle identifier in your app. |
| Bundle ID Suffix | Enter the Bundle ID suffix, which is a string that is appended to the bundle ID property if the bundle ID is a wildcard App ID. The bundle ID and bundle ID suffix must form a bundle identifier that exactly matches the bundle identifier in your app. |
| SKU | Enter the code to identify the app. Even though the code is up to your decision, it is necessary to create an ID that will identify the app in a unique way. |

5\. Click **Create**. You will be redirected to the `App Information` page.
6\. On the `App Information` page, choose a category for your app and click **Save**.

7\. Go to `Pricing and Availability`. On this page, you will need to configure three main points: price schedule, areas where your app is available and volume purchase program. Then, click **Save**.

8\. Go to `Prepare for Submission`. On this page, you will need to configure:
* App video preview and screenshots: at least one screenshot is required.
* Description
* Keywords
* Support URL
* App icon
* Copyright
* Contact information.

9\. After the configuration, click **Save**.
## Uploading the app
Monaca offers a [iOS App Upload feature](/products_guide/monaca_ide/deploy/appstore/app_submission) which allows you to upload your app to App Store Connect right from the Monaca IDE without using a Mac.
In addition to the upload function provided by Monaca, you can also upload apps to App Store Connect using [Transporter](https://apps.apple.com/app/transporter/id1450874784?mt=12) or the `altool` included in Xcode.
**altool usage example**
```bash
xcrun altool --upload-app -f file -u username -p password
```
For information about altool, see [Using altool](https://help.apple.com/asc/appsaltool/).
{% hint style="info" %}
If you upload multiple versions of the app, please make sure that each file has a different version number. Otherwise, the upload will fail.
{% endhint %}
## Selecting the uploaded app
Once you successfully uploaded your app to App Store Connect, it can be selected to submit to the App Store. Please do as follows:
1. From App Store Connect, go to `Prepare for Submission`. Under the `Build` section, click :heavy\_plus\_sign:.

2\. Select your build and click **Done**.

3\. Click **Save**.
## Submitting the app
Now that you have completed the necessary configurations, your app is ready to be submitted.
1. From App Store Connect, go to `Prepare for Submission`.
2. Click **Submit for Review**.
After you've successfully submitted the app, you will need to wait for the review from Apple. Apple will review your app and see if it is eligible or qualified to be in App Store. Usually the review takes about two weeks.
## Publishing the app
When your app is accepted by Apple, it is uploaded to the App Store.
{% hint style="info" %}
The large app icon, which was not necessary before, is now required for the submission. In fact, the required environment and information have changed in the submission procedure of the registration. If a registration/submission is not successful, please make sure you complete the necessary configurations properly.
{% endhint %}
See Also:
* [iOS App Upload Feature](/products_guide/monaca_ide/deploy/appstore/app_submission)
* [Building an iOS App](/products_guide/monaca_ide/build/ios/build_ios)
* [Google Play Distribution](/products_guide/monaca_ide/deploy/google_play)
* [Non-market App Distribution](/products_guide/monaca_ide/deploy/non_market_deploy)
* [Amazon Appstore Distribution](/products_guide/monaca_ide/deploy/amazon_store)
# iOS App Upload Feature
{% hint style="info" %}
In order to use iOS App Upload feature, you are required to subscribe to a valid plan. Please refer to [Monaca Subscription Plans](https://monaca.mobi/en/pricing).
{% endhint %}
{% hint style="info" %}
For shared projects, only the project owner can use the iOS App Upload feature.
{% endhint %}
Monaca allows you to upload your app to App Store Connect right from the Monaca IDE. In order to do this, follow these steps:
\
1\. Create a release build version of your app through Monaca. Please refer to [Building an iOS App](/products_guide/monaca_ide/build/ios/build_ios).
2\. The following screen will appear. Click the `AppStore` icon.

3\. The App Upload window will appear. Click **Next**.

4\. Fill in a valid Apple account information. Click **Next**.
Use an `app-specific password` on the password field. For details on how to obtain the password for an app, please refer [here ](https://support.apple.com/en-us/HT204397).

5\. Make sure you’ve [registered](/products_guide/monaca_ide/deploy/appstore/app_store_connect#registering-the-app) the app with App Store Connect before uploading your app. Then, tick **We've registered the application with App Store Connect.** and click **Upload**.

6\. The following screen is displayed for a plan that requires billing. Click **Purchase**.

7\. The following screen will be displayed when the billing process is completed. Click **Upload**.

8\. The upload will start. Please wait.
{% hint style="info" %}
If you upload multiple versions of the app, please make sure that each file has a different version number. Otherwise, the upload will fail.
{% endhint %}

9\. If your upload is successful, the following screen will appear. It may take a little while before the app shows up in App Store Connect.

{% hint style="info" %}
Sometimes, when Monaca uploads your app to App Store Connect, Apple finds errors on their end and reports them to you via email. If this happens, please read the report and fix the errors appropriately. Then, re-upload the app.
{% endhint %}
10\. Now that you have uploaded your app, you can see it in App Store Connect. Please refer to [Selecting the uploaded app](/products_guide/monaca_ide/deploy/appstore/app_store_connect#selecting-the-uploaded-app).
{% hint style="warning" %}
If you use an activation code to upgrade your account, you can use the Monaca upload feature if your plan supports it. Please [contact us ](https://monaca.io/service/index.html)for more details.
{% endhint %}
See Also:
* [App Store Distribution](/products_guide/monaca_ide/deploy/appstore)
* [App Store Connect Guide](/products_guide/monaca_ide/deploy/appstore/app_store_connect)
# Google Play Distribution
## Prerequisite
In order to distribute your apps through Google Play, you must register to a *Google Play Developer Console* account. The registration fee is `$25` (one time only). It will take `48` hours for your *Google Play Developer Console* registration to be fully processed. To register, please go [here](https://play.google.com/apps/publish/).
{% hint style="info" %}
If you want to sell your apps, you will also need to register as a Google checkout merchant as well. To register, please visit [Link a Google Play Developer account to your payments profile](https://support.google.com/googleplay/android-developer/answer/answer.py?hl=en\&answer=2972701).
{% endhint %}
## Create a release build of an app
Create and download a release build version of your app through Monaca. Please refer to [Building for Android](/products_guide/monaca_ide/build/build_android) to create a release build of the app. Then, download the built app (an APK file).
## Register an app in Google Play
1. Go to [Google Play Developer Console](https://play.google.com/apps/publish/) and login with a valid Google Developer account.
2. Click the **CREATE APPLICATION** button.
3. Choose the default language and enter a title for your app. Then, click **CREATE** and you will be forwarded to the `Store listing` page.

4\. On this page, fill in the following information and click **SAVE DRAFT**.
| Data | Description |
| ----------------- | ------------------------------------------------------------------------------------------------------------------------------------------------------------------------ |
| Short description | Description of your app shown in Google Play. It can be up to `80` characters. |
| Full description | Description of your app shown in Google Play. It can be up to `4000` characters. |
| Screenshots | At least 2 screenshots are required but you can upload up to 8 screenshots per type. |
| Hi-res icon | Upload a high-resolution icon (`512x512` PNG file) for your app. |
| Feature Graphic | Upload a feature graphic (`1024x500` PNG file) for your app. |
| Application type | Choose `Applications` or `Games`. |
| Category | Select a category for your app. |
| Content rating | Select a content rating for your app. |
| Contact details | You must have at least one support channel for your app. The support channel can be a website, email or phone number. The users of Google play can see this information. |
| Privacy Policy | Input your privacy policy URL if you have one. Otherwise, tick`Not submitting a privacy policy URL at this time.`. |
5\. Go to the `Content rating` section and click **CONTINUE**.
6\. Fill in your email address and select your app category. Then, you will be asked to answer some questions related to the selected app category.
7\. Click **SAVE QUESTIONNAIRE** and **CALCULATE RATING**.
8\. Confirm your rating information and click **APPLY RATING**.
9\. Go to the `Pricing & distribution` section. On this page, you will be asked to complete some questions related to the price and availability of your app. After this, you have completed the necessary information for your app and it is ready for the release.
## Release the app
In this section, we will upload the APK file and finalize the release information of the app before submitting it to the Play Store.
1. Go to the `App releases` section. On this page, you can upload your APK files for testing (Beta and Alpha) and production.
2. Under the `Production section`, click **MANAGE PRODUCTION**. Then, click **CREATE RELEASE**.
3. Then, you will need to:
* complete the Google Play App Signing option
* upload the APK file
* configure the release name (release version)
* describe what is new in this release
4. Click **SAVE** and **REVIEW**.
5. Review your app’s release information one more time and click the **START ROLLOUT TO PRODUCTION** button to submit your app to the Play Store. The button is disabled unless the required information is completed properly.
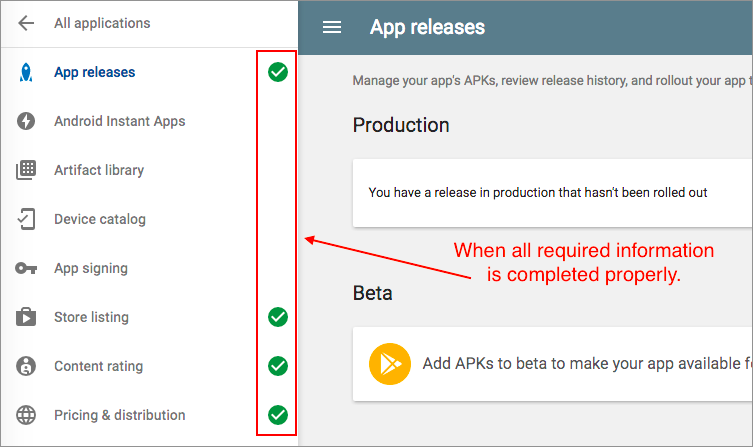
See Also:
* [Building for Android](/products_guide/monaca_ide/build/build_android)
* [App Store Distribution](/products_guide/monaca_ide/deploy/appstore)
* [Non-market App Distribution](/products_guide/monaca_ide/deploy/non_market_deploy)
# Amazon Appstore Distribution
## Prerequisite
In order to publish Android apps at Amazon Appstore, you will need to create a developer account in the [Amazon Apps Developer Portal](https://developer.amazon.com/appsandservices). The registration is free.
## Create a release build of the app
Using Monaca Cloud IDE build feature, you can build a release version of your app and upload it to the Amazon Appstore. Follow the steps in [Building for Android](/products_guide/monaca_ide/build/build_android) to build the app with release build. Then, download the built app (an APK file).
## Register the app in the Amazon AppStore
1. Go to [Amazon Apps Developer Portal ](https://developer.amazon.com/appsandservices)and login with a valid Amazon developer account.
2. Under the **DASHBOARD** tab, click **Add a New App**.

3\. Select **Android** and click **Next**.
4\. The `New App Submission` page will appear. On this page, you will need to fill in the necessary information:
| Data | Description |
| ------------------------ | ---------------------------------------------------------------------------------------------------------------------- |
| App title | The name of your app |
| Category | The category of your app. |
| Customer support contact | You can either use your default support information or input new information: email address, phone number and website. |
5\. Click **Save**. Then, the following page will appear:

6\. Go to the `Availability & Pricing` tab, select the appropriate type of your app and answer the listed questions. Then, click **Save**.

{% hint style="info" %}
Amazon covers over 200 countries. Your app can only be released after it has been approved.
{% endhint %}
7\. Go to the `Description` tab. On this page, you will need to fill in the following necessary information and click **Save**.
| Data | Description |
| ----------------------- | -------------------------------------------------------------------------------- |
| Display Title | The name of your app |
| Short description | The description of your app shown in the store. |
| Long description | The long description of your app shown in the store. |
| Product feature bullets | A list of your app’s features. They will be displayed in the`amazon.com`website. |
8\. Go to the `Images & Multimedia` tab. On this page, you will need to upload at least 3 screenshots, a small icon (`114x114` PNG file) and a large icon (`512x512` PNG file) of your app. Then, click **Save**.
9\. Go to the `Content Rating` tab. On this page, you will be asked to complete a questionnaire regarding the content rating of your app. Complete the questionaire and click **Save**.
10\. Go to the `Binary File(s)` tab. On this page, fill in the following information and click **Save**.
| Data | Description |
| --------------------------- | -------------------------------------------------------------------------------------------------------------------------------------------------------------------------------------------------- |
| Apply Amazon DRM? | Select **Yes** if you want that only authenticated users can see your application. |
| Binary file | Upload your APK file. There is no size restriction for an APK file but files larger than 150 MB need to be uploaded via [SFTP](https://developer.amazon.com/ftp/account.html?appId=MPU22LL128ECT). |
| Device Support | Select only the devices you intend to target with this binary file. |
| Language Support | Select the available language support for your app. |
| Export Compliance | Check this if your app can be imported to and exported from the United States and all other countries. |
| Use Amazon Maps Redirection | Amazon devices do not support the Google Maps API. However, the Amazon Maps API provides an interface parity with the Google Maps v1 API. |
11\. After completing the configuration, click **Save draft**. At this point, your app should be ready to be published.
## Release the app
You can't publish your app unless you fill in the necessary information related to it. Once you complete the required information, click on **Submit App** to release your app. This button is disabled if the required information is not completed properly.
After the submission is complete, Amazon will review your app. The security of the app is the primary concern. The review takes typically 1-2 days to complete.
After approved by Amazon, your app will be published on the Amazon Appstore for Android. The release date will be the specified date and time you have set in the step 6 of the previous section or as soon as it’s approved if you haven’t set any date or time yet.

## Inquiry
You can contact [Amazon customer support](https://developer.amazon.com/public/support/contact/contact-us) at the Amazon Appstore for Android with any inquiries. They can assist you with various issues including how to submit your app or use the API.
## Amazon badges for Amazon AppStore for Android
You can use the Amazon badges to promote the availability of your app on the Amazon store. Badges are available from [Amazon Badges](https://developer.amazon.com/public/support/legal/tuabg).
See Also:
* [Building for Android](/products_guide/monaca_ide/build/build_android)
* [Google Play Distribution](/products_guide/monaca_ide/deploy/google_play)
* [App Store Distribution](/products_guide/monaca_ide/deploy/appstore)
* [Non-market App Distribution](/products_guide/monaca_ide/deploy/non_market_deploy)
# Non-market App Distribution
## For iOS apps
You might want to distribute your application outside the App Store for these two purposes:
1. Testing: Before releasing your app, you want to test it as much as you can. Thus, you might also want to distribute your app to users (testers) by other ways than the App Store.
2. In-house applications: The application is made for internal use (in a company or organization) only.
{% hint style="info" %}
For in-house distribution, you will need to have an [Apple Developer Enterprise Program ](https://developer.apple.com/programs/enterprise/)account.
{% endhint %}
The differences between the Apple Developer and Apple Developer Enterprise programs regarding apps distribution:
| | Apple Developer Program | Apple Developer Enterprise Program |
| ----------------------- | ----------------------- | ---------------------------------- |
| Beta OS Releases | Yes | Yes |
| Ad Hoc Distribution | Yes | Yes |
| App Store Distribution | Yes | No |
| In-house Distribution | No | Yes |
| TestFlight Beta Testing | Yes | No |
| Team Management | No | Yes |
| App Analytics | Yes | No |
For more information about the differences between the two programs, please refer to [Choosing a Membership](https://developer.apple.com/support/compare-memberships/).
There are two ways to distribute your pre-release apps for testing:
1. using App Store Connect: requires a iOS Developer Account and takes time since it needs approval from Apple Review prior to the distribution.
2. using Ad Hoc distribution: can be done with either iOS Developer or iOS Developer Enterprise accounts. Also, it doesn’t require the approval from Apple Review.
In-house distribution is for distributing your iOS apps securely to your employees. In other words, you can distribute your app to any company devices. However, if you want someone outside of your company to test your app or restrict the distribution to specific devices, you can use Ad Hoc distribution.
Ad Hoc distribution is for distributing your apps using Ad Hoc provisioning profile to up to `100` registered devices.
Both types of distribution have the same ways of app installation. The difference is the provisioning profile.
There are several ways to install your applications outside the App Store as shown in the following sections.
### Install using Apple Configurator 2 (Mac Only)
1. Install the [Apple Configurator 2](https://apps.apple.com/us/app/apple-configurator-2/id1037126344?mt=12) program on your Mac from the App Store.
2. Connect your device to the PC.
3. Open the Apple Configurator 2 and select your device. If you device doesn’t appear, please make sure that your device is properly connected to your Mac.

4\. Click the :heavy\_plus\_sign: button and select the **Apps** option.

5\. Click the **Choose from my Mac** button and browse the `.ipa` file. Then, the app will be installed on your device.
### Install using Xcode
You can install your iOS app (`.ipa` file) via Xcode as follows:
1. Connect your device to your PC.
2. Open Xcode and go to **Window → Devices** .
3. The Devices screen will open. Choose the device you want to install the app on.
4. Drag and drop your `.ipa` file into the `Installed Apps` as shown below: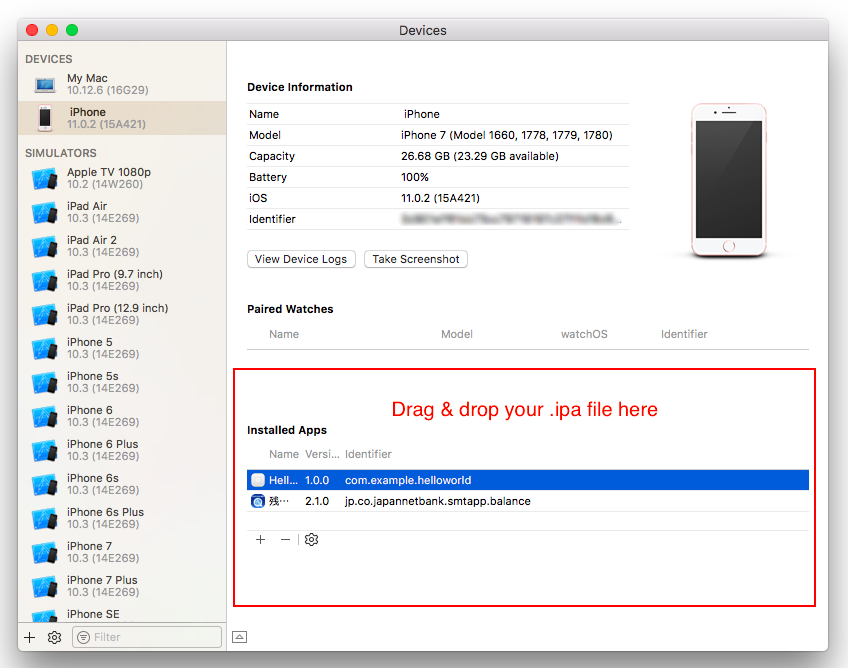
### Install using iTunes
{% hint style="warning" %}
iTunes 12.7 for Mac was released with a major change in the app. Apple has redesigned iTunes so that it focuses on sales of music, movies, TV shows, audiobooks, and podcasts. It no longer has an App Store for buying apps for your iPhone or iPad. Therefore, you can no long install your iOS App (.ipa file) through iTunes any longer.
{% endhint %}
1. Build your application with with the debug or ad-hoc build. For more details about the iOS build process, please refer to [Building an iOS App](/products_guide/monaca_ide/build/ios/build_ios).
2. After the build is completed, download the `.ipa` file.
3. Open iTunes and go to the `App library`.
4. Drag and drop the downloaded `.ipa` file into the `App library`.
5. Connect your device to iTunes and go to your device apps.
6. Click **Install** and then **Sync**. See the example below:

### Install using OTA deployment
OTA (Over-The-Air) deployment enables you to install your built apps via HTTPS.
1. Build your application with either debug, ad-hoc or in-house build. For more
details about the iOS build process, refer to [Building an iOS App](/products_guide/monaca_ide/build/ios/build_ios).
2. Download the `.ipa` file after the build completes.
3. Upload the `.ipa` file to the site you want.
4. Create a `.plist` file for this built application. The `.plist` file should look like this:
```markup
itemsassetskindsoftware-packageurlhttps://www.anysite.com/application/your_app.ipametadatabundle-identifiercom.example.helloworldbundle-version1.0.0kindsoftwaretitleHELLO
```
{% hint style="info" %}
While creating `.plist` file, please pay attention to these points:
* `.plist` file must be accessible via https protocol.
* update bundle-identifier with the App ID.
* specify correct path to the `.ipa` file.
{% endhint %}
5\. Upload the `.plist` file to the site you want. Make sure this file can be accessed via HTTPS protocol.
6\. Create a webpage embedded link to the uploaded `.plist` file using a special `itms-services://` protocol.
```markup
Download
```
7\. After you get the link, use your device to access the link. Then, you will be prompted to install the application.

## For Android apps
You might want to distribute your application outside the official markets such as Google Play Store and Amazon AppStore for these two purposes:
1. Testing: Before releasing your apps, you want to test
them as much as you can. Thus, you might want to distribute your
apps to users (testers) by other ways than the official
markets.
2. Personal/Internal Purpose: The application is made for your own
personal or internal use.
### Install using the ADB command
ADB (Android Debug Bridge) is a tool that enables you to use terminal commands on your phone.
Prerequisite:
1. Install Android SDK on your computer
2. Locate the ADB path after the Android SDK installation
3. Enable USB Debugging and allow the installation of the apps from sources
other than the Play Store on your device.
To install your built app via the ADB command:
1. Build your application with the debug build. For more details about
Android build process, please refer to [Building for Android](/products_guide/monaca_ide/build/build_android).
2. After the build is completed, download the `.apk` file.
3. Plug your device with a USB cable to your computer.
4. Run the below command on your computer in the command window. Make sure to use the correct path to your `.apk` file.
```markup
adb install foo.apk
```
### Install using a direct link
This is simply an installation through a direct link to your `.apk` file:
1. Build your application with the debug build. For more details about
Android build process, please refer to [Building for Android](/products_guide/monaca_ide/build/build_android).
2. After the build is completed, download the `.apk` file.
3. Upload the downloaded file to any site you want.
4. Go the link of the uploaded file from your device. Then, you will be prompted to install the application.
{% hint style="info" %}
Please make sure make these settings on your device beforehand:
* Enable USB debugging.
* Allow installation of the apps from sources other than the Play Store.
{% endhint %}
See Also:
* [Building for iOS](/products_guide/monaca_ide/build/ios)
* [Building for Android](/products_guide/monaca_ide/build/build_android)
* [Google Play Distribution](/products_guide/monaca_ide/deploy/google_play)
* [App Store Distribution](/products_guide/monaca_ide/deploy/appstore)
# Download App Package
In this chapter section, we will guide you through how you can take advantages of the app package download feature in Monaca Cloud IDE.
## Overview
The app package download feature is available on mobile devices. This feature is designed to easily install the results of builds performed by logged-in users on mobile devices. It is possible to manage build results across all projects owned by the logged-in user.
### Display login QR code in Monaca Cloud IDE
Access the [Monaca Cloud IDE dashboard](https://console.monaca.mobi/dashboard) from your PC.
Click `Download Package` in the dashboard header.
Click "Download Package"
Scan the QR code in the displayed dialog using the camera function of your mobile device; the QR code is valid for one minute only.
Scan the QR code from your device
### Access from Mobile Devices
Scan the QR code with your mobile device to log in to Monaca.
The QR code used for login becomes invalid after login.
Build results are displayed according to the terminal platform.
Only iOS build results are displayed for iOS devices and Android build results are displayed for Android devices.
### Filtering Build Results
You can change the filtering criteria for the build results screen.
Tap the filter icon in the screen header.
 
Filter the build results by the following criteria. Please change the conditions and tap the `Apply` button.
| Item | Description |
| ---------- | ------------------------------------------------------------------------------------------------------------------------------------- |
| Project | Select a project. |
| Build Type |
iOS:
Debug/Debugger/Ad Hoc/In House
Android: Debug/Debugger/Ad Hoc/Release
|
| Date | This Week/This 3 Days/ 24 Hours |
## Install App Package from Build Results
Tap the build result install icon. The app package will be installed on the device.

### For iOS
Installation will begin and an icon will be created on the home screen.
### For Android
The apk file will start downloading. After downloading, open the apk file.
## Refresh the list of build results
To refresh the build result screen, tap the refresh icon in the screen header.

## Add App Package Download Feature to Your Home Screen
App package download feature can be added to the mobile device home screen for easy access.
### For iOS (Safari)
Tap the Share button on Safari.
 
Tap the `Add` button.
 
### For Android (Chrome)
Open the Chrome menu and tap `Add to Home screen`.
 
Tap the `Add` button.
The `Monaca App` will be added to the Home screen.
 
# Tutorial
Monaca Cloud IDE provides a browser-based development environment. Right from your browser, all of your Cordova development can be done without any setup. Along with the [Monaca Debugger](/products_guide/debugger), Live Preview (built-in function in Monaca Cloud IDE) allows you to check easily the progress of your apps during development.
Before getting started with this tutorial, you will need the following:
* a computer with an internet connection
* a smart mobile device (either iOS or Android) if you want to test on a real device
{% content-ref url="/pages/-MfWeAiZIDDoGsGtJOZA" %}
[Part 1: Starting a Project](/tutorials/monaca_ide/starting_project)
{% endcontent-ref %}
{% content-ref url="/pages/-MfWeAl\_eTHXuAl\_z-t2" %}
[Part 2: Running Monaca Debugger with Monaca Cloud IDE](/tutorials/monaca_ide/testing_debugging)
{% endcontent-ref %}
{% content-ref url="/pages/-MfWeAjhshnfGvDVp9TN" %}
[Part 3: Building a Monaca App](/tutorials/monaca_ide/building_app)
{% endcontent-ref %}
{% content-ref url="/pages/-MfWeAkSgtX9tvl\_aK1J" %}
[Part 4: Publishing a Monaca App](/tutorials/monaca_ide/publishing_app)
{% endcontent-ref %}
# New Monaca Cloud IDE
## Overview
The new Monaca Cloud IDE uses [code-server](https://github.com/coder/code-server). By using code-server, you can develop apps using VSCode (Visual Studio Code).
This guide provides the features available in the new Monaca Cloud IDE.
* Switch IDE
* Switch Languages
* Previewer
* Terminal
* File
* Extension
* Source Control
# Switch IDE
## Switching Between IDE Versions
This guide provides step-by-step instructions on how to switch between the new and old IDE versions.
***
### Switching to the New IDE
Follow these steps to switch to the new IDE:
1. **Open a Project**
* Select the project you wish to open.
* Click **"Open in Cloud IDE"** to launch the project in current IDE.
2. **Locate the "Try New IDE!" Button**
* On your current IDE interface, locate the **Try New IDE!** button.
3. **Click "Try New IDE!"**
* Click the button to initiate the switch to the new IDE.
4. **Confirm the Switch**
* A confirmation dialog will appear with a **Switch** button.
* "Click **"Switch"** to proceed.
5. **Wait for the New IDE to Load**
* The system will take a moment to configure and launch the new IDE.
* Once the setup is complete, the new IDE interface will be displayed.
***
### Switching Back to the Old IDE
To revert to the old IDE, follow these steps:
1. **Open a Project**
* Select the project you want to open.
* "Click **"Open in Cloud IDE"** to launch the project in the new IDE.
**Note:** There is no drop-down icon next to the button.
2. **Open the Command Palette**
* Click the settings icon in the bottom-left corner.
* Select **Command Palette...** from the menu.
3. **Search for the Switch Command**
* In the Command Palette search box, type **Monaca: Switch Old IDE**.
* Press **Enter** or click the relevant search result.
4. **Confirm the Switch**
* A confirmation dialog will appear with an **OK** button.
* "Click **"OK"** to proceed.
5. **Close the Current IDE Tab**
* A prompt will appear asking you to close the current IDE tab. Click **"OK"** to dismiss the dialog.
* Manually close the tab.
6. **Access the Old IDE**
* The old IDE will open in a new tab.
***
### Notes
* Switching between IDE versions does not affect your files or projects.
* Some features and functionalities may differ between the old and new IDEs.
* If you encounter any issues, please contact support.
# Switch Languages
## Switching Language
This guide provides step-by-step instructions on how to switch between supported languages in the IDE. Currently, the IDE supports **English** and **Japanese**.
***
### Prerequisites
By default, the new IDE only supports the **English** language. To use **Japanese**, you need to install the **Japanese Language Pack** extension. This installation is required only once. Once installed, you can switch between English and Japanese as needed.
***
### Japanese Language Extension
When you open a project in the new IDE for the first time, the system will check if the **Japanese Language Pack** is installed. If it is not installed, the system will attempt to install it automatically, as shown in the screenshot below.
You can view the installation logs under the **Terminal** tab.
If the installation is successful, a pop-up dialog will appear in the bottom-right corner. Click **"Change Language and Restart"** to reload the IDE and apply the Japanese language setting.
**Note:**
* For **Free Plan** users, the Japanese Language Pack will be installed every time the IDE is opened.
* For **Paid Plan** users, the extension is installed once and stored in the user’s home directory.
***
### Manual Installation
If the automatic installation fails, follow these steps to install the **Japanese Language Pack** manually:
1. **Open the Extensions View**
* Click the **Extensions** icon on the Activity Bar.
* A list of installed extensions will be displayed. By default, you should see **Monaca Extension** listed.
2. **Search for the Japanese Language Extension**
* If the **Japanese Language Pack** is not listed, use the search bar and type:\
**Japanese Language Pack for Visual Studio Code**.
3. **Install the Extension**
* Click the **Install** button to install the extension.
* Once installed (either manually or automatically), the Japanese Language Pack will appear under the **installed extensions list**.
* The extension’s detail page will display an **Uninstall** button, indicating that the installation was successful.
***
### Switching Languages
#### Switching from English to Japanese
1. **Open the Command Palette**
* Click the **Settings** icon in the bottom-left corner.
* Select **Command Palette...** from the menu.
* (../img/common/setting-command-palette-en.png)
2. **Search for the Language Configuration Command**
* In the **Command Palette** search box, type **Configure Display Language**.
* Press **Enter** or click the relevant search result.
3. **Select "日本語 (ja)"**
4. **Restart the IDE**
* Click **"Restart"** to apply the language change.
5. **The IDE will reload and switch to Japanese.**
***
#### Switching from Japanese to English
1. **Open the Command Palette**
* Click the **Settings** icon in the bottom-left corner.
* Select **コマンドパレット...** from the menu.
2. **Search for the Language Configuration Command**
* In the **Command Palette** search box, type **表示言語を構成する**.
* Press **Enter** or click the relevant search result.
3. **Select "English (en)"**
4. **Restart the IDE**
* Click **"再起動"** to confirm.
5. **The IDE will reload and switch to English.**
***
### Notes
* The Japanese Language Pack must be installed before switching to Japanese.
* The **Free Plan** requires reinstallation of the language pack every time the new IDE is opened.
* The **Paid Plan** allows the extension to remain installed permanently.
* If you experience any issues, please contact support.
# Previewer
## Project Previewer
This section provides instructions on how to manage the project previewer, including resizing, repositioning, opening, and closing it.
***
### Layout
By default, the previewer is displayed on the **right side** of the editor group.
#### Resizing the Previewer
You can resize the previewer by moving your cursor to the **left edge** of the panel. Click and drag it **left or right** to adjust its size.
#### Moving the Previewer
The previewer can be repositioned anywhere within the editor group. For example, you can move it next to the file tab (e.g., `index.html`).
1. Click on the **Preview** tab.
2. Hold down the mouse button and drag it to your desired position.\
*(In this example, we move it next to the file tab.)*
After repositioning, it may appear as follows:
***
### Opening and Closing the Previewer
#### Closing the Previewer
If you no longer need the previewer, you can close it by clicking the **X** icon.
#### Reopening the Previewer
To reopen the previewer:
1. Open the **Command Palette**.
2. Search for **Monaca: Open Preview** and select it.
3. The preview tab will be restored in the editor group.
***
### Notes
* The previewer **displays** and **live-reloads** the preview content of your project as you modify the source code.
* If the previewer does not display content properly or encounters errors, check the **Preview Terminal** tab at the bottom of the IDE.
* The behavior of the previewer may vary depending on the project.
# Terminal
## IDE Terminal
The IDE provides two types of terminals: **Preview Terminal** and **Terminal**.
***
### Preview Terminal
The **Preview Terminal** is a specialized terminal that runs automatically when the IDE starts. It executes the **`monaca:preview`** script, which is defined in the project to create a development server for previewing content.
#### Identifying the Preview Terminal
* The **Preview Terminal** can be distinguished from a standard terminal by its title: **monaca:preview**.
* It is recommended to keep the **Preview Terminal** running, as it is essential for providing content to the **previewer**.
#### Restarting the Preview Terminal
If the **Preview Terminal** is accidentally closed or fails to start, you can reopen it by following these steps:
1. Open the **Command Palette**.
2. Search for **"Monaca: Open Previewer Terminal"** and select it.
***
### Terminal
The standard **Terminal** allows you to execute commands and manage your project environment.
#### Creating a New Terminal
To create a new terminal:
1. Click the **"+"** icon in the terminal panel.
2. A new **Bash terminal** will be created alongside the existing **Preview Terminal**.
#### Initial Setup
* When a new terminal is opened, it automatically executes **`.monacarc`** to set up the environment, such as configuring the Node.js version.
* You can run standard **Bash commands** in this terminal.\
*(Example: Running the `ls` command to list project files and directories.)*
#### Deleting a Terminal
To close a terminal:
1. Hover over the terminal title (e.g., **Bash**).
2. Click the **delete (trash bin)** icon.
***
### Notes
* Free-plan users may have certain limitations when using the terminal.
# File
## Basic File Operation
This section provides basic instructions for managing files and folders in the new IDE.
***
### 1. Creating a New File or Folder
#### Create a New File
1. Open the **Explorer** panel by clicking on the **file icon** in the Activity Bar (left sidebar).
2. Right-click on the **desired directory** where you want to create the file.
3. Select **New File**.
4. Enter the file name (e.g., `index.html`, `script.js`).
5. Press **Enter** to create the file.
#### Create a New Folder
1. In the **Explorer** panel, right-click on the **desired directory**.
2. Select **New Folder**.
3. Enter the folder name.
4. Press **Enter** to create the folder.
***
### 2. Opening a File
1. Open the **Explorer** panel.
2. Click on the file you want to open.
3. The file will open in a new tab in the editor.
***
### 3. Editing and Saving a File
#### Edit a File
1. Open the file in the editor.
2. Click inside the file and start editing.
#### Save Changes
* Press **`Ctrl + S`** (Windows/Linux) or **`Cmd + S`** (Mac).
* Alternatively, go to **File > Save** from the menu.
***
### 4. Deleting a File or Folder
1. Open the **Explorer** panel.
2. Right-click on the **file or folder** you want to delete.
3. Select **Delete**.
4. Confirm the deletion when prompted.
***
### 5. Renaming a File or Folder
1. Open the **Explorer** panel.
2. Right-click on the **file or folder** you want to rename.
3. Select **Rename**.
4. Enter the new name and press **Enter**.
***
### 6. Downloading a File
1. Open the **Explorer** panel.
2. Right-click on the file you want to download.
3. Select **Download**.
4. The file will be downloaded to your local system.
***
### 7. Uploading a File
1. Open the **Explorer** panel.
2. Click the **Upload Files** button (or right-click on a folder and select **Upload Files**).
3. Select the file from your local computer.
4. The file will be uploaded to the selected directory.
***
### 8. Moving Files and Folders
1. Open the **Explorer** panel.
2. Click and drag the file or folder to a new location.
3. Drop it in the desired directory.
***
### 9. Copying Files and Folders
1. Open the **Explorer** panel.
2. Right-click on the file or folder.
3. Select **Copy**.
4. Right-click on the target directory and select **Paste**.
***
### 10. Searching for a File
1. Press **`Ctrl + P`** (Windows/Linux) or **`Cmd + P`** (Mac).
2. Type the file name.
3. Select the file from the search results to open it.
***
### Notes
* Some features may be restricted based on user permissions or plan limitations.
* Use **`Ctrl + Z`** (Windows/Linux) or **`Cmd + Z`** (Mac) to undo changes before saving.
* Use the integrated **terminal** for advanced file operations (e.g., `mv`, `cp`, `rm` commands).
* This manual just cover some basic file operations. There are more functions provided by the IDE. If you can't find any specific operation or function you wish to perform, please contact our support team.
# Extension
## Extensions
This section provides basic instructions on how to manage extensions in the new IDE, including installing, enabling, disabling, updating, and uninstalling extensions.
***
### 1. Opening the Extensions Marketplace
To manage extensions, follow these steps:
1. Click on the **Extensions** icon in the **Activity Bar** (left sidebar).
2. The **Extensions Marketplace** will open, displaying a list of installed extensions.
***
### 2. Installing an Extension
1. Open the **Extensions Marketplace**.
2. Use the **Search Bar** at the top to find the desired extension.
3. Click on the extension from the search results.
4. Click **"Install"** to install the extension.
5. The installation progress will be displayed, and once completed, the extension will be available for use.
***
### 3. Enabling and Disabling Extensions
#### Enable an Extension
1. Open the **Extensions Marketplace**.
2. Locate the extension under **Installed** extensions.
3. Click **"Enable"** if the extension is disabled.
4. The extension will now be active.
#### Disable an Extension
1. Open the **Extensions Marketplace**.
2. Locate the extension under **Installed** extensions.
3. Click **"Disable"** to deactivate the extension.
4. The extension will be disabled but not removed.
***
### 4. Updating an Extension
1. Open the **Extensions Marketplace**.
2. Check if any installed extensions have an **"Update"** button next to them.
3. Click **"Update"** to install the latest version.
4. The extension will be updated automatically.
***
### 5. Uninstalling an Extension
1. Open the **Extensions Marketplace**.
2. Locate the extension under **Installed** extensions.
3. Click **"Uninstall"**.
4. The extension will be removed from the IDE.
***
### Example: Enabling Syntax Highlighting for Vue Files
In this example, we will enable the **"Vue - Official"** extension to enable syntax highlighting for Vue files.
By default, the IDE only provides syntax highlighting for basic file types such as **HTML, CSS, and JavaScript**. If you open a **Vue (`.vue`) file**, syntax highlighting will not be applied.
#### Before Installing the Vue Extension
In the screenshot below, the **"App.vue"** file is opened, but the syntax is not highlighted.
#### Installing the Vue Extension
To enable syntax highlighting for Vue files, follow these steps:
1. Open the **Extensions Marketplace**.
2. In the search bar, type **"Vue highlight"**.
3. A list of extensions related to Vue will appear.
4. Read the descriptions and choose an extension that provides syntax highlighting.
5. Look for an extension with **high download numbers and positive user feedback** to ensure reliability and security.
In this case, we selected **"Vue - Official"** because it is a trusted extension used by many developers.
#### Activating the Extension
1. Click **"Install"** and wait for the installation to complete.
2. Reload the browser to apply the changes.
3. Reopen the Vue file to see the updated syntax highlighting.
#### After Installing the Vue Extension
Now, the **Vue syntax highlighting** is properly applied.
***
### Notes
* Always verify the extension details before installing to ensure security and compatibility.
* Some extensions may require a **browser reload** or **IDE restart** to take effect.
* If an extension does not work as expected, try disabling and re-enabling it.
* Certain extensions may not be fully compatible with this IDE.
* Free-plan users may have limitations on available extensions.
# Source Control
## Source Control (GitHub) - User Manual
This guide provides step-by-step instructions for managing source control in **cloud-based VS Code (code-server)** using **GitHub**.
***
### Prerequisites
Before using GitHub with Monaca, you must first [**link your Monaca account to GitHub**](https://monaca.mobi/vcs)**.**
***
### 1. Committing File Changes
1. Open the **Source Control** panel by clicking the **Git** icon in the **Activity Bar** (left sidebar).
2. Click **Initialize Repository**.
3. Enter a commit message (e.g., `"init"`) and click **Commit**.
4. In the confirmation dialog, click **Yes** to commit all changes.
***
### 2. Publishing to a New GitHub Repository
1. Click **Publish Branch** to push the committed changes.
2. If this is your first time using GitHub in the IDE, a sign-in dialog will appear. Click **Allow** to proceed.
3. Copy the authentication code and click **Copy & Continue to GitHub**.
4. A new tab will open. Review your GitHub account details and click **Continue**.
5. Paste the copied authentication code and click **Continue**.
6. Review your GitHub account details and click **Authorize Monaca** to grant access.
7. Depending on your GitHub authentication settings, a different sign-in page may appear. Choose your preferred authentication method.
8. If using **GitHub Mobile**, open the GitHub app on your phone and enter the verification code.
8. Once authentication is successful, you will see a confirmation page. You can close this tab and return to the IDE.
10. The default repository name will be set to the **Project ID**.
11. You can keep the default name or change it. Select whether to create a **private** or **public** repository.
12. Once the repository is successfully created, you will see confirmation messages.
* Click **Open on GitHub** to view the repository.
* Click **Yes** to enable periodic syncing with the remote repository.
***
### 3. Publishing to an Existing GitHub Repository
Once the GitHub repository is linked to your project, you will not be required to authenticate again.
1. Make modifications to your project.
2. Enter a commit message describing the changes and click **Commit**.
3. Click **Yes** to confirm or **Always** to avoid this confirmation dialog in the future.
4. Click **Sync Changes** to push the latest commits to the remote repository.
5. Click **OK** to confirm or **OK, Don't Show Again** to disable this confirmation for future syncs.
6. Once the changes are successfully pushed, the commit list will be cleared, and the sync button will be disabled.
***
### 4. Additional Git Operations
Additional Git operations such as **Pull, Stash, Branch Management, and more** can be accessed by clicking the **menu (hamburger icon)** in the **Source Control** panel.
***
### Notes
* Ensure you have **write access** to the repository before committing changes.
* Always **pull the latest changes** before making updates to prevent merge conflicts.
* GitHub authentication steps may vary depending on user settings.
* Some features may be restricted for **free-plan users**.
* **Private repositories** are not available for **free-plan users**.
# Monaca Localkit

{% content-ref url="/pages/-MfWeAgRrbWbeAMk\_5fr" %}
[Overview](/products_guide/monaca_localkit/overview)
{% endcontent-ref %}
{% content-ref url="/pages/-MfWeAiUQZW4Rcl\_r0qn" %}
[Pairing and Debugging](/products_guide/monaca_localkit/pairing_debugging)
{% endcontent-ref %}
{% content-ref url="/pages/-MfWeAhBMtqF3cTaPky1" %}
[Remote Building and Publishing](/products_guide/monaca_localkit/build_publish)
{% endcontent-ref %}
{% content-ref url="/pages/-MfWeAhtiLxJ0\_vKSvjm" %}
[Troubleshooting Guide](/products_guide/monaca_localkit/troubleshooting)
{% endcontent-ref %}
{% content-ref url="/pages/-MfWeAfdCBqFmNE1R7bg" %}
[Tutorial](/products_guide/monaca_localkit/tutorial)
{% endcontent-ref %}
# Overview
## Introduction
Monaca Localkit is a tool to support local development environment for Monaca apps. You can use it with various development tools including editors, source code management system, task runner and so on. Monaca Localkit allows you to develop offline with a faster synchronization with Monaca debugger.
Monaca Localkit can accelerate your app development process because it provides the following functions:
* **Create and import Cordova project:** You can create a new project based on templates provided by Monaca. Moreover, you can import either a Monaca project from Monaca Cloud IDE or an existing Cordova project.
* **Live reload of the project:** By pairing with Monaca Debugger, you can run your project instantly on your device. All changes made to the source code of the project will be updated immediately after those changes are saved.
* **Integrate with Chrome DevTools:** By connecting your device (running Monaca Debugger) to the host PC (running Monaca Localkit) via USB cable, you can debug your app using Chrome DevTools. With Chrome DevTools, you can set breakpoints and implement JavaScript debugging and app inspection.
* **Remote build:** Monaca Localkit allows you to build your app for various platforms with support from Monaca server.
{% hint style="info" %}
You are required to have a valid plan in order to use Monaca Localkit. Otherwise, Monaca Localkit will run in an evaluation mode for 30 days after the first login. Please refer to [Monaca Subscription Plans ](https://monaca.mobi/en/pricing)for more details of each Monaca plan.
{% endhint %}
{% hint style="warning" %}
Please note that [Monaca Backend ](broken://pages/-MfWeAgCwPQFDDYJG4vc)as well as [Push Notification ](broken://pages/-MfWeAfPQVMlEV3x9YSK)are currently not available in the Monaca Localkit.
{% endhint %}
## Installation and setup
Before getting started, you need to install the Monaca Localkit on your computer and [Monaca Debugger](/products_guide/debugger) on your device.
1. Download the latest version of Monaca Localkit [here](https://monaca.io/localkit.html). Please refer to [GitHub release page](https://github.com/monaca/Localkit/releases) for change logs.
2. Install Monaca Debugger as described in [Debugger Installation](/products_guide/debugger/installation).
{% hint style="warning" %}
Installing the Localkit under Windows environment requires Git.
{% endhint %}
## Usage
### Starting Monaca Localkit
1. Open Monaca Localkit and sign in using your Monaca account.

2\. After a successful login, the Monaca Localkit dashboard will open.

### Creating a new project
You can create a new project based on templates provided by Monaca.
1. From the Monaca Localkit dashboard, click the:heavy\_plus\_sign:button. Then, click **Create**.

2\. Fill in the necessary information:
* `Project Name`: create a name to represent your new project which will be shown in the project list.
* `Working Directory`: specify a directory where you want to keep your project files.
* `Select Category`: choose a template category for your new project.
* `Select Template`: choose a template for your new project. Use the **Preview** button to see how each template looks like.

3\. If the project is created successfully, it will be shown in the project list.
### Importing a project
There are 3 types of projects you can import to the Monaca Localkit:
1. `From Cloud IDE`: projects you have in your Monaca Cloud IDE.
2. `From Local Cordova Project`: Cordova projects you have on your PC. There are some limitations when importing Cordova projects such as:
* App icons and splash images may not be imported. They can be configured on the`Build Config` screen.
* The scripts in the hooks directory are ignored.
* Platform specific codes including Cordova are not imported. Monaca will use its own Cordova and surrounded libraries.
3. `From Zip File`: the zip file of a valid project.
To import a project to the Monaca Localkit, please do as follows:
1. From the Monaca Localkit dashboard, click the:heavy\_plus\_sign:button on the top right corner of the left panel. Then, click **Import** and choose how you want to import the Monaca project.
* If you choose the `From Cloud IDE` option, fill in the necessary information:
* `Select Project`: select a project from the list of all projects you have in Monaca Cloud IDE.
* `Working Directory`: specify a directory where you want to keep your project files.

* If you choose the `From Local Cordova Project` option, fill in the necessary information:
* `Working Directory`: specify a directory where you want to keep your project files.
* `Project Name`: create a name to represent your new project which will be shown in the project list.

* If you choose the `From Zip File` option, fill in the necessary information:
* `Zip File`: browse the zip file of your project.
* `Project Name`: create a name to represent your new project which will be shown in the project list.
* `Working Directory`: specify a directory where you want to keep your project files.
2\. After that, the new project will be shown in the project list.
### Adding an editor program for local projects
Monaca Localkit provides an `Open in` feature which is used to open your local project files in different ways such as:
* **Finder/File Explorer:** This will reveal the selected project's folder
in Finder (for Mac), File Browser (for Linux), or File Explorer (for Windows).
* **Terminal/Command Prompt:** This will open the selected project's
folder in Terminal (for Mac/Linux) or Command Prompt for (Windows).
* **Other editor programs:** You can also add any preferred editors to
open your local project files from Monaca Localkit.
To add an editor program to Monaca Localkit, please do as follows:
1. In Monaca Localkit, select a project.
2. Click the **Open in...** button and select **Open with...**.

3\. Then, `Add Application` dialog will open. Fill in the necessary information related to the editor program:
* `Application Path`: browse the editor execution file (`.app` file for Mac or `.exe` file for Windows).
* `Application Name`: name the selected editor program. It will be shown in the list of programs when you click **Open in...**.
* `Command-line Arguments`: applicable arguments for the selected editor program. Currently, one command line parameter is available: `%d` (Project File Path).

4\. Click **OK**. Now, the new editor program should appear in the `Open in` list as shown below:

### Transpile process management
Some of the modern frameworks have created their own languages in order to interact with their products (like JSX), or have just integrated some extensions that are not natively available in JavaScript (for example TypeScript). The transpiling process transforms the code written with those languages to a native JavaScript code ready to be executed on modern browsers/WebViews. We currently use WebPack to perform the transpiling operations.
One of the biggest issues in the Localkit transpiling environment has been the inability to control the transpiling process management. For example, when a user selected a transpilable project, the transpiler was automatically triggered every time a change was made on that project.
We realized this may bring issues on outdated hardware. That’s why we decided to allow you to choose when to enable the automatic transpiling or pause it. You can freely manage it with the switch `Enable automatic transpiling`. The settings are persistent and related to each project. The status of the automatic transpiling can also be checked in the `Transpiler` tabbar element.

#### *Transpiler console*
It is important that you can constantly check the transpiling process log as it can help you to spot issues related to your project in real time. Before, the transpiling process log was not user-friendly because of the need to manually configure the log settings. That’s why we decided to integrate the console directly on Localkit, where you will be able to follow the progression of the whole transpiling process.
The displayed information includes:
* Transpiling status
* Creation of a new transpiling process with relative PID
* Information related to the transpiling process Kill operation
* Transpiling settings management
Moreover, the console can be easily resized and hidden, in case the developer is not interested in displaying the generated log.
### Preferences dialog
1. From the Monaca Localkit menu, go to **Preferences** (for Mac) or **File → Preferences** (for Windows/Linux).

2\. In the `Preferences` dialog, you can change the following settings:
* `Working Directory`: Specify a default location to store your local projects.
* `Listening Port`: Specify the port number to be used when pairing Monaca Localkit with Monaca Debugger.
* Project Preview Port:Specify the port number used in the preview screen.
* `Proxy Server`: Specify the proxy server.
* `Log Output`: Specify where you want to store the log file.
* `Language`: Specify the display language.
* `Synchronize Changes`: Specify the download operation after closing remote windows (Remote Build and Settings) on the Preferences menu.
* `Upload Option`: Specify whether a project is transpiled before uploading.
* `Beacon Broadcast`: Specify the beacon broadcast used when synchronizing Monaca Localkit and Monaca Debugger.
* Environment Path:Specify the node.js path if the monaca Localkit does not recognize node.js.
3\. Save the settings.
### Upload/download control
You might sometimes want to exclude specific files and folders from the Monaca Cloud. When using Monaca, the `.monacaignore` file will be automatically created and placed under the root directory of the React Native projects. You can edit the file to add or remove specific files and folders.
{% hint style="info" %}
`.monacaignore` is using the same pattern as `.gitignore`.
{% endhint %}
The default `.monacaignore` file looks like this:
```bash
/.monaca/*
!/.monaca/project_info.json
/platforms
.DS_Store
*.swp
.vscode/
typings/
node_modules
.git
```
# Pairing and Debugging
In order to debug a Monaca app with Monaca Localkit, you need to pair your host PC (running Monaca Localkit) with your device (running Monaca Debugger).
Before connecting Monaca Debugger to your host PC, please pay attention to the following points:
1. Monaca Debugger and the host PC have to connect to the same network (LAN or Wi-Fi). Some public networks do not allow connections between clients; therefore, pairing cannot be done in this case.
2. Use the same Monaca account for both Monaca Debugger and the host
PC.
3. Disable the host PC's firewall.
## Start Pairing
{% hint style="info" %}
On iOS 14 or later, you need to manually pair the monaca debugger the first time you launch it. For information on how to pair manually, see [Troubleshoot Pairing](/products_guide/debugger/troubleshooting).
{% endhint %}
1. Log in to Monaca Localkit on your host PC.
2. Use the same account to log in to Monaca Debugger as on your mobile device.
3. Once logged in, Monaca Debugger should be able to detect the host PC as shown below. Then, click **Pair** to start the pairing. However, if Monaca Debugger is unable to detect the host PC automatically, please refer to [Troubleshoot Pairing](/products_guide/debugger/troubleshooting).

4\. If the pairing is successful, the debugger will be shown under the `Debuggers` tab in Monaca Localkit.

5\. When the debugger is successfully connected to the Monaca Localkit, the local projects list will be shown in Monaca Debugger as shown below:

## Stop pairing
1. From the Monaca Debugger, click the toggle menu on the top-left corner and go to `Local Computers`.
2. The connected PC will be shown. Click the:information\_source:icon of the connected PC (see the screenshot below).

3\. The information of the connected PC will be shown here. Click **Unpair this computer** to disconnect from the selected PC. Once you unpair, you can't debug your local Monaca projects with this debugger anymore unless you pair it again.
## Debugging Monaca apps with Monaca Localkit
Please refer to [Monaca Debugger with Monaca Local Development Tools](/products_guide/debugger/debug).
# Remote Building and Publishing

Inside the **Remote Build** and **Settings** menus, the following configurations can be modified:
* **App Settings**: app's information configuration for each platform (iOS, Android & Windows).
* **Build & Build Settings**: build configuration for each platform (iOS,
Android & Windows).
* **Project**: project dependencies configuration including [Cordova plugins](broken://pages/-MfWeAhOiNeOfMv3d_kF), [JS/CSS Components](broken://pages/-MfWeAhK0WNR5b9XuZ8g) and Service Integration.
Please refer to the following documentation on how to build and distribute your app according to each platform:
* [Build](/products_guide/monaca_ide/build)
* [Distribution](/products_guide/monaca_ide/deploy)
# Troubleshooting Guide
In this page, we will describe how to solve some known issues related to Monaca Localkit.
## Installation in Windows
When installing Monaca Localkit on Windows, the following screen might show up preventing you from installing the Localkit.
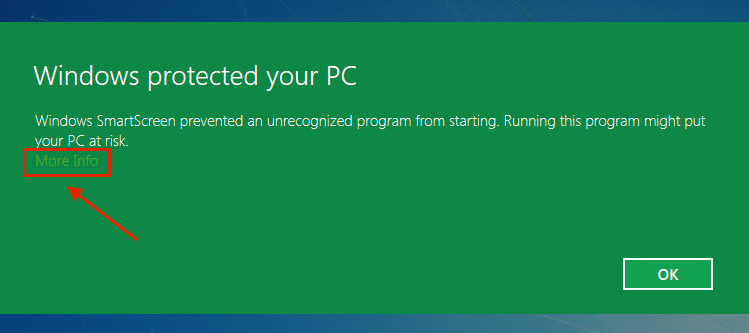
In order to solve this problem, click **More Info**. Then, click the **Run Anyway** button.
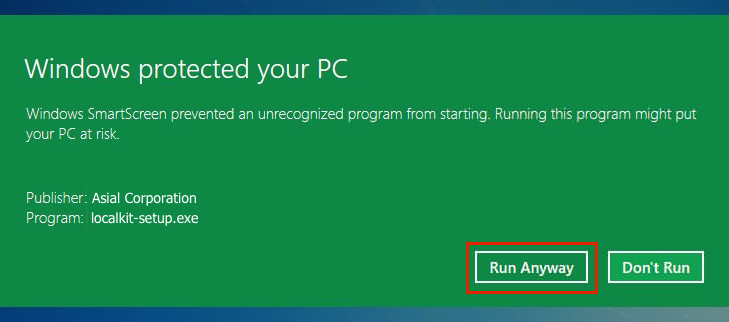
## Installation in Mac OS X
When installing Monaca Localkit in Mac OS X, the following screen might show up preventing you from installing the Localkit.
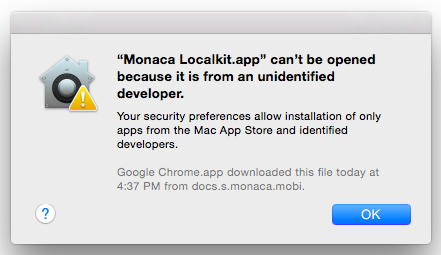
In order to solve this problem, do as follows:
1. Open the `System Preferences` and go to `Security & Privacy`.
2. Click **Open Anyway**.

3\. Now, try installing the app again. It should work on this time.
## Removing Monaca Localkit (for Windows)
While uninstalling Monaca Localkit, you might not be able to remove its remaining files. In this case, please remove them manually from `Program Files` folder.
## Incomplete files and folder structure
Monaca/Cordova projects initially consist of the following files and folders:
| File/Folder | Description |
| ------------ | --------------------------------------------------- |
| `www/` | Storage folder for the main body of the application |
| `config.xml` | Cordova configuration file |
In this section, we will talk about how to fix your project if the `www/` or `config.xml` file is missing.
### Missing www folder
#### For standard projects
The user should create a `www` folder in the root of the project or restore a previous backup of the folder.
#### For Webpack projects
`www` folder will be created automatically during the transpiling process. Transpiling is triggered automatically after selecting a project from the project list in the Monaca Localkit if the option is enabled.
### Missing the config.xml file
{% hint style="info" %}
This solution works only if your project exists on Monaca Cloud.
{% endhint %}
1. From Localkit, select a project from the project list.
2. Click **Download** and the `config.xml` file will be restored.
### The preview window is not refreshing
The problem might be occured with Localkit 4.1.0 and up. Prior to this version, the preview window is served with `file://` protocol from the project file. However, this `file://` is not supported for project using `module` javascript such as the project using `vite` tool. Therefore, in Localkit 4.1.0, we have switched to `http://` protocol to support newer tool and framework. With this change, there might be some browser cache problems causing the preview windows to remember the previous served projects not the current one as the url is using the same address (by default ) for all the projects.
To resolve this problem, you can "disable cache" in the chrome developer tools of the preview window and click "refresh" to reload the preview window when needed.
Disable cache and refresh preview window
### Error while installing
This error might occur on the windows environment when you using `nvm` version <= `1.1.7` and `npm` version `8.x.x`. This issue is already reported and resolved in NPM github issue - .
To resolve this issue, please following steps:
* Upgrade `nvm` to the latest version
* as the time of this writing 1.1.9 -
* Install the exe and follow the steps
* Restart the PC if neccessary
* Open `PowerShell` with `Run As Administrator` priviledge
* re-install node version, for example
* nvm uninstall 16.18.0
* nvm install 16.18.0
* nvm use 16.18.0
* Close and open Localkit again
* Check the startup log and make sure the node/npm version is correct
# Tutorial
{% hint style="info" %}
You are required to have a valid plan in order to use Monaca Localkit. Otherwise, it will run in an evaluation mode for 30 days after the first login. Please refer to [Monaca Subscription Plans](https://monaca.mobi/en/pricing) for more details.
{% endhint %}
{% hint style="info" %}
Please note that [Backend](broken://pages/-MfWeAgCwPQFDDYJG4vc) as well as [Push Notification](broken://pages/-MfWeAfPQVMlEV3x9YSK) are currently not available in the Monaca Localkit.
{% endhint %}
Monaca Localkit is a local development environment tool for Monaca applications. It can be used with many development tools including editors, source code management system and task runner. It also allows you to develop offline and provides a faster synchronization with Monaca Debugger.
Before getting started with this tutorial, do the following:
* Install Monaca Localkit. Download [here](https://monaca.io/localkit.html).
* Have a smart mobile device (either iOS or Android) if you want to test on a real device.
{% content-ref url="/pages/-MfWeAkZOY9of4Ubo5aN" %}
[Part 1: Starting a Project](/tutorials/monaca_localkit/starting_project)
{% endcontent-ref %}
{% content-ref url="/pages/-MfWeAkENWR6ZWAf048I" %}
[Part 2: Running Monaca Debugger with Monaca Localkit](/tutorials/monaca_localkit/testing_debugging)
{% endcontent-ref %}
{% content-ref url="/pages/-MfWeAlePIGtjQbjfusI" %}
[Part 3: Building a Monaca App](/tutorials/monaca_localkit/building_app)
{% endcontent-ref %}
{% content-ref url="/pages/-MfWeAmTS65Ss2cuVa0O" %}
[Part 4: Publishing a Monaca App](/tutorials/monaca_localkit/publishing_app)
{% endcontent-ref %}
# Monaca CLI
{% content-ref url="/pages/-MfWeAmtT49MPfrhDKsl" %}
[Overview](/products_guide/monaca_cli/overview)
{% endcontent-ref %}
{% content-ref url="/pages/-MfWeAhn-79Bep\_OMXIW" %}
[Monaca CLI Commands](/products_guide/monaca_cli/cli_commands)
{% endcontent-ref %}
{% content-ref url="/pages/-MfWeAl5cswhIizy2fsD" %}
[Pairing and Debugging](/products_guide/monaca_cli/pairing_debugging)
{% endcontent-ref %}
{% content-ref url="/pages/-MfbJC\_48AwQXxcYfBZC" %}
[Project Dependencies](/products_guide/monaca_cli/dependencies)
{% endcontent-ref %}
{% content-ref url="/pages/-MfWeAiWPt53dxgiLv6a" %}
[Remote Building and Publishing](/products_guide/monaca_cli/build_publish)
{% endcontent-ref %}
{% content-ref url="/pages/-MfWeAk0cTpbLrQeIlft" %}
[Troubleshooting Guide](/products_guide/monaca_cli/troubleshooting)
{% endcontent-ref %}
{% content-ref url="/pages/-MfWeAkvD5cbtDL8wa\_z" %}
[Tutorial](/products_guide/monaca_cli/tutorial)
{% endcontent-ref %}
{% content-ref url="/pages/-MfWeAg3zTuDcF7xk0GP" %}
[Broken mention](broken://pages/-MfWeAg3zTuDcF7xk0GP)
{% endcontent-ref %}
# Overview
## Introduction
Monaca CLI is a local development environment that is used to develop Monaca apps locally. The Monaca CLI provides a command line interface for using Monaca Cloud from your local PC. With the Monaca CLI, you can:
* Create new local projects and import or clone existing projects from
Monaca Cloud to your PC.
* Develop Monaca apps with a local code editor you prefer.
* Debug your app with inspector integration.
* Support transpiler options for transpilable projects such as ReactJS
and Angular2 projects.
* Remote build your projects without any local setup.
## Getting started
### Prerequisite
You are required to have [Node.js](https://nodejs.org/) installed on your PC in order to install the Monaca CLI.
### Step 1: CLI installation
Use the following command to install the Monaca CLI:
```javascript
$ npm install -g monaca
```
On some systems you may have to prefix the command with `sudo` because of a permission issue:
```javascript
$ sudo npm install -g monaca
```
{% hint style="info" %}
In order to check the currently installed Monaca CLI’s version, use `monaca` command. Moreover, if you want to update Monaca CLI, just re-install it using the above command.
{% endhint %}
### Step 2: Following the CLI tutorial
After installing the Monaca CLI, please follow our simple and easy tutorial on [how to use Monaca CLI](/products_guide/monaca_cli/tutorial).
## Transpiling in the Monaca CLI
Some of the modern frameworks have created their own languages in order to interact with their products (like JSX), or have just integrated some extensions that are not natively available in JavaScript (for example TypeScript). The transpiling process transforms the code written in those languages to a native JavaScript code ready to be executed on modern browsers/WebViews. We currently use WebPack to perform the transpiling operations.
Currently, it is available for the Vue, React and Angular2 templates. It can be triggered in two ways:
1. `monaca transpile`: runs the transpiler on the current project.
2. `monaca preview`: runs the transpiler in watch mode and starts an
HTTP server to display the app’s content.
## Upload/download control
You might sometimes want to exclude specific files and folders from the Monaca Cloud. When using Monaca, the `.monacaignore` file will be automatically created and placed under the root directory of the React Native projects. You can edit the file to add or remove specific files and folders.
{% hint style="info" %}
`.monacaignore` is using the same pattern as `.gitignore`.
{% endhint %}
The default `.monacaignore` file looks like this:
```bash
/.monaca/*
!/.monaca/project_info.json
/platforms
.DS_Store
*.swp
.vscode/
typings/
node_modules
.git
```
See Also:
* [Monaca CLI Tutorial](/products_guide/monaca_cli/tutorial)
* [Monaca CLI Commands](/products_guide/monaca_cli/cli_commands)
* [Project Dependencies](/products_guide/monaca_cli/dependencies)
* [Pairing and Debugging](/products_guide/monaca_cli/pairing_debugging)
* [Remote Building and Publishing](/products_guide/monaca_cli/build_publish)
* [Troubleshooting Guide](/products_guide/monaca_cli/troubleshooting)
# Monaca CLI Commands
| Command | Description |
| ------------------------------------------------------------------------------------ | ---------------------------------------------------------------------------- |
| [monaca login](/products_guide/monaca_cli/cli_commands#monaca-login) | Sign in to Monaca Cloud. |
| [monaca logout](/products_guide/monaca_cli/cli_commands#monaca-logout) | Sign out from Monaca Cloud. |
| [monaca update](/products_guide/monaca_cli/cli_commands#monaca-update) | Update projects created with CLI 2.x to the latest Monaca project structure. |
| [monaca init](/products_guide/monaca_cli/cli_commands#monaca-init) | Initialize projects created using other CLI tools to execute with Monaca. |
| [monaca signup](/products_guide/monaca_cli/cli_commands#monaca-signup) | Register a new Monaca account. |
| [monaca create](/products_guide/monaca_cli/cli_commands#monaca-create) | Create a new local Monaca project. |
| [monaca clone](/products_guide/monaca_cli/cli_commands#monaca-clone) | Clone a project from Monaca Cloud. |
| [monaca import](/products_guide/monaca_cli/cli_commands#monaca-import) | Import a project from Monaca Cloud. |
| [monaca download](/products_guide/monaca_cli/cli_commands#monaca-download) | Download a project from Monaca Cloud. |
| [monaca upload](/products_guide/monaca_cli/cli_commands#monaca-upload) | Upload a project to Monaca Cloud. |
| [monaca signing](/products_guide/monaca_cli/cli_commands#monaca-signing) | Manage signing configurations for iOS and Android builds. |
| [monaca remote build](/products_guide/monaca_cli/cli_commands#monaca-remote-build) | Build a project in Monaca Cloud. |
| [monaca remote config](/products_guide/monaca_cli/cli_commands#monaca-remote-config) | Open the project configuration on Monaca Cloud. |
| [monaca preview](/products_guide/monaca_cli/cli_commands#monaca-preview) | Run a local web server for preview . |
| [monaca debug](/products_guide/monaca_cli/cli_commands#monaca-debug) | Run an app on a device using Monaca Debugger. |
| [monaca transpile](/products_guide/monaca_cli/cli_commands#monaca-transpile) | Transpile project source code. |
| [monaca config](/products_guide/monaca_cli/cli_commands#monaca-config) | Manage Monaca CLI configuration. |
| [monaca plugin](/products_guide/monaca_cli/cli_commands#monaca-plugin) | Manage the Cordova plugins of a project. |
| [monaca docs](/products_guide/monaca_cli/cli_commands#monaca-docs) | Display docs of Monaca CLI and Onsen UI. |
## monaca login
Signs in to Monaca Cloud. You will be asked to input your Monaca account information (username and password).
```javascript
$ monaca login [options]
```
**Options**
* `email`: Email address used to login to Monaca Cloud.
**Example**
Here is an example of how to login to Monaca Cloud with Monaca CLI:
```javascript
$ monaca login
$ monaca login me@monaca.io
$ echo "mypass" | monaca login me@monaca.io
```
## monaca logout
Signs out from Monaca Cloud and removes the stored login token.
```javascript
$ monaca logout
```
**Example**
Here is an example of how you logout from Monaca Cloud with the Monaca CLI:
```javascript
$ monaca logout
Signing out from Monaca Cloud...
You have been signed out.
Removed Monaca Debugger pairing information.
```
## monaca update
This command is available from Monaca CLI 3.x. It is used to update old projects created with Monaca CLI 2.x.
**Non-transpile project**
The `package.json` will be modified with the following changes:
* A `monaca:preview` command will be added to the `script` property.
* A `dev` command will be added to the script unless it already exists.
* `"dev": "browser-sync start -s www/ --watch --port 8080 --ui-port 8081"`
* `Browser-sync` and `Cordova` will be added as `devDependencies`.
**Transpile projects**
The `package.json` will be modified with the following changes:
* `monaca:preview`, `monaca:transpile` and `monaca:debug` commands will be added to the `script` property.
* `dev`, `build`, and `watch` commands will be added to the script unless they already exist.
* Required packages including `Webpack` and `Cordova` will be added as `devDependencies`.
```javascript
$ monaca update [options]
```
**Options**
* `--force`: Accept default.
* `--createPackageJson`: Create a basic `package.json` file with a name and a description if the project doesn't have a `package.json` file.
**Example**
Here is an example of how to use this command:
```javascript
$ monaca update
$ monaca update --force --createPackageJson
```
## monaca init
This command is available from Monaca CLI 3.x. It initializes a project created using other CLI tool to execute it with Monaca (Monaca CLI, Monaca Cloud IDE, Monaca Localkit). The following resources will be added to the project.
* `www/components`: Monaca loaders needed to use the GUI page to include the CSS/JavaScript libraries into the project.
* `config.xml`: a global configuration file that controls many aspects of the Cordova applications' behavior.
* `res`: Android, iOS and Windows icons and splashes (users can remove it after the init process).
* `cordova`: Cordova 7.1 is installed as a dev dependency in case the project does not have it.
* `.monaca/project_info.json`: A JSON file with some information such as cordova version and framework\_version.
```javascript
$ monaca init
```
## monaca signup
Signs up for Monaca Cloud. Will display a prompt that asks for user credentials.
```javascript
$ monaca signup
```
## monaca create
Creates a new local Monaca project from a template at a specified path. You will be asked to choose a project template from a list of available templates provided by Monaca Cloud. An app with the selected template will be created to the specified location.
```javascript
$ monaca create [options]
```
* `path`: Location where you want to store your project files.
**Options**
* `--url`: URL of a zip file containing a Monaca template.
* `--`template-list: Prints a list of all the available Monaca templates.
* `--`template: Name of the chosen template for the project creation.
**Example**
Here is an example of how to create a new project with the Monaca CLI:
```javascript
$ monaca create myproject
$ monaca create --template-list
$ monaca create myproject --template blank
$ monaca create myproject --url http://github.com/me/myproject/archive/master.zip
```
## monaca clone
Clones a project from the Monaca Cloud into your local PC at a specified location. You will be asked to select a project from a list of all your existing projects in Monaca Cloud and specify a location to download to project.
{% hint style="info" %}
If you make changes to a cloned project locally and upload it (using [monaca upload ](/products_guide/monaca_cli/cli_commands#monaca-upload)) to Monaca Cloud, the older files of the project will be overwritten.
{% endhint %}
```javascript
$ monaca clone
```
**Example**
Here is an example of how to clone a project called `Memo Application` from Monaca Cloud into "CloneMemoProject" folder on your local PC.

## monaca import
Imports a project from Monaca Cloud. You will be asked to select a project from a list of all your existing projects in Monaca Cloud and specify a location for the downloaded project.
{% hint style="info" %}
If you make changes to an imported project locally and upload (using [monaca upload ](/products_guide/monaca_cli/cli_commands#monaca-upload)) it to Monaca Cloud, the project will be uploaded as a new project to Monaca Cloud.
{% endhint %}
```javascript
$ monaca import
```
**Example**
Here is an example of how to import a project called `Memo Application` from Monaca Cloud into `ImportedMemoApplication` folder on your local PC.

## monaca download
Downloads changes (of the corresponding synced project) made in Monaca Cloud into the local project.
{% hint style="info" %}
This command will overwrite the changes of the local project. If your local project does not exist in Monaca Cloud, you can’t use this command.
{% endhint %}
```javascript
$ monaca download [options]
```
**Options**
* `--delete`: Deletes local files that do not exist in Monaca Cloud.
* `--force`: Doesn't ask users for permission to continue.
* `--dry-run`: Simulates the downloading operation and provides details of which files are downloaded. No actual downloading operation is done.
**Example**
Navigate to your project folder. Then, type the `monaca download` command with the options you want to use.

## monaca upload
Uploads the current project files to Monaca Cloud. The project files will be compared with the corresponding remote files so that only the new and changed ones will be uploaded.
1. If the current project is a new/imported project, this command will
upload the whole project as a new project in Monaca Cloud.
2. If the current project is a cloned project, this command will
overwrite the same existing project in Monaca Cloud. In other words,
only changed and new files will be uploaded.
{% hint style="info" %}
For transpilable projects, `monaca upload` command will transpile the project before uploading it.
{% endhint %}
```javascript
$ monaca upload [options]
```
**Options**
* `--delete`: Deletes the project files in Monaca Cloud which do not exist locally.
* `--force`: Doesn't ask users for permission to continue the uploading process.
* `--dry-run`: Simulates the uploading operation and provides details of which files are uploaded. No actual uploading operation is done.
**Example**
Navigate to your project folder. Then, type the `monaca upload` command with the options you want to use.

## monaca signing
Manages signing configurations for iOS and Android builds.
```javascript
$ monaca signing
```
**action**
* `generate`: can be used with `keystore` or `pkcsr`.
* `upload`: can be used with`keystore`, `pkcs12`, `certificate` or `provisioning`.
* `add`: can be used with `alias`.
* `remove`: can be used with `alias`, `pkcs12`, `certificate` or `provisioning`.
* `export`: can be used with `keystore` or `pkcsr`.
**item**
* `alias`: alias within a keystore file
* `keystore`: Android KeyStore
* `pkcsr`: CSR (Certificate Signing Request) file
* `pkcs12`: private key with certificate
* `certificate`: iOS certificate
* `provisioning`: iOS provisioning profile
{% hint style="info" %}
For more information on how to sign or create iOS and Android build settings (involving KeyStore, private key, certificate & provisioning profile), please refer to [Configure iOS build settings ](/products_guide/monaca_ide/build/ios/build_ios#configure-ios-build-settings)and [Configure Android KeyStore ](/products_guide/monaca_ide/build/build_android#step-2-configure-android-keystore), respectively.
{% endhint %}
**Example**
Navigate to your project folder and try out these commands:
```javascript
$ monaca signing generate keystore
$ monaca signing generate pkcsr
$ monaca signing add alias
$ monaca signing upload keystore
$ monaca signing upload pkcs12
$ monaca signing upload certificate
$ monaca signing upload provisioning
$ monaca signing export keystore
$ monaca signing export pkcsr
$ monaca signing remove alias
$ monaca signing remove pkcs12
$ monaca signing remove certificate
$ monaca signing remove provisioning
```
## monaca remote build
Builds a project in Monaca Cloud. If your project does not exist in Monaca Cloud yet, it will be automatically uploaded to the cloud first before the build starts. However, if your project already exists in Monaca Cloud, all its local updates/changes will be uploaded to the cloud first before the build starts.
Please refer to [Building Monaca App](/tutorials/monaca_localkit/building_app) for more information about:
* configuring the build settings for each platform
* types of build
* building an application for each platform
* installing built apps
```javascript
$ monaca remote build [options]
```
* `platform`: Builds for a specific platform. It can be: `ios`, `android` or `windows`.
**Options**
* `--build-type`: Chooses a build type. It can be:
* `debug`: (for iOS, Android and Windows) The default option.
* simulator, adhoc: (for iOS only)
* debugger, inapp\_updater: (for iOS and Android)
* `release`: (for iOS and Android)
* `--output`: The path in which the built file will be stored (including the filename)
* `--android_webview`: (Android only) Chooses a type of the webview. It can be `default` or `crosswalk`.
* `--android_arch`: (Android only) Required if `--android_webview` is `crosswalk`. It can be `x86` or `arm`.
* `--skipUpload`: Skips the upload of the local project to the cloud.
* `--skipTranspile`: Skips the transpile process when uploading the local project to the cloud.
* `--browser`: Opens the build process in a browser (see the screenshot below).
**Example**
Navigate to your project folder and try out this command with different options:
```javascript
$ monaca remote build ios
$ monaca remote build ios --build-type=debug
$ monaca remote build android --build-type=debug --android_webview=crosswalk --android_arch=arm
$ monaca remote build --browser
```

## monaca remote config
Opens the project configuration on Monaca Cloud. Once the configuration is done, execute `monaca download` to get the changes locally.
```javascript
$ monaca remote config
```
**Options**
* `--skipUpload`: Skips the upload of the local project to the cloud.
* `--skipTranspile`: Skips the transpile process when uploading the local project to the cloud.
**Use Case**
Navigate to your project folder and try out these commands:
```javascript
$ monaca remote config
$ monaca download
```
## monaca preview
Starts a local web server that serves the `www` assets. The command will watch the file system for changes and reload the browser when a change occurs. It will execute `npm run monaca:preview` defined in package.json.
{% hint style="info" %}
For transpilable projects, `monaca preview` command will transpile the project in memory before launching the previewer. Additionally, if the preview is still running and you make a change, the transpile process should be triggered and the previewer will be served with the new files.
{% endhint %}
```javascript
$ monaca preview
```
**Example**
Navigate to your project folder and use the `monaca preview` command. Then, a browser will be opened running your project.


{% hint style="info" %}
To stop `monaca preview` process, press `Ctrl+c`.
{% endhint %}
## monaca debug
Debugs one or more applications on a device and receives code changes instantly. This command starts a web server for Monaca Debugger to connect to. It also starts broadcasting messages to tell debuggers in the local network to connect to it. When a debugger is connected, it will send file system changes to the debugger. It will execute the`npm run monaca:debug` script defined in package.json.
{% hint style="info" %}
For transpilable projects, the `monaca debug` command will transpile the project before serving the files to Monaca Debugger. Additionally, if the debug is still running and you make a change, the transpile process should be triggered and the debugger will be served with the new files.
{% endhint %}
```javascript
$ monaca debug [options]
```
**Options**
* `paths`: List of directories. Omit it to serve the current directory.
* `--port`: HTTP port to listen to (default value is 8001)
**Example**
Navigate to your project folder and use the `monaca debug` command. Then, you should be able to see the project name in the Monaca Debugger under the `Local Projects` section. Click the project in order to run it. Try to make some changes to the project and save them. You should be able to see those changes to reflect instantly.
```javascript
$ cd MyProjectFolder/ImportRssProject
$ monaca debug
```
When running this command, you should be prompted to pair your debugger with your local PC or see the notification of a successful network connection (see the screenshots). Otherwise, please refer to [Failure to Pair Monaca Debugger](/products_guide/debugger/troubleshooting).

{% hint style="info" %}
To stop `monaca debug` process, press `Ctrl+c`.
{% endhint %}
## monaca transpile
Transpiles projects that are transpilable such as ReactJS, VueJS and Angular projects. It will execute the `npm run monaca:transpile` script defined in `package.json`.
```javascript
$ monaca transpile
```
**Example**
Navigate to your transpilable project folder and use the `monaca transpile` command.
```javascript
$ monaca transpile
Running Transpiler...
Build completed in 71.835s
....
```
## monaca config
Manages proxy and API endpoint configuration.
```javascript
$ monaca config [options]
```
**Options**
* `proxy `: If \ is not set, the current proxy server will be displayed.
* `endpoint `: If \ is not set, the current API endpoint will be displayed.
* `--help`: Displays a config helper.
* `--reset`: Resets to the default value.
**Example**
Here are examples of how to use this command:
```javascript
$ monaca config --help
$ monaca config proxy
$ monaca config proxy http://my.proxy.com:8080
$ monaca config proxy --reset
$ monaca config endpoint
$ monaca config endpoint my.endpoint.com
$ monaca config endpoint --reset
```
## monaca plugin
Manages plugins of a project by adding new plugins and removing installed plugins.
```javascript
$ monaca plugin [options]
```
**Options**
* `add `: Adds a plugin.
* `rm `: Removes a plugin.
**Example**
Navigate to your project folder and type the command below:
```javascript
$ monaca plugin add cordova-plugin-camera
$ monaca plugin rm cordova-plugin-camera
```
## monaca docs
Displays docs for Monaca CLI and Onsen UI.
```javascript
$ monaca docs [options]
```
**Options**
* `onsen`: Opens the Onsen UI documentation in a browser window.
* `usage`: Opens the Monaca CLI documentation in a browser window.
**Example**
Here is an example of how to use this command:
```javascript
$ monaca docs onsen
$ monaca docs usage
```
See Also:
* [Monaca CLI Tutorial](/products_guide/monaca_cli/tutorial)
* [Monaca CLI Overview](/products_guide/monaca_cli/overview)
* [Project Dependencies](/products_guide/monaca_cli/dependencies)
* [Pairing and Debugging](/products_guide/monaca_cli/pairing_debugging)
* [Remote Building and Publishing](/products_guide/monaca_cli/build_publish)
* [Troubleshooting Guide](/products_guide/monaca_cli/troubleshooting)
# Pairing and Debugging
In order to debug Monaca app with Monaca CLI, you need to pair your host PC (running Monaca CLI) with your device (running Monaca Debugger).
Before connecting Monaca Debugger to your host PC, please pay attention to the following points:
1. Monaca Debugger and the host PC have to connect to the same network
connection (LAN or Wi-Fi). Some public networks do not allow
connections between clients; therefore, pairing cannot be done in
this case.
2. Use the same Monaca account for both Monaca Debugger and the host
PC.
3. Disable the host PC's firewall.
## Start pairing
{% hint style="info" %}
On iOS 14 or later, you need to manually pair the Monaca Debugger the first time you launch it. For information on how to pair manually, see [Troubleshoot Pairing](/products_guide/debugger/troubleshooting).
{% endhint %}
1. Launch Monaca Debugger app on your device and sign in using your
Monaca account information. Make sure you are using the same account
information that you are using with the Monaca CLI.
2. In the command line window on your PC, navigate to your project folder and use the [monaca debug](/products_guide/monaca_cli/cli_commands#monaca-debug) command to connect to the Monaca Debugger:
```
$ monaca debug
```
3\. Then, a popup message prompting you to pair the Monaca Debugger with the host PC will appear. After this, your application should run on the debugger.

4\. If your pairing is successful, your local project’s name will appear under Local Projects in the Monaca Debugger. However, if the pairing doesn't work, refer to [Fail to Pair Monaca Debugger](/products_guide/debugger/troubleshooting).

## Stop pairing
There are two ways to stop the pairing:
### 1. From the PC
In the same command window on your PC which you are running the [monaca debug](/products_guide/monaca_cli/cli_commands#monaca-debug) command, please press `ctrl + C` to break the debug process between your PC and Monaca Debugger.
### 2. From Monaca Debugger
1. Open the toggle menu on the top-left corner and click **Local Computers**.
2. The connected PC will be shown. Click the:information\_source: icon of the connected PC (see the screenshot below).

3\. The information of the connected PC will be shown. Click the **Unpair this computer** button to disconnect from the selected PC. Pair your device back to the PC if you want to debug your app again.
See Also:
* [Monaca CLI Tutorial](/products_guide/monaca_cli/tutorial)
* [Monaca CLI Overview](/products_guide/monaca_cli/overview)
* [Project Dependencies](/products_guide/monaca_cli/dependencies)
* [Monaca CLI Commands](/products_guide/monaca_cli/cli_commands)
* [Remote Building and Publishing](/products_guide/monaca_cli/build_publish)
* [Troubleshooting Guide](/products_guide/monaca_cli/troubleshooting)
# Project Dependencies
{% content-ref url="/pages/-MfbJC\_5boq2CZCLB40t" %}
[File and Folder Structure](/products_guide/monaca_cli/dependencies/file_dir)
{% endcontent-ref %}
{% content-ref url="/pages/-MfbJC\_7kbtiYesBHAyG" %}
[JS/JSS Components](/products_guide/monaca_cli/dependencies/components)
{% endcontent-ref %}
{% content-ref url="/pages/-MfbJC\_6i2i1kDbsVQep" %}
[Cordova Plugins](/products_guide/monaca_cli/dependencies/cordova_plugin)
{% endcontent-ref %}
{% content-ref url="/pages/-MfbJC\_8iQPbmkM2F7JL" %}
[Custom Cordova Plugins](/products_guide/monaca_cli/dependencies/custom_cordova_plugin)
{% endcontent-ref %}
# File and Folder Structure
## Cordova version
With different Cordova versions, the file and folder structure of a Monaca project are configured differently.
### For Cordova 6.2 and 6.5
| File/Folder Name | Description |
| ------------------------------------------------------------------------------ | --------------------------------------------------- |
| [plugins/](/products_guide/monaca_cli/dependencies/file_dir#plugins-folder) | Storage folder for additional plugins |
| `res/` | Resources folder for Android, iOS and Winrt |
| [www/](/products_guide/monaca_cli/dependencies/file_dir#www-folder) | Storage folder for the main body of the application |
| [config.xml](/products_guide/monaca_cli/dependencies/file_dir#config-xml-file) | Application configuration file |
### For Cordova 7.1
| File/Folder Name | Description |
| ------------------------------------------------------------------------------ | --------------------------------------------------- |
| [plugins/](/products_guide/monaca_cli/dependencies/file_dir#plugins-folder) | Storage folder for additional plugins |
| `res/` | Resources folder for Android, iOS and Winrt |
| [www/](/products_guide/monaca_cli/dependencies/file_dir#www-folder) | Storage folder for the main body of the application |
| [config.xml](/products_guide/monaca_cli/dependencies/file_dir#config-xml-file) | Application configuration file |
| `package.json` | Cordova plugins management file |
## www folder
Files of the application’s main body are stored here. Files and folders can be arranged freely within the `www` folder, but the following parts have a special significance:
| File/Folder Name | Description |
| -------------------------------------------------------------------------- | ----------------------------------------------------------------------------------------------- |
| `index.html` | The first page to be displayed when the application starts up. The startup file can be changed. |
| [components/](/products_guide/monaca_cli/dependencies/file_dir#www-folder) | The folder created by Monaca for all JS/CSS components used in the project. |
## Components folder
The folder `www/components/` is for all JS/CSS components used in the project. However, the following two files exist in the folder by default regardless of what kinds of components you have added to your project:
| File Name | Description |
| ------------ | ------------------------------------------------------------- |
| `loader.js` | A JavaScript file used by Monaca to load JavaScript libraries |
| `loader.css` | A style sheet file used by Monaca to load CSS libraries |
{% hint style="info" %}
The `loader.js` and `loader.css` files must be read from an HTML file.
{% endhint %}
Each component will create its own folder in the (one level below) `www/components/` folder.`loader.js` file also loads `cordova.js` file.
## Plugins folder
If you import a Cordova plugin using a ZIP file, it will be stored inside this folder. However, if you import the plugin using package URL/Plugin ID, the plugin file will be downloaded during build.
## config.xml file
The `config.xml` is a file that controls various settings of Cordova. Please refer to the following documentations regarding how to edit the `config.xml` file for Android and iOS:
* [config.xml for Android](/reference/config/android/config_xml)
* [config.xml for iOS](/reference/config/ios/config_xml)
{% hint style="info" %}
For Cordova 6.2 or higher, `config.xml` file is also used to configure either Android or iOS application settings. Please refer to [Cordova Custom Config Plugin](/reference/third_party_phonegap/custom_config).
{% endhint %}
See Also:
* [Third-party Cordova Plugins](/reference/third_party_phonegap)
* [Core Cordova Plugins](/reference/core-cordova-plugins)
# JS/JSS Components
JS/CSS components are JavaScript and CSS libraries you may need to include to your project such as jQuery, jQuery mobile, Onsen UI.
In order to add a JavaScript/CSS library, please do as follows:
1. From Monaca Cloud IDE, go to **Configure → JS/CSS Component Settings**.
2. `JS/CSS Components` page will be shown. You can see several libraries listed there. If you can’t find the library you want, input the library’s name in a search box to find it.

3\. Assuming you are searching for Angular, a list of matched libraries will be shown after clicking the **Search** button.

4\. Click the **Add** button to include the library you prefer. Then, you can choose which version of the library to include in your project.

5\. Select which files of the library you want to include and click Save.

6\. After that, you will find your newly added library in the list. Click the **Configure** button when you want to change the library’s version or selected file(s).

When a library is added, its files are added into the `www/components` folder. The following JavaScript and CSS files will also be automatically updated. These files will always be presented regardless of which libraries are added into your project:
| File Name | Description |
| ------------ | ------------------------------------------------------------- |
| `loader.js` | A JavaScript file used by Monaca to load JavaScript libraries |
| `loader.css` | A style sheet file used by Monaca to load CSS libraries |

Therefore, libraries can be loaded by simply referencing the two files (as shown above) in the HMTL file. More specifically, all you need to do is to include the following descriptors within the `` tag of the HTML file.
```markup
```
{% hint style="info" %}
If you would like to use images within your libraries, you can directly load the image files from the `components` folder.
{% endhint %}
{% hint style="info" %}
The `loader.js` file also loads the `cordova.js` file.
{% endhint %}
# Cordova Plugins
Usually, you need native code (Java for Android, Objective-C for iOS, etc) to access native device functions such as camera, file system, storage, etc. However, you can access these native functions using JavaScript with Cordova.
Cordova is a set of device APIs that allow a mobile app developer to access native device functions such as the camera or accelerometer from JavaScript. Therefore, Monaca uses Cordova to enable hybrid apps to access native device functions from JavaScript.
For more information about Cordova, please refer to [here](https://cordova.apache.org/).
## Loading Cordova
You can’t use device APIs (Cordova plugins) before Cordova is fully loaded. The `deviceready` event fires once Cordova has fully loaded. Once the event fires, you can safely make calls to Cordova APIs. Applications typically attach an event listener with `document.addEventListener` once the HTML document’s DOM has loaded.
As an example, let’s start up the camera function by using Camera APIs. Please copy and paste the code below to your project in Monaca Cloud IDE. Then you can run it on [Monaca Debugger](/products_guide/debugger).
{% hint style="info" %}
This code was written for Cordova 7.1. We apologize in advance in case the code may behave differently on different devices.
{% endhint %}
```markup
Camera Sample
```
## Upgrading the Cordova version
{% hint style="info" %}
The Cordova version in Monaca cannot be downgraded.
{% endhint %}
{% hint style="info" %}
When upgrading a Cordova version, a backup of the project is automatically created before the conversion.
{% endhint %}
When creating a new project, the latest Cordova version available in Monaca will be automatically applied.
In order to upgrade the Cordova version of your project, please do as following:
1. From Monaca Cloud IDE, go to **Configure → Cordova Plugin Settings**.
2. Click the **Upgrade** link.

## Built-in Cordova plugins in Monaca
Directly from Cordova Plugins page in Monaca Cloud IDE, you can easily enable Cordova plugins.
* Core Cordova plugins refer to a minimal set of Cordova APIs such as battery, camera, contacts, devices. For more information, please refer to [Core Cordova Plugins](/reference/core-cordova-plugins).
* Third-party Cordova plugins refer to other existing Cordova plugins. There are [some third-party Cordova plugins](/reference/third_party_phonegap) that you can add to your project right from the Cordova Plugins page.

## Importing Cordova plugins
To import a Cordova plugin into your project, please do as follows:
1. From the Monaca Cloud IDE, go to **Configure → Cordova plugin Settings**.
2. The Cordova Plugins page will be shown. On this page, core and some third-party Cordova plugins are listed. Mouseover a plugin and click **Enable** to add the plugin. If you cannot find the plugin you want in the list, you can import other third-party Cordova plugins by using the **Import Cordova Plugin** button. A project containing external third-party Cordova plugins requires a custom built Monaca Debugger. Please refer to [Monaca Debugger with Custom Cordova Plugin](/products_guide/monaca_ide/dependencies/custom_cordova_plugin#monaca-debugger-with-custom-cordova-plugin).

3\. Once a plugin is enabled/imported, you might want to configure it. Mouseover a plugin you want to configure and click **Configure** to open the plugin’s settings dialog where you can change the plugin’s version and set the plugin’s parameters.


# Custom Cordova Plugins
Cordova Plugin provides a simple way to write a native code onto your program. On this page, we will describe how to create and add custom Cordova plugins into your Monaca project.
{% hint style="info" %}
You need to subscribe to a valid plan in order to use custom Cordova plugins. Please refer to [Monaca Subscription Plans](https://monaca.mobi/en/pricing).
{% endhint %}
Your custom Cordova plugin needs to follow these requirements:
* It should be compatible with Cordova 4.2 or higher.
* It must have a `plugin.xml` file and is installable with `plugman`
command line tool.
* It must support iOS and Android platforms.
You can find various Cordova plugins in the Internet, but it is likely that they are either obsolete or their version would not match. Therefore, how to create a custom Cordova plugin from scratch is covered in this page.
## Structure of a Cordova plugin
A typical structure of a Cordova plugin is as follows (directories are displayed in bold letters):
* *plugin\_name*
* *src*
* *ios*
* plugin\_name.h
* plugin\_name.h
* *www*
* plugin\_name.js
* plugin.xml
Before getting started, please download the following zip file containing sample plugin code.
[Download a Sample Cordova Plugin](https://github.com/monaca/docs-monaca-en/tree/0a90636fb9497e030d62edcca68ba9d3cac10042/download/cordova_plugin_sample.zip)
When you extract the package, you will see the following files and folders:

### plugin.xml file
`plugin.xml` file is a plugin specification file containing plugin's definitions. For more details, please refer to [Cordova Plugin Specification](http://cordova.apache.org/docs/en/latest/plugin_ref/spec.html).
Below is a `plugin.xml` file from the downloaded sample plugin.
```markup
HelloWorldPluginHelloWorldPlugin DescriptionAsial CorporationApache 2.0 License
```
### hello\_world.js file
`hello_world.js` is defined as `js-module` in plugin spec. Therefore, it will be automatically loaded by `cordova.js`, which is included in `loader.js`.
```javascript
var HelloWorld = function() {};
HelloWorld.prototype.say = function(success, fail) {
cordova.exec(success, fail, "HelloWorldPlugin","say", []);
};
var helloWorld = new HelloWorld();
module.exports = helloWorld;
```
For more details about how to write Cordova callback function, please refer to [Plugin Development Guide](http://cordova.apache.org/docs/en/latest/guide/hybrid/plugins/index.html).
### iOS and Android native code
Native code must be written in either Objective-C or Java, depending on the platform. It must have the same function as defined in the JavaScript file. Also, please be aware that all callbacks are asynchronous.
Here are the guides about native code development.
* [Android Plugin Development Guide](https://cordova.apache.org/docs/en/latest/guide/platforms/android/plugin.html)
* [iOS Plugin Development Guide](https://cordova.apache.org/docs/en/latest/guide/platforms/ios/plugin.html)
## Import a custom Cordova plugin
To import a custom Cordova plugin, please do as follows:
1. From the Monaca Cloud IDE, go to **Configure** **→** **Cordova plugin Settings**.
2. The Cordova Plugins page will be shown. Click the **Import Cordova Plugin** button.

3\. Then, browse your plugin file (zip file) and click **OK**.
## Monaca Debugger with custom Cordova plugin
The standard Monaca Debugger, which can be found in the store such as App Store or Google Play, includes the standard (core) and several third-party Cordova plugins (refer to [Third-party Cordova Plugins](/reference/third_party_phonegap) for the list of all third-party Cordova plugins pre-included in Monaca). For this reason, the standard Monaca Debugger cannot be used with Monaca projects containing custom or other external third-party Cordova plugins. In this case, custom built Monaca Debugger is required to run such projects properly.
Custom built Monaca Debugger is a debugger which is built within Monaca Cloud IDE inside a project containing custom or external third-party Cordova plugins. Please refer to the following links on how to build custom built debugger and the differences between the standard and custom built debugger:
* [Custom Monaca Debugger for iOS](/products_guide/debugger/installation/debugger_ios#how-to-build-custom-monaca-debugger)
* [Custom Monaca Debugger for Android](/products_guide/debugger/installation/debugger_android#build-and-install-custom-monaca-debugger)
Please make sure to import the custom or external third-party Cordova plugins before building the custom built debugger.
We also offer technical support (fee required) for developing your custom Cordova Plugin. Please contact our support team [here](https://monaca.io/service/index.html).
## Testing a custom Cordova plugin
1. Create a project in the Monaca Cloud IDE using the `Minimum Project Template`.
2. Import a sample custom Cordova plugin you downloaded earlier in [Structure of a Cordova plugin](/products_guide/monaca_cli/dependencies/custom_cordova_plugin#structure-of-a-cordova-plugin).
3. Add the following snippet in the `index.html` file. The code below shows just a simple message dialog using the sample custom Cordova plugin:
```javascript
```
4. Now, run the project in the standard Monaca Debugger. You will see that the message dialog will not be shown because the custom Cordova plugin doesn't exist in the standard debugger.
5. Build a custom built Monaca Debugger. Please refer to the following links on how to build a custom built Monaca Debugger:
* [Custom Monaca Debugger for iOS](/products_guide/debugger/installation/debugger_ios#how-to-build-custom-monaca-debugger)
* [Custom Monaca Debugger for Android](/products_guide/debugger/installation/debugger_android#build-and-install-custom-monaca-debugger)
6. Install the custom built Monaca Debugger.
7. Open the debugger and check the debugger's information by clicking the **About this debugger** button.

1. You should be able to find the custom Cordova plugin as shown in the screenshot below:

1. Login to the debugger and run the project containing the custom Cordova plugin. The message dialog should show if the project runs properly.

# Remote Building and Publishing
Inside the `Remote Build`, there are some important functions such as:
* **Building application**: Choose a specific platform (among Android,
iOS and Windows) to build.
* **Building configuration**: Configure the necessary information regarding
the application and build for each platform.
* **Project dependencies**: Include the necessary dependencies
([Cordova plugins](/products_guide/monaca_cli/dependencies/cordova_plugin), [JS/CSS Components](/products_guide/monaca_cli/dependencies/components) and [Service Integration](/reference/service_integration)) used by the project.
At this point, we assume that you have successfully developed a complete application. Then, you can try building your app and installing it on your device. Once the app development and testing are completed, your app is ready for the market submission. Before releasing or distributing your app into the markets (App Store, Google Play, ...), you will need to create a release build of your app.
Please refer to the following documentation on how to build and distribute your app according to each platform:
* [Building Monaca Apps](/tutorials/monaca_cli/building_app)
* [Publishing Monaca Apps](/tutorials/monaca_cli/publishing_app)
See Also:
* [Monaca CLI Tutorial](/products_guide/monaca_cli/tutorial)
* [Monaca CLI Overview](/products_guide/monaca_cli/overview)
* [Project Dependencies](/products_guide/monaca_cli/dependencies)
* [Monaca CLI Commands](/products_guide/monaca_cli/cli_commands)
* [Pairing and Debugging](/products_guide/monaca_cli/pairing_debugging)
* [Troubleshooting Guide](/products_guide/monaca_cli/troubleshooting)
# Troubleshooting Guide
### Incomplete files and folder structure
Monaca/Cordova projects initially consist of the following files and folders:
| File/Folder | Description |
| ------------ | --------------------------------------------------- |
| `www/` | Storage folder for the main body of the application |
| `config.xml` | Cordova configuration file |
In this section, we will talk about how to fix your project if the `www/` or `config.xml` file is missing.
## Missing the www folder
### For standard projects
The user should create a `www` folder in the project root or restore the previous backup of the folder.
### For Webpack projects
The user should proceed as follows:
1. In the command line window, navigate to the project folder.
2. Run the `monaca transpile` command. This will generate the `www` folder with the body of the application.
## Missing the config.xml file
{% hint style="info" %}
This solution will only work if your project exists in the Monaca Cloud or you have a backup version of it.
{% endhint %}
1. The user should create an empty `config.xml` file in the project
root.
2. Copy the content of the `config.xml` file of the project in the
Cloud or the backup project.
3. Paste the content to the empty `config.xml` file.
See Also:
* [Monaca CLI Tutorial](/products_guide/monaca_cli/tutorial)
* [Monaca CLI Overview](/products_guide/monaca_cli/overview)
* [Project Dependencies](/products_guide/monaca_cli/dependencies)
* [Monaca CLI Commands](/products_guide/monaca_cli/cli_commands)
* [Pairing and Debugging](/products_guide/monaca_cli/pairing_debugging)
* [Remote Building and Publishing](/products_guide/monaca_cli/build_publish)
# Tutorial
Monaca CLI is a local development environment that can be used to develop Monaca apps locally. Monaca CLI provides a command line interface for using Monaca Cloud from your local PC. You can create new local projects and import or clone existing projects from Monaca Cloud to your PC and start developing Monaca apps with an editor you prefer. Monaca CLI allows you to debug your app with inspector integration and remote build your projects without any local setup.
Before getting started with this tutorial, you should:
* install Monaca CLI with the following command ([read more](/products_guide/monaca_cli/overview#step-1-cli-installation)):
```
$ npm install -g monaca
```
* have a smart mobile device (either iOS or Android) if you want to test on a real device.
{% content-ref url="/pages/-MfWeAgicwVpXLZ8DS5-" %}
[Part 1: Starting a Project](/tutorials/monaca_cli/starting_project)
{% endcontent-ref %}
{% content-ref url="/pages/-MfWeAgXlWVNXvvODF3B" %}
[Part 2: Running Monaca Debugger with Monaca CLI](/tutorials/monaca_cli/testing_debugging)
{% endcontent-ref %}
{% content-ref url="/pages/-MfWeAhFJ317DF4UqjJe" %}
[Part 3: Building a Monaca App](/tutorials/monaca_cli/building_app)
{% endcontent-ref %}
{% content-ref url="/pages/-MfWeAhMkpvxAOHE8t0i" %}
[Part 4: Publishing a Monaca App](/tutorials/monaca_cli/publishing_app)
{% endcontent-ref %}
# Monaca Debugger
{% content-ref url="/pages/-MfWeAg\_ELa-xvzwNDTh" %}
[Functionalities](/products_guide/debugger/features)
{% endcontent-ref %}
{% content-ref url="/pages/-MfWeAfblMLMGL2awat3" %}
[Installation](/products_guide/debugger/installation)
{% endcontent-ref %}
{% content-ref url="/pages/-MfWeAiCPFFdqhcp3iPW" %}
[Usage](/products_guide/debugger/debug)
{% endcontent-ref %}
{% content-ref url="/pages/-MfWeAgoNQwx8bN6tzAJ" %}
[Troubleshooting Guide](/products_guide/debugger/troubleshooting)
{% endcontent-ref %}
{% content-ref url="/pages/-MfWeAhcBWhroibfvESK" %}
[Tutorials](/products_guide/debugger/tutorials)
{% endcontent-ref %}
# Functionalities
## Debugger functions
Monaca Debugger provides useful functions for testing and debugging your apps. You can find the debugger functions button when you run a project in the Monaca Debugger. When you click the `Debugger Functions` button, you will see:
* Back button
* Reload button
* [Screenshot button](/products_guide/debugger/features#screenshot)
* [App Log button](/products_guide/debugger/features#app-log)
 
### Screenshot
While using Monaca Debugger, you can take screenshots and save them on the device's storage. On the screenshot screen, you can edit the screenshot and save it in the storage of the device.

### App log
Monaca Debugger allows you to see the log of the app that shows the progress and errors of the app while running.

## Debugger menu

The submenus inside the debugger menu are:
### All projects
Shows a list of all the Monaca projects that can be run on the Monaca Debugger. There are two types of projects in the Monaca Debugger:
* `Monaca.io projects`: projects created in the Monaca Cloud IDE.
* `Local projects`: projects created in the [Monaca Localkit](/products_guide/monaca_localkit) or [Monaca CLI](/products_guide/monaca_cli) and stored in your PC. Local projects appear only when the debugger is paired with the Monaca Localkit or CLI.

### Local computers
Shows a list of all currently paired and available computers. Paired computers are local computers running Monaca Localkit/CLI and currently connected to the debugger. You may want to see to the following documentations:
* [Pairing Monaca Debugger with Monaca Localkit](/products_guide/monaca_localkit/pairing_debugging)
* [Pairing Monaca Debugger with Monaca CLI](/products_guide/monaca_cli/pairing_debugging)

### Debugger settings
Shows debugger's configurations:
* Allow the device to sleep
* Show the memory usage
* Restart after resume
* Restart after network connection recovery
* Hide the debugger menu
* Clear the synced files
* Clear the storage data
Synced files are synced project files while storage data is previously stored data (local storage data) created by your projects on your device memory.

### Debugger information
Shows detailed information of the debugger such as its version, platform, CLI version and available plugins.

## Project options
In the project list inside the Monaca Debugger, there is a :information\_source: button for each Monaca.io project. Click it and you can:
* set the project as your favorite: moves it to the top of the project list.
* launch the app: runs the current project in the debugger.
 
See Also:
* [Installation](/products_guide/debugger/installation)
* [Usage](/products_guide/debugger/debug)
* [Debugger Troubleshooting Guide](/products_guide/debugger/troubleshooting)
# Installation
Monaca Debugger can be installed in several platforms: Android, Android Emulator, iOS and Chrome App.
{% content-ref url="/pages/-MfWeAmd\_VOFsrMzg\_1K" %}
[Monaca Debugger for Android](/products_guide/debugger/installation/debugger_android)
{% endcontent-ref %}
{% content-ref url="/pages/-MfWeAfaxtAJJ0Bh0pwi" %}
[Monaca Debugger for iOS](/products_guide/debugger/installation/debugger_ios)
{% endcontent-ref %}
{% content-ref url="/pages/-MfWeAgUVcUPwmPovxBd" %}
[Monaca Debugger for Android Emulator](/products_guide/debugger/installation/debugger_emulator)
{% endcontent-ref %}
# Monaca Debugger for Android

| | Monaca Debugger (Store Version) | Custom Monaca Debugger |
| ----------------------------------------------------------------------------------------- | ------------------------------------------------------------------------------------------------------------------------ | ------------------------------------------------------------------------------------------------------------------------------------------------------ |
| Description | Monaca Debugger available in the stores | Monaca Debugger built from the Monaca Cloud IDE |
| Installation |
| Refer to [Build and install custom Monaca Debugger](/products_guide/debugger/installation/debugger_android#build-and-install-a-custom-monaca-debugger) |
| [Cordova Plugins](/products_guide/debugger/installation/debugger_android#cordova-plugins) | Core and some third-party Cordova plugins are automatically included. | In addition to the core and third-party Cordova plugins, user submitted plugins (of the current project) are included. |
| App ID (Android:`PackageName`) | `mobi.monaca.debugger` | |
| Version Name (Android:`versionName`) | Fixed | Display version name set by a user |
| App Version (Android:`versionCode`) | Fixed | Version set by the user |
| [USB Debugging](/products_guide/debugger/installation/debugger_android#usb-debugging) | Available (Chrome Dev Tools) | Available (Chrome Dev Tools) |
{% hint style="warning" %}
The following Cordova plugins for push notifications can not be used in the store version and the custom build debugger. You can use these plugins only in a debug build or a release build.
* Cordova plugins for push notifications:
* onesignal-cordova-plugin
* cordova-plugin-firebasex
{% endhint %}
## Cordova plugins
In the Monaca Debugger, core cordova plugins are automatically included.
Monaca includes the core cordova plugins such as battery status, camera, contacts and device. For a complete list of the core Cordova plugins, please refer to [Core Cordova Plugins](/reference/core-cordova-plugins).
While developing your project, you may need to add other third-party or [custom Cordova plugins](/products_guide/monaca_ide/dependencies/custom_cordova_plugin) to your project. The standard Monaca Debugger (Store Version) doesn't have these newly added plugins. For this reason, your project might not run properly in the debugger. Therefore, you need to use a custom Monaca Debugger. Custom Monaca Debugger is a debugger that is built from a Monaca project in the Monaca Cloud IDE.
## USB debugging
Monaca Debugger for Android supports USB debugging functions with Google Chrome browser:
* **console debugging**: using a console to diplay message
* **DOM inspection**: viewing and modifying the DOM structure with live
updates
* **JavaScript debugging**: profiling JavaScript performance, setting
breakpoints and execution control
For more information, please refer to [USB Debugging with Monaca Debugger for Android Apps](/products_guide/debugger/debug#chrome-remote-debugging-for-android-with-google-chrome-browser).
## Build and install a custom Monaca Debugger
1. From the Monaca Cloud IDE menu, go to **Build → Build App for Android**.
2. Select `Custom Debugger Build` and click **Start Build**.

3\. It may take some time until the build is completed. The following screen will open after the build is successfully completed. Then, you can use the QR code to install the debugger on your device or download the built file to your PC.
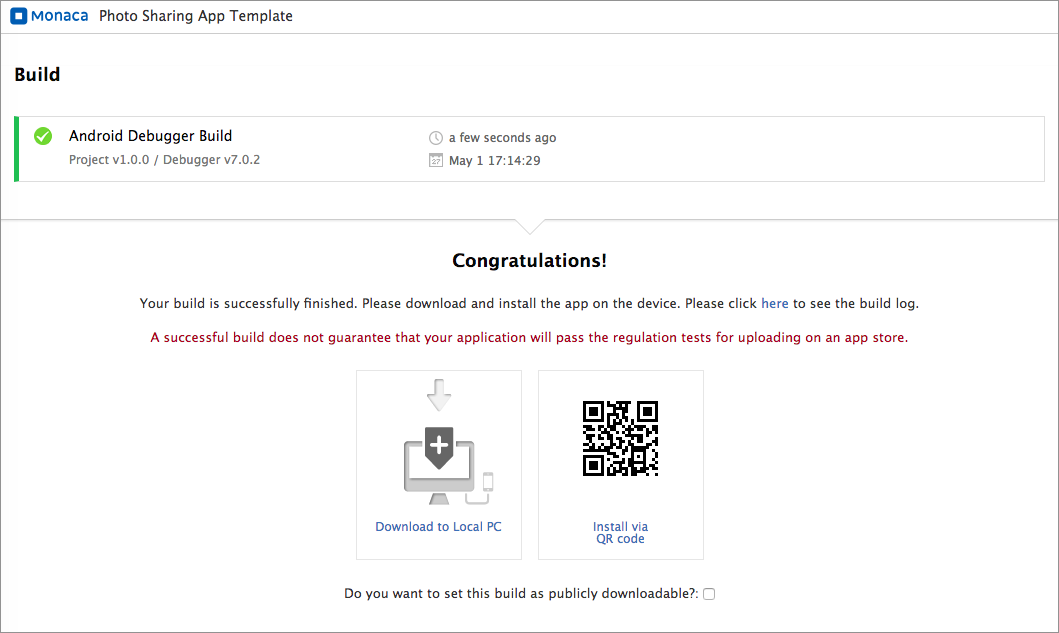
See Also:
* [Debugger Installation on Emulator](/products_guide/debugger/installation/debugger_emulator)
* [Debugger Installation for iOS](/products_guide/debugger/installation/debugger_ios)
* [Debugger's Functionalities](/products_guide/debugger/features)
* [Debugger's Usage](/products_guide/debugger/debug)
# Monaca Debugger for iOS

| | Monaca Debugger (Store Version) | Custom Monaca Debugger |
| ------------------------------------------------------------------------------------------------------ | --------------------------------------------------------------------- | ---------------------------------------------------------------------------------------------------------------------- |
| Description | Monaca Debugger available in the App Store | Monaca Debugger built in the Monaca Cloud IDE |
| Installation | Unsubscribe | Refer to [Build and Install Custom Monaca Debugger](#build-and-install-custom-monaca-debugger) |
| [Cordova Plugins](/products_guide/debugger/installation/debugger_ios#cordova-plugins) | Core and some third-party Cordova plugins are automatically included. | In addition to the core and third-party Cordova plugins, user submitted plugins (of the current project) are included. |
| App ID (iOS:`CFBundleIdentifier`) | `mobi.monaca.debugger` | |
| Version Name (iOS:`CFBundleShortVersionString`) | Fixed (currently `6.0.0`) | Display the version name set by the user |
| App Version (iOS:`CFBundleVersion`) | Fixed (currently `6.0.0`) | The version set by the user |
| [USB debugging](/products_guide/debugger/installation/debugger_ios#usb-debugging-for-ios-and-mac-only) | Not Available | Available (Safari’s Web Inspector) |
{% hint style="info" %}
The following Cordova plugins for push notifications can not be used in the store version and the custom build debugger. You can use these plugins in a debug build or a release build.
* Cordova plugins for push notifications:
* onesignal-cordova-plugin
* cordova-plugin-firebase
{% endhint %}
## Cordova plugins
In the Monaca Debugger, core and third-party Cordova plugins are automatically included.
Monaca includes the core cordova plugins such as battery status, camera, contacts and device. For a complete list of the core Cordova plugins, please refer to [core cordova plugins.](https://en.docs.monaca.io/reference/core-cordova-plugins)
While developing your project, you may need to add other third-party or [custom cordova plugins](/products_guide/monaca_ide/dependencies/custom_cordova_plugin) to your project. The standard Monaca Debugger (Store Version) doesn't have these newly added plugins. For this reason, your project might not run properly in the debugger. Therefore, you need to use a custom Monaca Debugger. Custom Monaca Debugger is a debugger that is built from a Monaca project in the Monaca Cloud IDE.
## USB debugging (for iOS and Mac only)
Monaca Debugger for iOS supports USB debugging functions with Safari browser:
* **console debugging**: using a console to diplay message
* **DOM inspection**: viewing and modifying the DOM structure with live
updates
* **JavaScript debugging**: profiling JavaScript performance, setting
breakpoints and execution control
For more information, please refer to [Safari remote debugging](https://en.docs.monaca.io/products_guide/debugger/debug#safari-remote-debugging-for-ios-and-mac-only).
{% hint style="info" %}
This feature is not available on Windows.
{% endhint %}
## Build and Install Custom Monaca Debugger
### Preparation
You are required to have:
* a valid private key
* a developer certificate
* a development provisioning profile
Please refer to [Building an iOS App](/products_guide/monaca_ide/build/ios/build_ios) (Step 1 and Step 2) on how to get the above items and make necessary configurations before start building the custom debugger. After obtaining the above necessary files, start building with the following instructions:
### Build the debugger
1. From the Monaca Cloud IDE menu, go to **Build → Build App for iOS** .
2. Select `Custom Debugger Build` and choose `Development provisioning profile`. Then, click **Start Build**.

3\. It may take some time until the build is completed. The following screen will open after the build is successfully completed. Then, you can use the QR code to install the debugger on your device or download the built file to your PC.
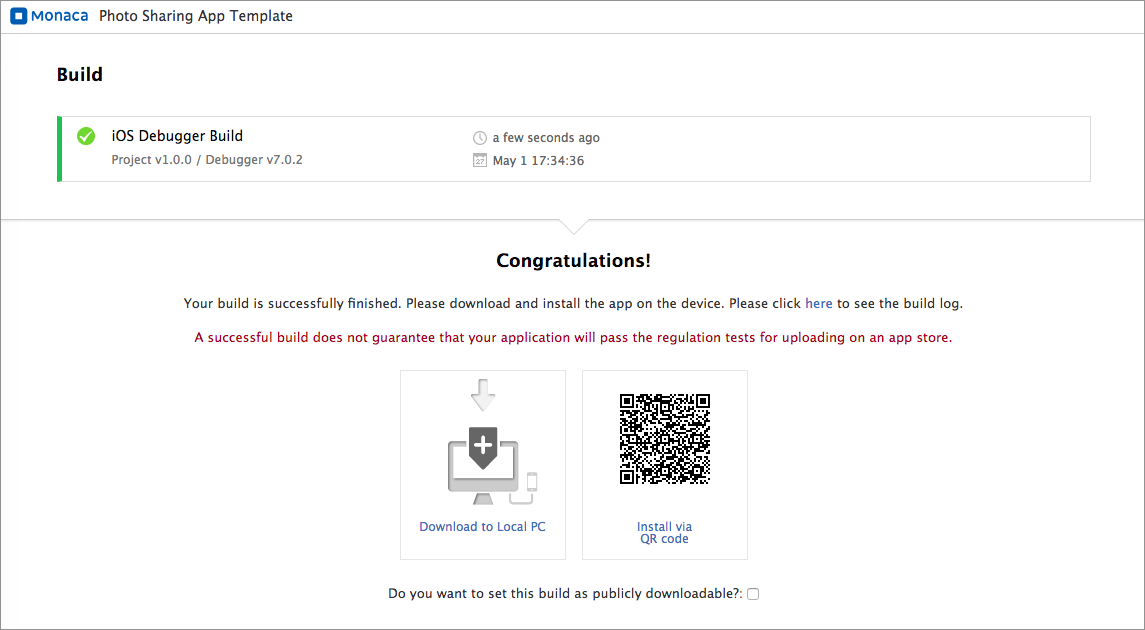
See Also:
* [Debugger Installation on Emulator](/products_guide/debugger/installation/debugger_emulator)
* [Debugger Installation on Android](/products_guide/debugger/installation/debugger_android)
* [Debugger's Functionalities](/products_guide/debugger/features)
* [Debugger's Usage](/products_guide/debugger/debug)
# Monaca Debugger for Android Emulator
On this page, we will describe how the Monaca Debugger works on an AVD (Android Virtual Device) called Android Emulator. You can simulate Android apps on a PC with it. Moreover, it is useful when you want to test your apps on more than one Android device.
{% hint style="info" %}
Monaca Backend plugin is not included in the Monaca Debugger.
{% endhint %}
{% hint style="info" %}
On this page, the instructions are made for a Mac OS X. Internet is needed in order to run the Monaca Debugger on an emulator.
{% endhint %}
## Step 1: Setting up an Android Virtual Device
1. Download and install [Android Studio](https://developer.android.com/sdk/index.html).
2. Run the Android Studio.
3. Create a new project or open an existing one.
4. Click **AVD Manager**. Then, the `Android Virtual Device Manager` dialog will open.

5\. Click **+ Create Virtual Device**.
6\. Select an Android device and click **Next**.
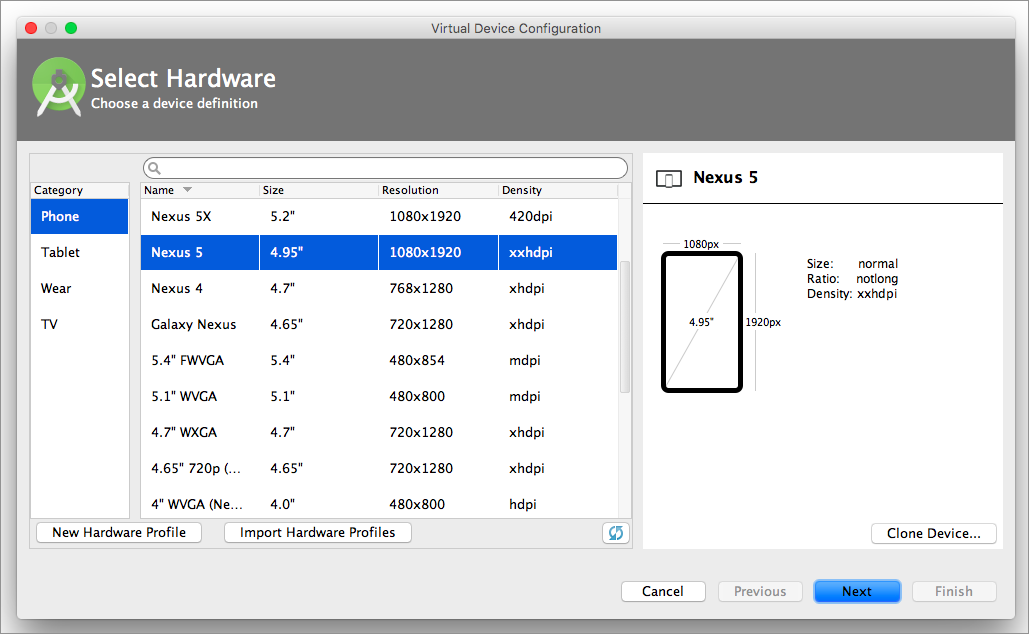
7\. Select a system image (you may need to download it first) and click **Next**.
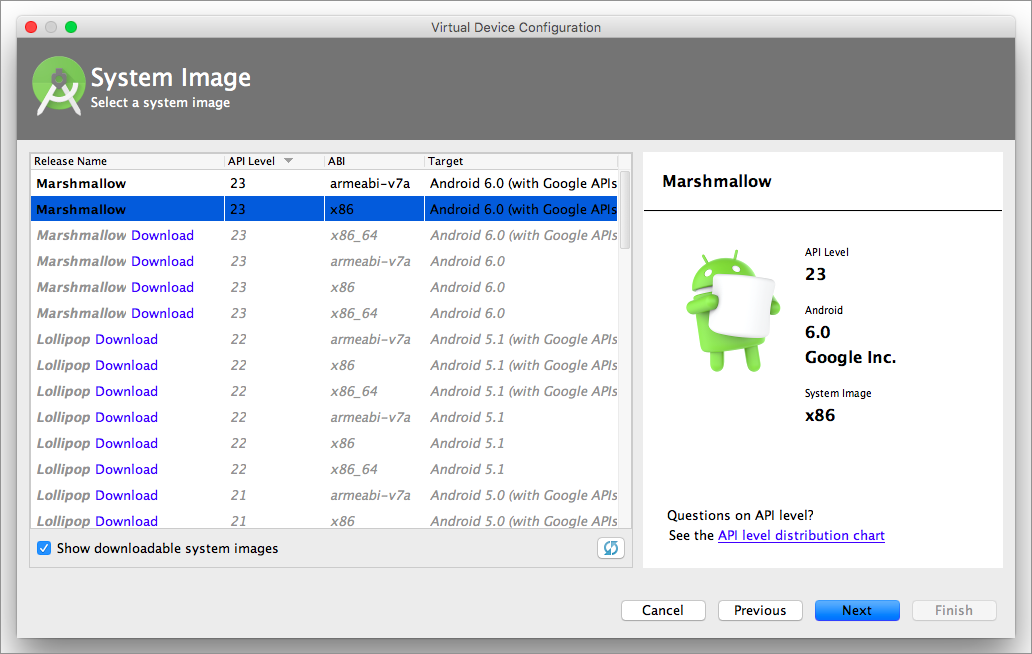
7\. Make the virtual device’s configurations. Select **Show Advanced Settings** for other settings such as memory, storage, device frame and keyboard.
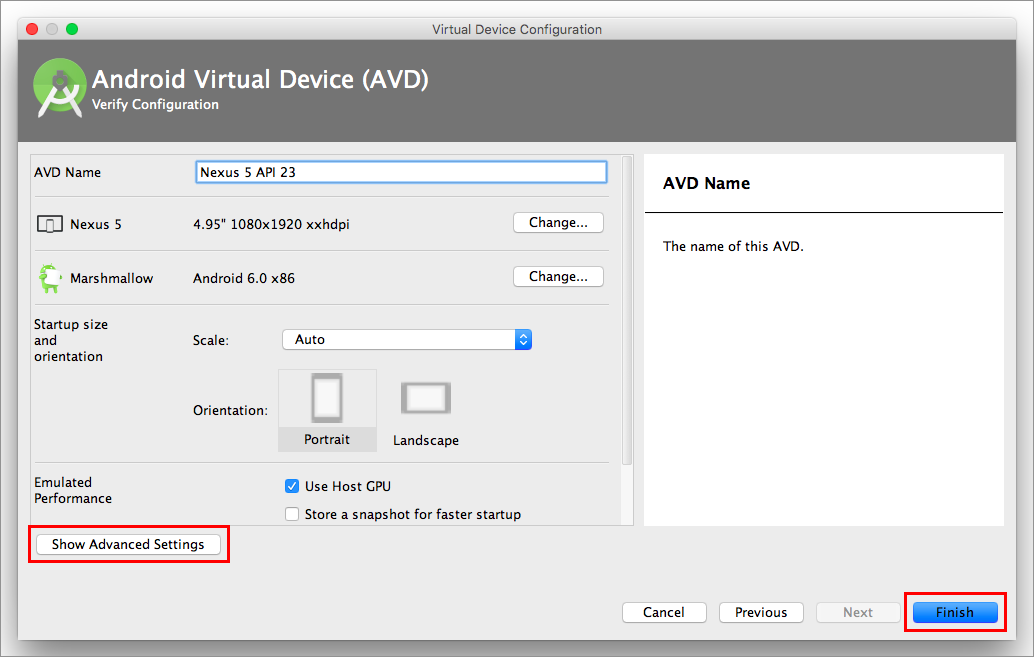
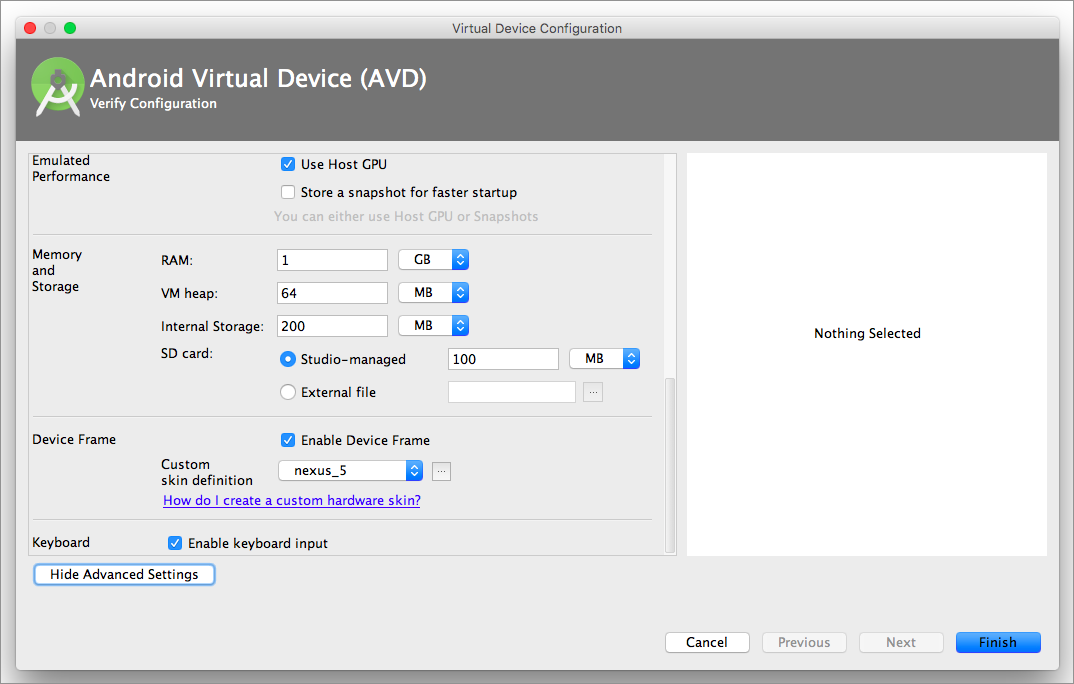
8\. After completing the configurations, click **Finish**.
## Step 2: Building Custom Monaca Debugger for Android
1. Go Monaca Cloud IDE and build custom Monaca Debugger for Android.
For more information, please refer to [Build and install a custom Monaca Debugger](/products_guide/debugger/installation/debugger_android#build-and-install-a-custom-monaca-debugger).
2. Download the debugger file and upload it to any file hosting
services such as Google Drive or Dropbox.
3. Get a download link of the uploaded file. You will use this
link later in the virtual device.
## Step 3: Installing the Monaca Debugger
1. Open the `AVD Manager` and launch the virtual device.

2\. On your virtual device, open a browser and the download link you created in the previous step to download the custom Monaca Debugger for Android.
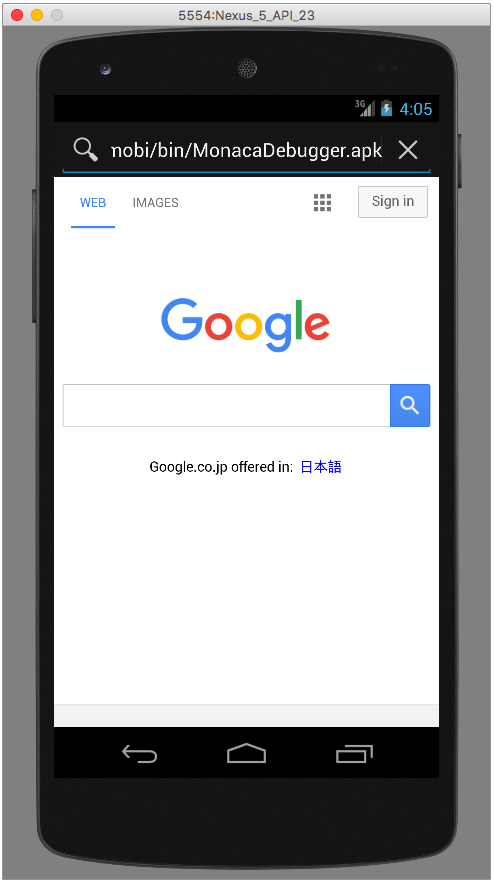
3\. After the download is completed, click the downloaded file to start installing the debugger.
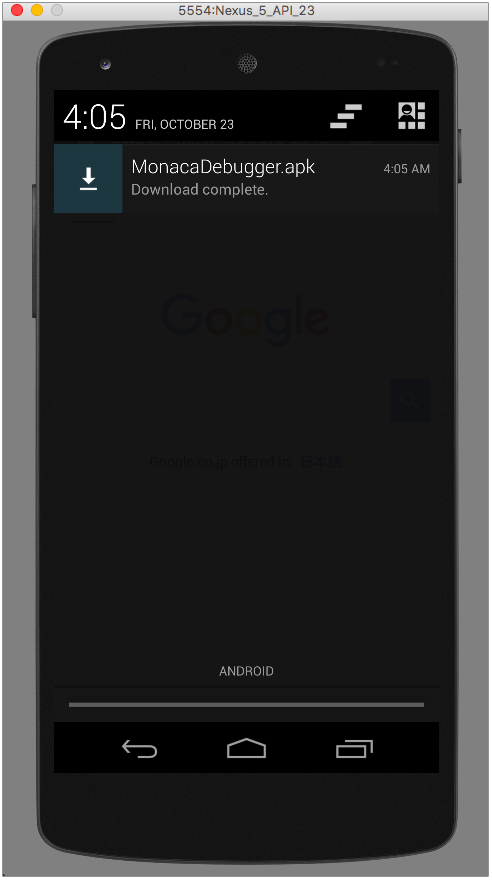
4\. Follow the installation wizard.
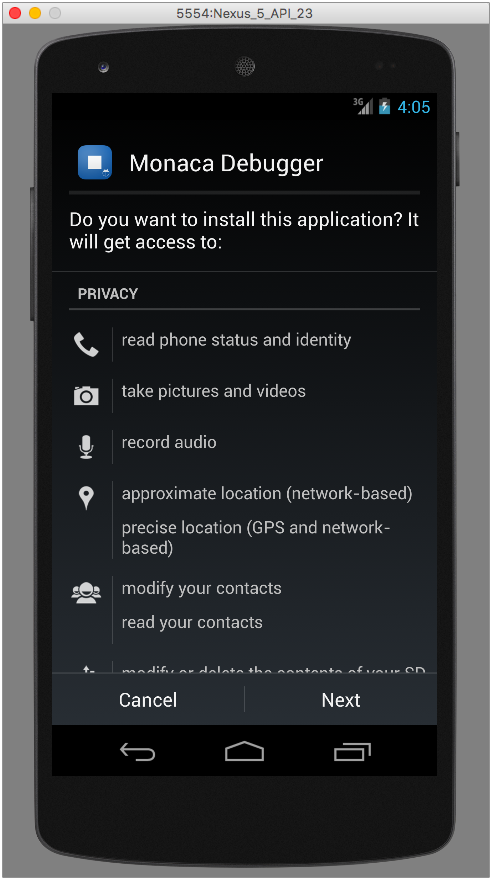
5\. Once the installation is completed, you can find the Monaca Debugger on your apps page.
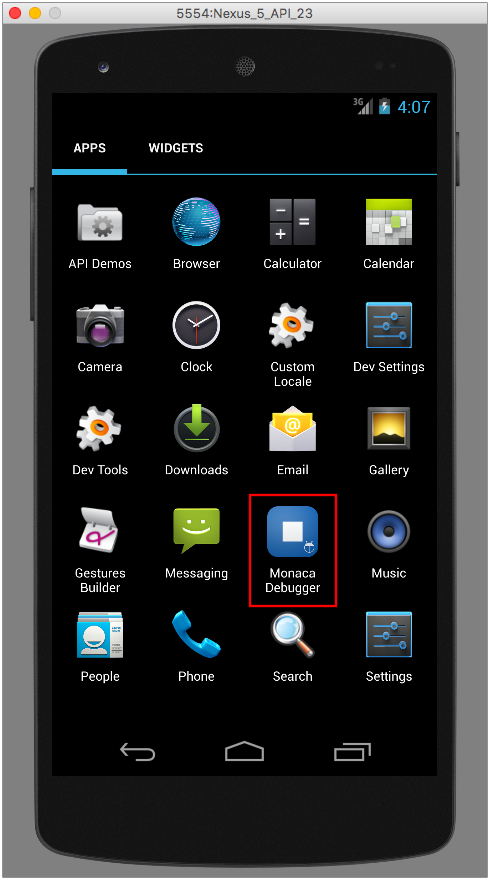
## Step 4: Running a project on the Monaca Debugger
1. Open the Monaca Debugger and sign in with your Monaca account.

2\. Click on the project you want to run in the Monaca Debugger.
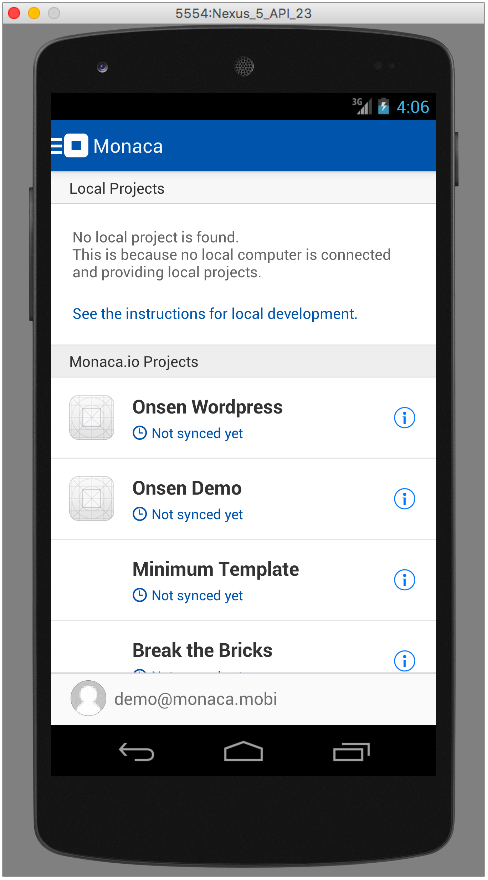
3\. Now your project is running and you can start testing your project. Please refer to [Functionalities](/products_guide/debugger/features) and [Usage](/products_guide/debugger/debug) on what you can do with the Monaca Debugger.
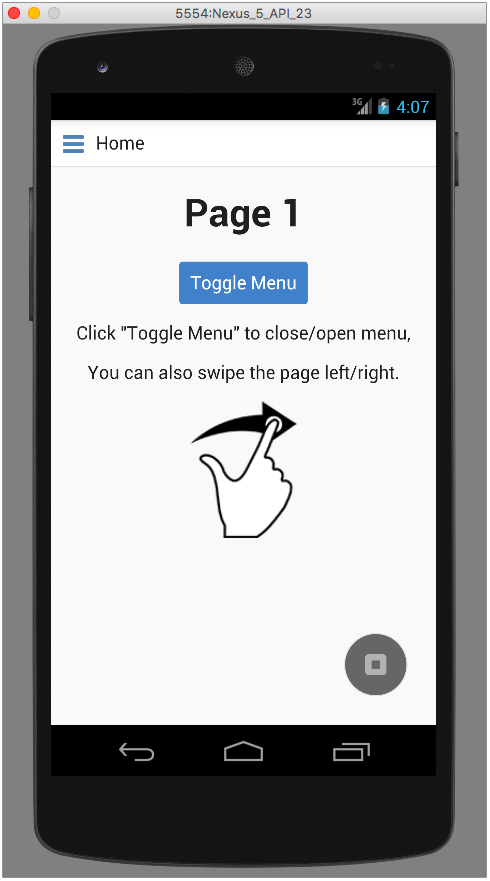
* [Debugger Installation on iOS](/products_guide/debugger/installation/debugger_ios)
* [Debugger Installation on Android](/products_guide/debugger/installation/debugger_android)
* [Debugger's Functionalities](/products_guide/debugger/features)
* [Debugger's Usage](/products_guide/debugger/debug)
# Usage
On this page, we will describe how to use Monaca Debugger with Monaca Cloud IDE and Monaca local development tools Monaca Localkit and Monaca CLI.
{% hint style="info" %}
Before starting, please install Monaca Debugger on your device or emulator. Please refer to [How to Install Monaca Debugger](/products_guide/debugger/installation) for more information.
{% endhint %}
## Monaca Debugger with Monaca Cloud IDE
There are 2 main debugging functionalities that can be used to debug Monaca apps with the Monaca Cloud IDE:
* **Monaca Debug Panel**: DOM inspection and console debugging.
* **USB Debugging**: DOM inspection, console and JavaScript debugging.
### Monaca debug panel
A popular web debugging tool, [Weinre (WEb INspector REmote)](https://people.apache.org/~pmuellr/weinre/docs/latest/), is embedded in the debug panel of the Monaca Cloud IDE. This tool allows you to debug your app using console debugging and DOM inspection.

To start debugging your app by using Monaca Debugger with Monaca Cloud IDE, follow these instructions:
1. Open a project in the Monaca Cloud IDE.
2. Run the project in the Monaca Debugger.
3. Make sure your device is connected with the IDE. If your device appears in the debug panel, it is successfully connected to the IDE (see the screenshot below). Otherwise, please refresh the IDE or debugger until the connection is successfully made.

4\. After your device is connected to the IDE, you can start debugging your app.
#### Console debugging
Console API allows you to write and display messages to the console using Javascript.
Here are some commonly used commands to log text in the console:
* `console.log()`: displays a message to the console.
* `console.debug()`: displays a message on the debug level (you can see
the message in the debug tab).
* `console.warn()`: displays a message with a yellow warning icon.
{% hint style="info" %}
For more information about console API, please refer to [Console API references](https://developer.chrome.com/devtools/docs/console-api).
{% endhint %}
Here is an example of using the console API:
1. Copy and paste the following code to the `index.html` file.
```markup
Hello World!
```
2\. Save the code and connect the Monaca Debugger with the Monaca Cloud IDE. Run the project in the Monaca Cloud IDE. Now you can see the messages on the debug panel in the Monaca Cloud IDE and in the app log inside the Monaca Debugger.
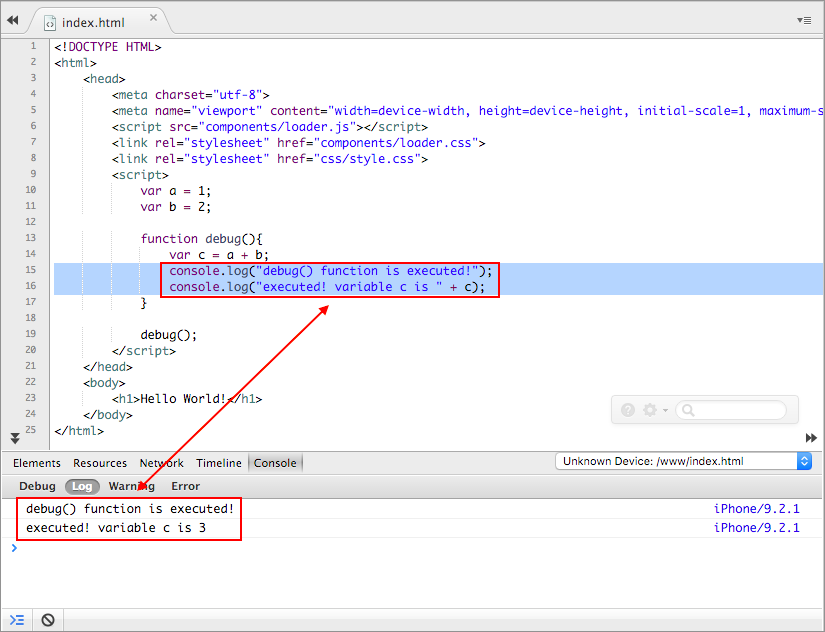
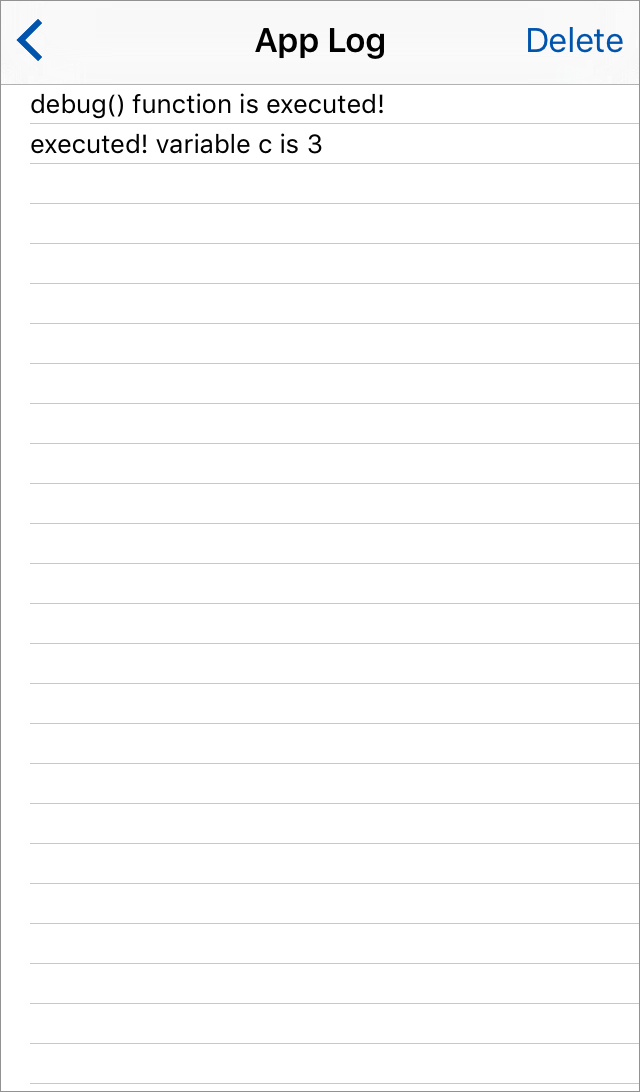
3\. The debug panel allows you to see the error log of your app as well.
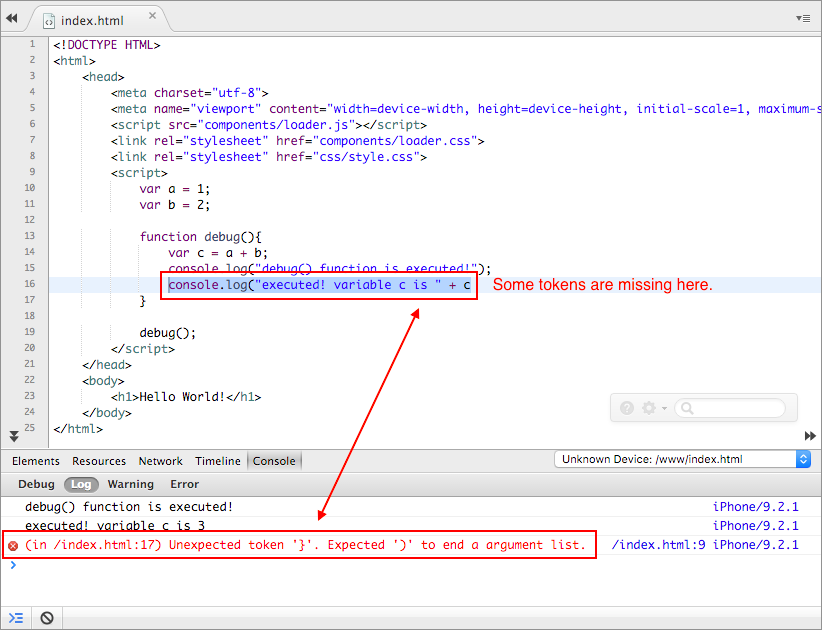
#### DOM inspection
DOM (Document Object Model) inspection allows you to:
* view the DOM structure of the currently active page.
* modify the DOM structure as well as the CSS of the page with live
update.
For more information, please refer to [DOM Inspection and Style Editing](https://developer.chrome.com/devtools/docs/dom-and-styles).

### USB debugging
With USB debugging, you can:
* **Console debugging**: use the console to display messages and set debugging
sessions.
* **DOM inspection**: view and modify DOM structures with live updates.
* **JavaScript debugging**: profile JavaScript performance, set
breakpoint and use the execution control.
There are two ways to implement USB debugging depending on what kind of device you use:
1. If you are using an iOS device, you can use the [Safari remote debugging](/products_guide/debugger/debug#safari-remote-debugging-for-ios-and-mac-only).
2. If you are using an Android device, you can use the [Chrome remote debugging](/products_guide/debugger/debug#chrome-remote-debugging-for-android-with-google-chrome-browser).
#### Prerequisites for USB debugging with Monaca
| Platform | iOS | Android |
| --------------------------- | ----------------------------------------------------------------------------------------------------------------------------------------------------------------------------------------------------------------------- | --------------------------------------------------------------------------------------------------------------------------------------------------------------------------------------------------------- |
| **Monaca Debugger** | [Custom built Monaca Debugger](/products_guide/debugger/installation/debugger_ios) only | Either store version or custom built [Monaca Debugger](/products_guide/debugger/installation/debugger_android) |
| **Install driver** | On Mac OS X, the necessary drivers should be already installed. The system will automatically find the device without any installation. | On Windows, you need to check the device manufacturer to find an appropriate driver for the device. |
| **Enabling USB debugging** |
Enable the web inspector on an iOS device:
Go to Settings ‣ Safari
Scroll down and select Advanced.
Switch on Web Inspector.
|
Enable USB debugging on an Android device:
Go to Settings ‣ More
Select Developer options.
Tick USB Debugging.
|
| **Trust connection** | The connected device should be displayed if you trust the host computer. Please trust the computer in order to get connected. | The connected device should be displayed if you trust the host computer. Please trust the computer in order to get connected. |
#### Safari remote debugging (for iOS and Mac only)
{% hint style="info" %}
You are required to do some setups before using USB debugging with Monaca. Please refer to [Prerequisites for USB debugging with Monaca](/products_guide/debugger/debug#prerequisites-for-usb-debugging-with-monaca).
{% endhint %}
1. Connect your iOS device to your Mac via a USB cable.
2. Run your Monaca project in its custom built debugger.
3. Open Safari app and go to the `Develop` menu. Your iOS device’s name should show in the list. You can see the available pages of the Monaca app from the submenu of the device. Select the one you want to open.

4\. The web inspector window will appear. In this window, you can for example use timing HTTP requests, profile JavaScript and manipulate the DOM tree. In order to learn how to use the web inspector, please refer to [Safari Web Inspector](https://developer.apple.com/library/ios/documentation/AppleApplications/Conceptual/Safari_Developer_Guide/Introduction/Introduction.html#//apple_ref/doc/uid/TP40007874).

#### Chrome remote debugging (for Android with Google Chrome browser)
{% hint style="info" %}
You are required to do some setups before using USB debugging with Monaca. Please refer to [Prerequisites for USB debugging with Monaca](/products_guide/debugger/debug#prerequisites-for-usb-debugging-with-monaca).
{% endhint %}
1. Connect your Android device to your PC via a USB cable.
2. Run your Monaca project in the Monaca Debugger.
3. In the Chrome address bar, enter `chrome://inspect/`.
4. The `Devices` page appears as shown below. Your connected Android device should show there. Click **inspect**.

5\. The Chrome inspection page should open. Now you can start debugging your Monaca app. For more information, please refer to [How to Use Chrome DevTools](https://developer.chrome.com/devtools).
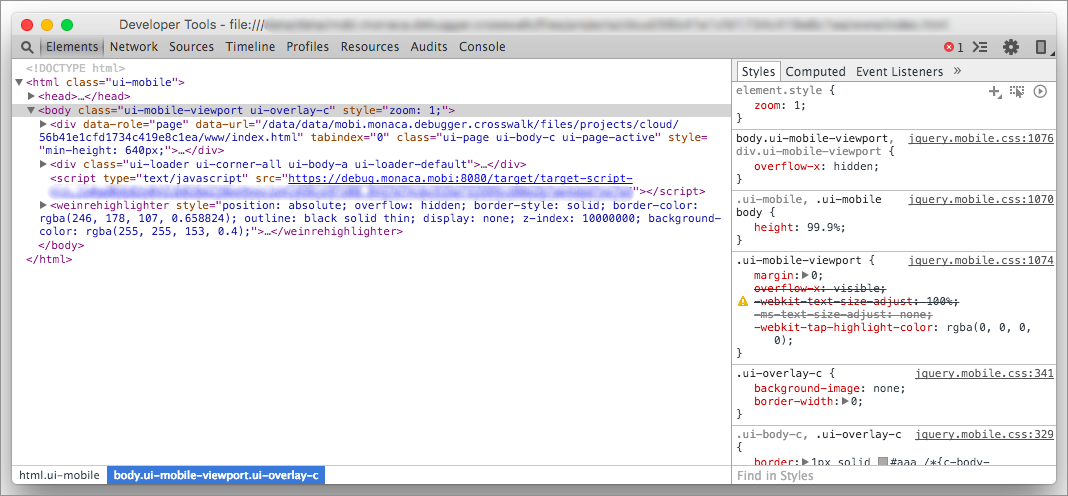
See Also:
* [Functionalities](/products_guide/debugger/features)
* [Installation](/products_guide/debugger/installation)
* [Debugger Troubleshooting Guide](/products_guide/debugger/troubleshooting)
# Custom Build Debugger for iOS
Monaca Debugger is an application to optimize the testing of apps. With Monaca Debugger, you can instantly check the app's operation on the actual device just by saving the source code. No need to build the app or install it on the device to check its operation.
## Instructions for Use
### 1. Prerequisites
You need the following certificates to create a custom build debugger.
Refer to [iOS Build Prerequisites](/build-app/build-for-ios) to get the required materials, which are the same as those needed for an iOS Debug build.
* Private Key
* Development Certificate
* Development Provisioning Profile
### 2. Build an App
Follow the steps below to build the debugger and install it on the physical device.
1. Log into Monaca Cloud IDE and open the project you want to debug.
2. Select Build > iOS App Build from the IDE menu.
3. Select Custom Build Debugger, then click Start Build.
4. Once the build is complete, the built app can be installed to the device using a QR code, or downloaded to a PC as a file.
# iOS App Simulator Build
By using `Simulator Build` , you can test the application using iOS Simulator on macOS. Any Certifications, provisioning profiles, or subscriptions of the Apple Developper Program are not required for `Simulator Build` .
### Restrictions
* It is not possible to install the simulator build on any iOS devices.
* The phone hardware is unavailable in Simulator. \
For example:
* Camera
* Barcode Scanner
* NFC Reader
### Requirements
* On macOS\
The app built for Simulator works on macOS with Xcode's iOS Simulator.
* On Browser (via external web service)\
The app built for Simulator works on web service like `Appetize.io`. It does not need Simulator.
### Test on the local Simulator
1. From the Monaca Cloud IDE menu, go to **Build→Build App for iOS**. Select the `Simulator Build` option and start build.
2\. After the build is completed, the `Download to Local PC` button will appear on the build result screen. \
Click the button to download the app.
3\. Extract downloaded zip file and drag & drop to Simulator.
4\. The app can run on Simulator.
### Test on Appetize.io
1. Prerequisites\
In order to use `Appetize.io`, it is necessary to register the service and configure on Monaca Cloud IDE. \
Please refer [Deploy to Appetize.io](https://ja.docs.monaca.io/products_guide/monaca_ide/monaca_ci/appetizeio) for registering `Appetize.io`.
2. From the Monaca Cloud IDE menu, go to **Build→Build App for iOS**.\
Select the `Simulator Build` option and start build.\
\
After the build is completed, the `Deployment & Optional Services` section will appear on the bottom of the build result screen. \
Select `Appetize.io`.
Click `Deploy` button and the app will be uploaded to `Appetize.io`.
3\. Sign in to `Appetize.io` and open [dashboard](https://appetize.io/apps).
You can confirm that the app from Monaca is added to `Appetize.io`.
4\. Click `view` and run the app.
The app launches and you can test your app. \
For details of `Appetize.io`, see [Appetize.io Documentation](https://docs.appetize.io/)
# Troubleshooting Guide
This page describes some of the most common problems with the Monaca Debugger and how to solve them.
## Failure to pair the Monaca Debugger
### Monaca Debugger can see the host PC but fails to pair
This is most likely a firewall problem in the host PC. The host PC needs to accept the TCP connection from the debugger. On default, the port `8001` will be used, but you can change the server port in the [preferences dialog](/products_guide/monaca_localkit/overview#preferences-dialog). Please change the port or configure your firewall settings and then try again.
### Monaca Debugger does not detect the host PC
Check that your device and the host PC are connected to the same network. If they are connected to the same network but Monaca Debugger still can't detect the host PC, please do a manual pairing:
1. From the Monaca Debugger, open the toggle menu on the top-left corner and select `Local Computers`.

2\. Click the **Pair To New Computers** button.
3\. Input the [IP address of the host PC and port number](/products_guide/debugger/troubleshooting#ip-address-and-port-number). Then, click **Pair**.
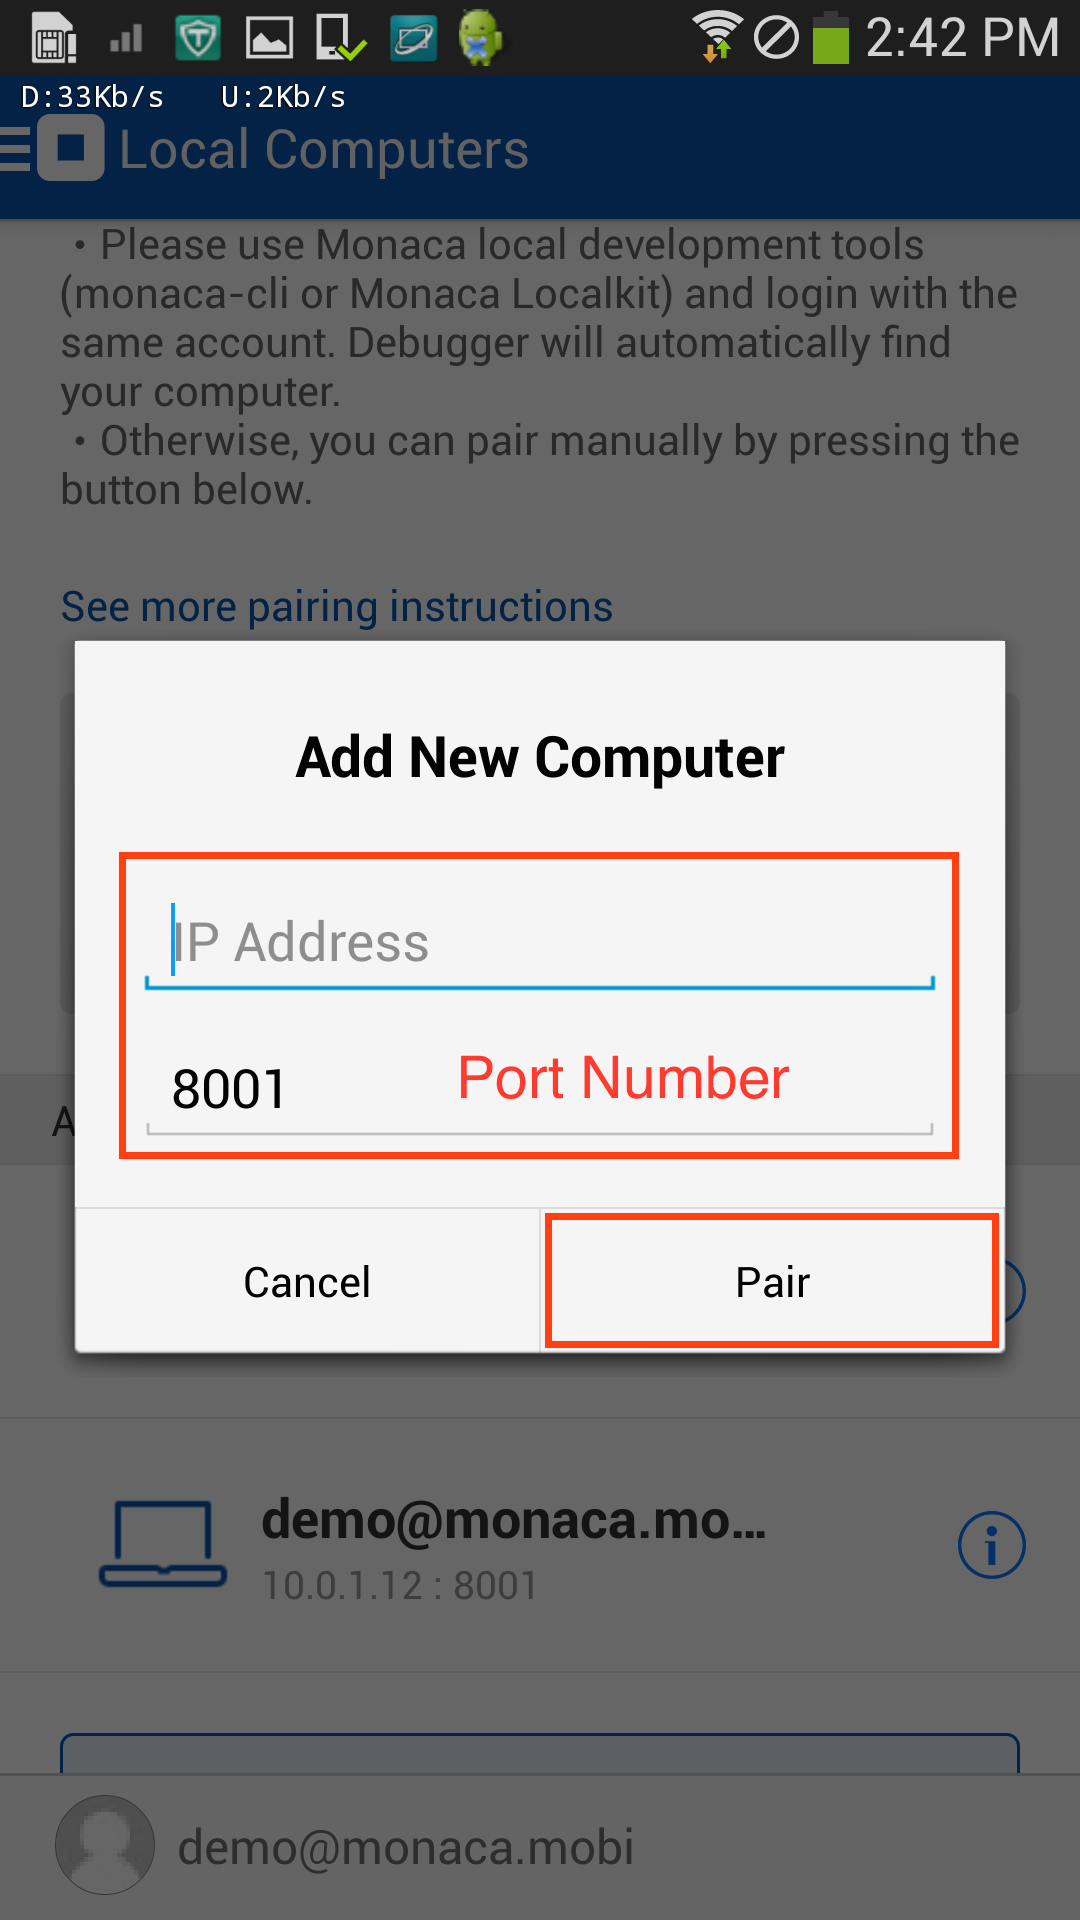
4\. Once the pairing is successfully completed, the host PC should appear under `Paired computers` as shown below:
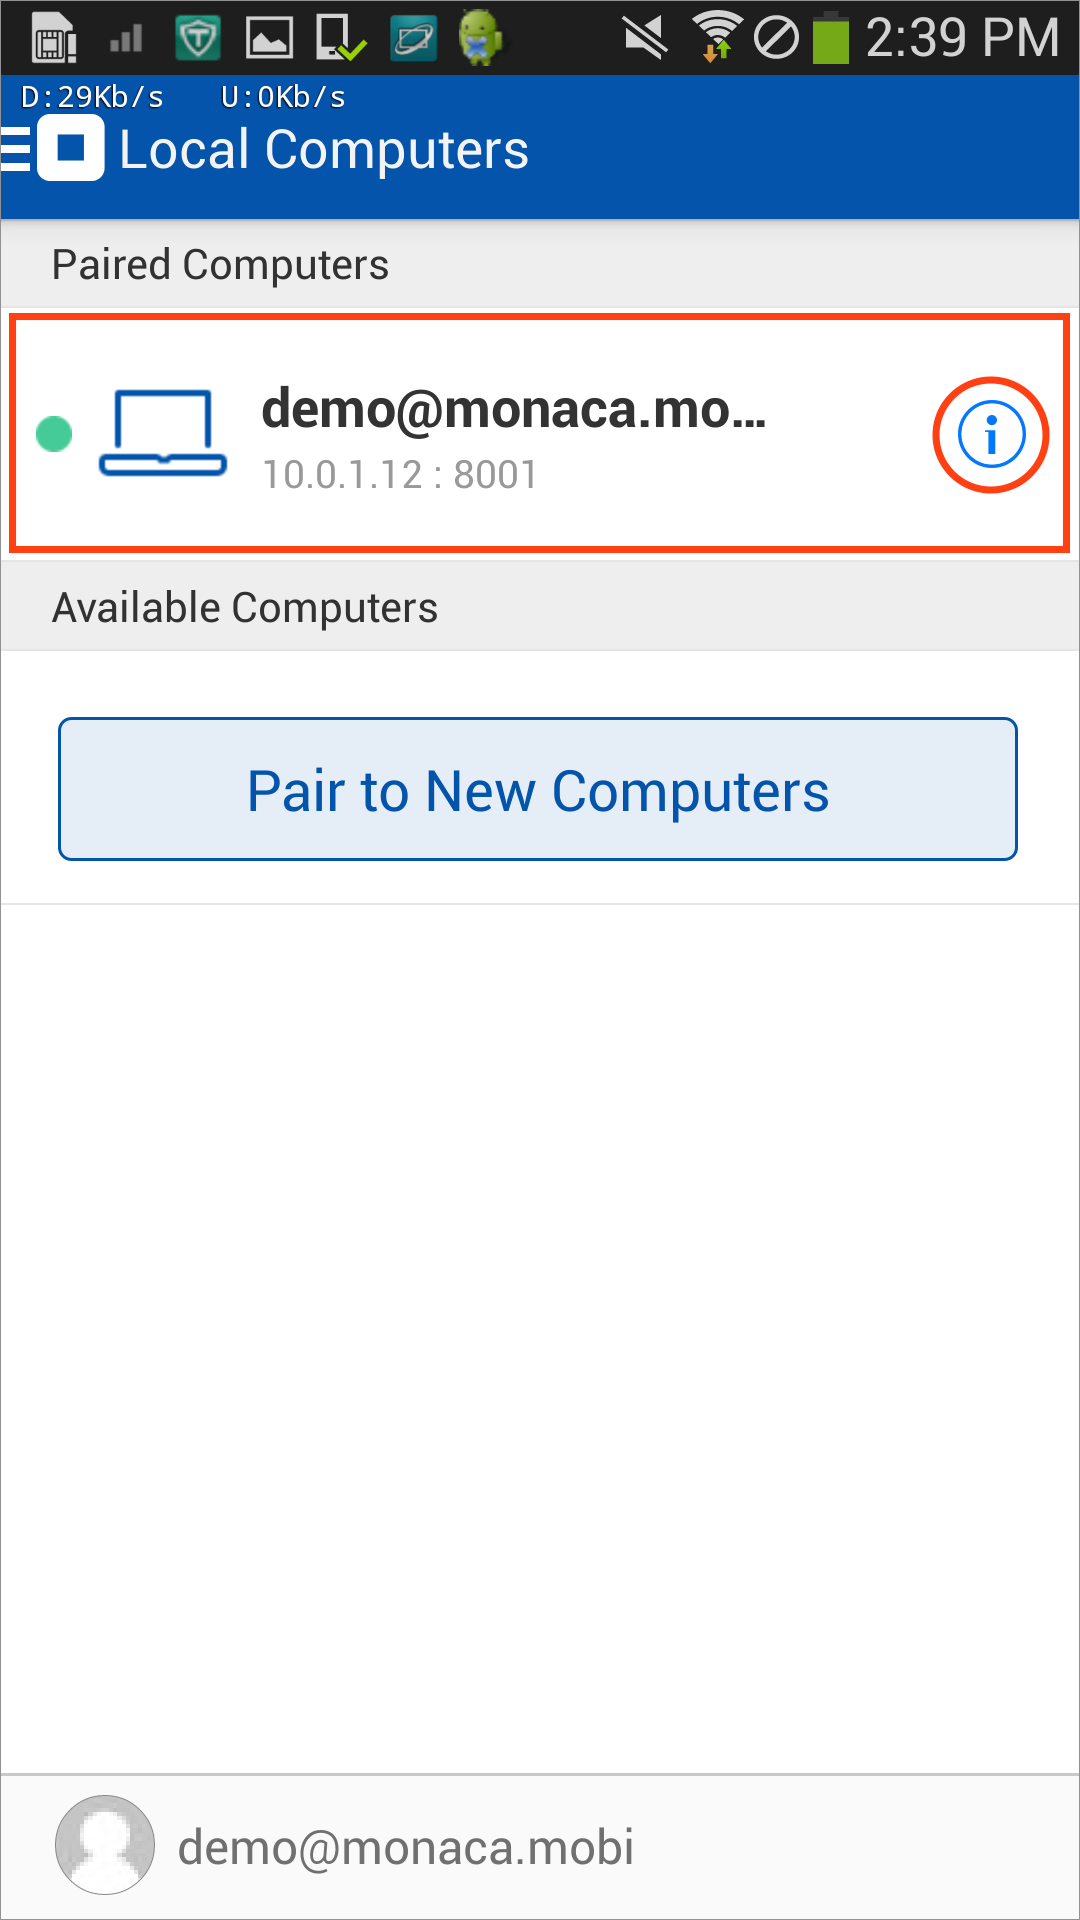
{% hint style="info" %}
Some Wi-Fi access points (usually that is available for public access) don’t allow the connected clients to communicate with each other. In this case, please try pairing on another local network.
{% endhint %}
#### **IP address and port number**
IP address and port number are needed to establish the communication path between the Monaca Debugger and the host PC. IP address represents the host PC and port number (set to `8001` by default) represents the Monaca local development tool (Monaca CLI, Localkit or Monaca for Visual Studio). Please note that the communication can't be established if the port number you use is not open or it's already used.
{% hint style="info" %}
If you are using more than one of Monaca local development tool at the same time on the same host PC, you are required to use a different port for each tool.
{% endhint %}
| OS | Mac | Windows |
| --------------------------------------- | ------------------------------------------------------------------------------------------------ | ---------------------------------------------------------------------------------------- |
| **Finding the IP Address** |
Open Terminal window.
Type ifconfig.
|
Open Command Prompt window.
Type ipconfig.
|
| **Check if a port number is available** |
Open a terminal window.
Run lsof -i :PORT\_NUMBER.
|
Open a command prompt window.
Run netstat.
|
### Pairing fails on Android 9+.
When using a custom build debugger on Android 9 or later, you need to add the Android namespace to the `widget` tag and `usesCleartextTraffic="true"` to the `application` tag in the `config.xml` file.
Create a custom build debugger after adding the settings to the `config.xml` file.
{% hint style="info" %}
If you are using an Android custom build debugger v9.0.1 or later, these settings are not required.
{% endhint %}
```markup
```
See Also:
* [Installation](/products_guide/debugger/installation)
* [Usage](/products_guide/debugger/debug)
* [Functionalities](/products_guide/debugger/features)
# Tutorials
{% content-ref url="/pages/-MfWeAl\_eTHXuAl\_z-t2" %}
[Part 2: Running Monaca Debugger with Monaca Cloud IDE](/tutorials/monaca_ide/testing_debugging)
{% endcontent-ref %}
{% content-ref url="/pages/-MfWeAkENWR6ZWAf048I" %}
[Part 2: Running Monaca Debugger with Monaca Localkit](/tutorials/monaca_localkit/testing_debugging)
{% endcontent-ref %}
{% content-ref url="/pages/-MfWeAgXlWVNXvvODF3B" %}
[Part 2: Running Monaca Debugger with Monaca CLI](/tutorials/monaca_cli/testing_debugging)
{% endcontent-ref %}
# Team Dashboard
## Monaca dashboard
There are two types of dashboards in Monaca:
1. **Developer dashboard**: used on the developer accounts to develop and manage projects.

2\. **Team Dashboard**: used on the administrator accounts to manage the developer team and licenses as well as tickets in a company.

{% hint style="warning" %}
In order to access the Team Dashboard, you are required to subscribe to a valid plan. Please refer to [Pricing](https://monaca.io/pricing.html).
{% endhint %}
## Account types
There are two types of enterprise and business accounts:
1. Administrator account
* An account for managing developer accounts and licenses, plugin licenses, support & CI tickets and contract information.
* Used for management only, independent of the general Monaca developer accounts. It can only be used to log into the [Team Dashboard](https://enterprise.monaca.mobi/en/).
* If your account is both Developer and Administrator account, you can access Team Dashboard directly from [Developer Dashboard](https://monaca.mobi/en/dashboard) and vice versa.
2. Developer account
* An account for logging into the [Developer Dashboard](https://monaca.mobi/en/dashboard) and developing Monaca projects.
* In the dashboard, the plan name is displayed as `Enterprise (company name)` or `Business (company name)`.
* Enterprise users can use any [power plugins](/reference/power_plugins) for free while business users need to pay for each power plugin. The plugins can be acquired through the team dashboard (refer to [Purchasing Plugin Licenses](/products_guide/team_dashboard#purchasing-plugin-licenses)).
## Overview of the team dashboard
In a company, administrators can log into the team dashboard to perform tasks such as managing a developer team, purchasing and assigning developer licenses, purchasing and using support tickets and changing the contract type.
On the team dashboard, administrators are mainly doing the following tasks:
* **Developer management**: invite/remove developers to/from the team.
* **License management**: purchase and manage developer and power plugin licenses.
* **Ticket management**: purchase and manage support and CI (Continuous Integration) tickets, view ticket usage history and check the remaining number of tickets.
* **Access restriction management**: limit the access to the team and developer dashboards by using IP address restriction.
* **Contract management**: view/update the contract information, change the contract type and delete the team.
* **Support request**: contact Monaca support team for assistance.
## Prerequisites
Once you have registered and logged in as an administrator on the team dashboard, you should complete the following tasks before you can fully start using the team dashboard:
1. [Register the company's information](/products_guide/team_dashboard#team-information)
2. [Invite developers into the team](/products_guide/team_dashboard#managing-developers)
## Team account
On the team account page, you can manage the developers and administrators in your team.

### Managing developers
To add a developer into your team, click the **Invite a developer** button. Then, you will be asked to input the email of new member.

The new member can be one of the following types of users:
1. A free Monaca user: this member can be added to the team right away.
2. A paid Monaca user: this member will need to cancel his currently contracted plan before being added to the team.
3. Not a Monaca user: an email will be sent to the member to register to Monaca and then being added to the team.
After adding a developer to the team, the added developer will be automatically in a trial state of the same plan as the administrator. For example, if the administrator is under a business plan, the added developer will be in a trial state of the business plan.
{% hint style="info" %}
While in a trial state, the developer can use any Monaca services belonging to the assigned plan except creating a release build.
{% endhint %}
### Managing administrators
To add an admin into your team, click the **Add an administrator** button. Then, you will be asked to input the following information about the new admin.

{% hint style="info" %}
For a business plan account, you cannot add any administrators because only one administrator is allowed in the business plan. However, an enterprise account can have multiple administrators.
{% endhint %}
## Developer license
On the developer license page, you can manage the developer licenses of your team. There are 3 types of developer licenses:
1. **Bundled licenses**: full licenses included in your contract
2. **Trial licenses**: trial licenses for evaluation purposes
3. **Purchased licenses**: additional licenses that you purchase

### Modifying license key usage
On the license key usage modification page, you can modify the usage of each license key:
* assign/remove licenses to/from developers
* modify the auto-renewal option for a license key
* modify the license period
{% hint style="info" %}
Only developers who belong already to the team can be assigned here. Otherwise, you will need to invite them to the team first. Please refer to [managing developers](/products_guide/team_dashboard#managing-developers).
{% endhint %}

### Purchasing additional licenses
You can purchase additional developer licenses separately. Each license period is handled separately from the contract term. The usage period is counted after the purchasing is completed.
In order to purchase additional licenses, click on **Purchase developer license** button. Then, you will be asked to input the following information. After that, follow the purchasing wizard to complete the process.

## Power plugin license
Business plan users can use power plugins by purchasing the plugin license. However, enterprise users can use power plugins for free.
If there are valid Power plugin licenses, all developers within the team can use the plugins (for a trial period). However, only the developer who actually has been assigned to the plugin license to can create a release build.

### Plugin settings
To assign a plugin license to a developer, follow the instructions below:
1. Click the **Configure** button of the plugin you want to assign to open the `Plugin Settings` page.
2. Select a developer from the `Developer` list.
3. Select the project that you want to assign the plugin license to.
4. Click **Register** to complete this assigning process.

### Purchasing plugin licenses
If you are on trial, you cannot buy plugin licenses. Please register a full contract first. Each plugin license is valid for one year after a complete purchasing.

## Support & CI tickets
On the support and CI tickets page, you can to see the information related to support and CI tickets such as number of the available tickets, expiration date of the tickets and usage history of each ticket.

### Purchasing additional tickets
After a valid contract registration, a certain number of support and CI tickets are awarded monthly. However, you can purchase additional tickets and use them separately.


## Access restriction
On the access restriction page, you can limit accesses to either developer dashboard or team dashboard by using IP address restrictions. By default, there are no access restrictions.

### Changing the access restrictions
You can change the access restriction to both dashboards as follows:
1. Click the **Change** button.
2. Select the `Filter by IP address range` option.
3. Input the IP addresses that you want to allow to access the dashboard. Input one IP address per line. You can also specify IP address range. Any texts after the white space will be considered as a note/description (see the example below).

{% hint style="warning" %}
When modifying the team dashboard's access restrictions, you are required to input your current IP address in addition to other IP addresses. This is to prevent restricting yourself.
{% endhint %}
## Team information
On the team information page, you can view and update your team information.

## Contract information
On the contract information page, you can view and update your contract information.
If you are on a trial, you can see your trial period in the top page of the dashboard.

### Registering the contract
You can either end the trial or wait until it is over to register to a full contract. When registering to a full contract, fill in the following information:

After that, fill in the payment information:

{% hint style="info" %}
If you choose `Credit Card` as your payment method, your contract plan will be effective immediately after completing the registration. However, if you choose `Invoice Payment`, your contract plan will be effective after the payment is settled/completed.
{% endhint %}
Once valid payment information is filled, you will be asked to confirm your contract registration one last time before completing the process. Then, your `Contract Information` page will look something like this:

## Invoice and receipt
On the invoice and receipt page, you can view the history of your previous settlements. You can also issue and download invoices of each settlement.
{% hint style="danger" %}
When issuing an invoice, you will be asked to specify the receipt address. This address can not be changed later.
{% endhint %}
{% hint style="warning" %}
Invoices can only be issued from a credit card settlement.
{% endhint %}

## Support inquiry
If you have any questions about the usage of the team dashboard, contract registration, changing payment method and so on, please contact us directly on the `Support Inquiry` page.

# Quick Viewer
With this feature, you can preview the design of your project on the device just by accessing Monaca from the mobile device.
{% hint style="info" %}
You cannot check device functions such as cameras and device motions. If you want to check the functions, please use a [custom debugger](/products_guide/debugger/custom-build-debugger-for-ios) or debug build.
{% endhint %}
## How to use
Two login methods are available to access this feature.
1. QR code login
2. Browser Login from a real device
After logging in, you can preview the project being developed in Monaca Cloud IDE on the real device.
### QR code login
Open the dashboard of Monaca Cloud IDE, and click on the Quick Viewer in the header menu.
You can log in by scanning the QR code displayed on your mobile device.
### Login from a Browser
Access [the Monaca Login URL](https://monaca.mobi/en/login) from your mobile device's browser.
After login, tap the project to view the preview.
## Features of the Function
This feature provides the following functions in addition to previewing the project:
### Live Reload
When a project is opened and files are edited and saved in Monaca Cloud IDE, it will be synchronized in real time.
### Debug Log
When console log (console.log()) is called on the quick viewer, the log information will be displayed in the log panel of Monaca Cloud IDE.

# Migrating from Other Platforms
Monaca is built on top of Cordova. Therefore, any Cordova-like projects can be imported to Monaca. This page provides guides on how to migrate your existing projects from other platforms to Monaca. Also, each guide assists you in getting started with Monaca and building applications with it.
Welcome to Monaca and enjoy the ride!
{% content-ref url="/pages/-MfWeAg7sjBZS-VpLxrv" %}
[Key Points](/products_guide/migration/key_point)
{% endcontent-ref %}
{% content-ref url="/pages/-MfWeAfwjTbC0JyeSg7x" %}
[Migrating from Angular](/products_guide/migration/angular_migration)
{% endcontent-ref %}
{% content-ref url="/pages/-MfWeAfvud0y\_iyZuINT" %}
[Migrating from Ionic](/products_guide/migration/ionic_migration)
{% endcontent-ref %}
{% content-ref url="/pages/-MfWeAgLjR9eLMSjbu4t" %}
[Migrating from React](/products_guide/migration/react_migration)
{% endcontent-ref %}
{% content-ref url="/pages/-MfWeAmXKIltIIRpf2tV" %}
[Migrating from Vue](/products_guide/migration/vue_migration)
{% endcontent-ref %}
{% content-ref url="/pages/-MfWeAfm\_eh7XOjKB-iF" %}
[Migrating from PhoneGap](/products_guide/migration/phonegap_migration)
{% endcontent-ref %}
{% content-ref url="/pages/-MfWeAlPnrgkDJFxQU4v" %}
[Migrating from Telerik](/products_guide/migration/telerik_migration)
{% endcontent-ref %}
# Key Points
Before starting the migration of your projects into Monaca, there are some key points you need to pay attention to in order to have a seamless migration.
## Build environment
Before getting started with the migration, you may want to know about the supported Cordova versions and build environments in Monaca.
All newly created projects in Monaca will be using the latest supported Cordova version by default.
| Cordova | Android platform | iOS platform | Windows platform (electron) |
| ---------- | ---------------- | ------------ | --------------------------- |
| **11.0.0** | **10.1.2** | **6.2.0** | **3.0.0** |
For more information on build environments for lower Cordova versions, pleaser refer to [Supported Environments](/environment).
## Installed plugins
In Monaca, the Cordova plugins are managed by the `package.json` file. If your plugin information is defined in the `config.xml` file, you will need to import the plugins again into Monaca. Please refer to [Importing Cordova plugins](/products_guide/monaca_ide/dependencies/cordova_plugin#importing-cordova-plugins).
## Third party Cordova plugins
The store-version Monaca Debugger (found in Google play or AppStore) only includes the [core Cordova plugins](/reference/core-cordova-plugins). If your project contains any third party Cordova plugins besides the core Cordova plugins, you will need to build a custom debugger to test it. A custom debugger will only include the plugins used in the project. Please refer to:
* [Build custom debugger for iOS](/products_guide/debugger/installation/debugger_ios#building-a-custom-monaca-debugger)
* [Build custom debugger for Android](/products_guide/debugger/installation/debugger_android#build-and-install-a-custom-monaca-debugger)
## JS/CSS component
There is a GUI page for you to manage the CSS/JavaScript libraries.
* For the Monaca CLI, you can open the GUI page by running `monaca remote config` in the project directory.
* For the Monaca Localkit, you can go there by clicking the `Settings` menu.

On the JS/JSS components page, you can add CSS/JavaScript libraries to your project. However, this works only if you include the following lines in your `index.html` file:
```markup
```
Please note that the `loader.js` file loads also the `cordova.js` file. Therefore, if you are going to include the above lines, you can remove this line:
```markup
```
## Output directory
Lastly, please notice the following points since they are important when working with the Monaca Debugger and the Monaca Build Server.
* The output folder for the building process must be `www`. You may need to change the build output to `www`.
* Make sure that opening the `index.html` file over `file://` works. For example, you may need to set `
```
3\. Then, run `monaca init` to convert your project to a Monaca project:
```
monaca init
...
? Are you sure you want to continue initializing this project? Yes
? Is it a transpilable project? No
? Which command do you use to serve the app? ng serve --base-href='.'
? Which command do you use to build the app? ng build --base-href='.' --output-path='www'
? Which command do you use to watch the changes from your app? ng build --base-href='.' --output-path='www' --watch
```
## Debugging with the Monaca CLI
[Monaca Debugger](/products_guide/debugger) is an application for testing and debugging your Monaca apps on real devices in real time. When developing Monaca apps on your local PC, all changes you make to the project files reflect in the Monaca Debugger as soon as you save the changes.
Let’s get started with the Monaca Debugger as follows:
1. Install the Monaca Debugger app on your device from Google Play or AppStore.
[ ](https://itunes.apple.com/us/app/monaca/id550941371?mt=8)[](https://play.google.com/store/apps/details?id=mobi.monaca.debugger\&hl=en)
{% hint style="info" %}
If you want to install Monaca Debugger on Android emulator, please refer to [Monaca Debugger for Android Emulator](/products_guide/debugger/installation/debugger_emulator).
{% endhint %}
2\. Launch the Monaca Debugger app and sign in with your Monaca account. Make sure you are using the same account as for Monaca CLI.
3\. Check that the Monaca Debugger and the PC are connected to the same network connection (LAN or Wi-Fi) and disable the firewall of the PC.
4\. To pair your device to the PC, navigate to the project directory in the command line and type `monaca debug`.
```
cd
monaca debug
```
5\. A popup message prompting you to pair the debugger with the PC opens inside the Monaca Debugger.
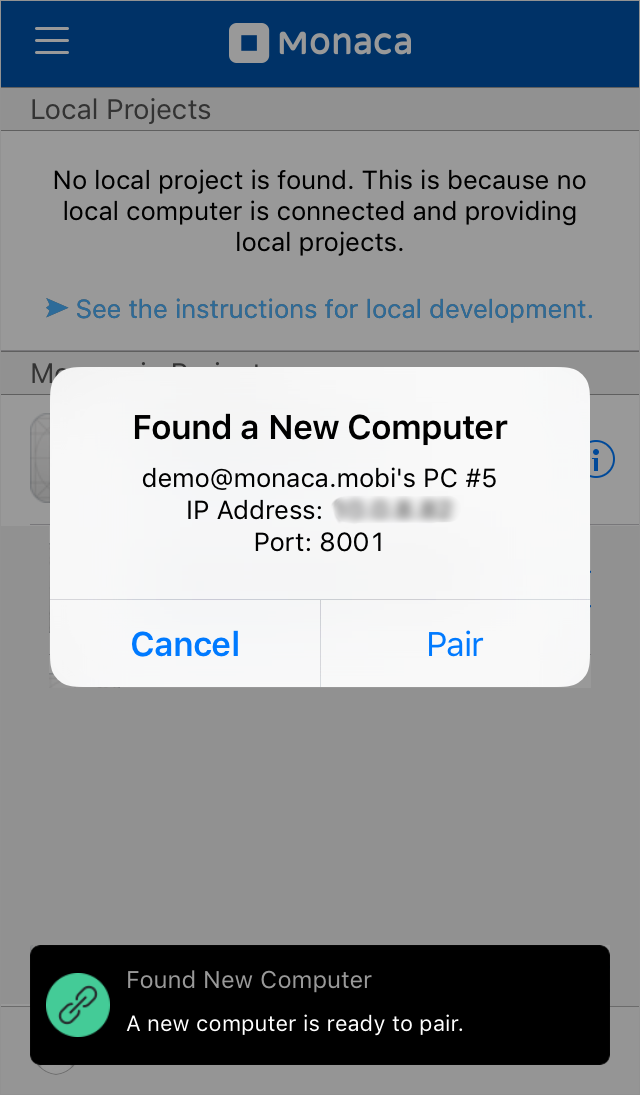
6\. If the pairing is successful, your local project name will appear under `Local Projects` in Monaca Debugger. However, if the pairing fails, please refer to [Fail to pair the Monaca Debugger](/products_guide/debugger/troubleshooting#fail-to-pair-the-monaca-debugger).
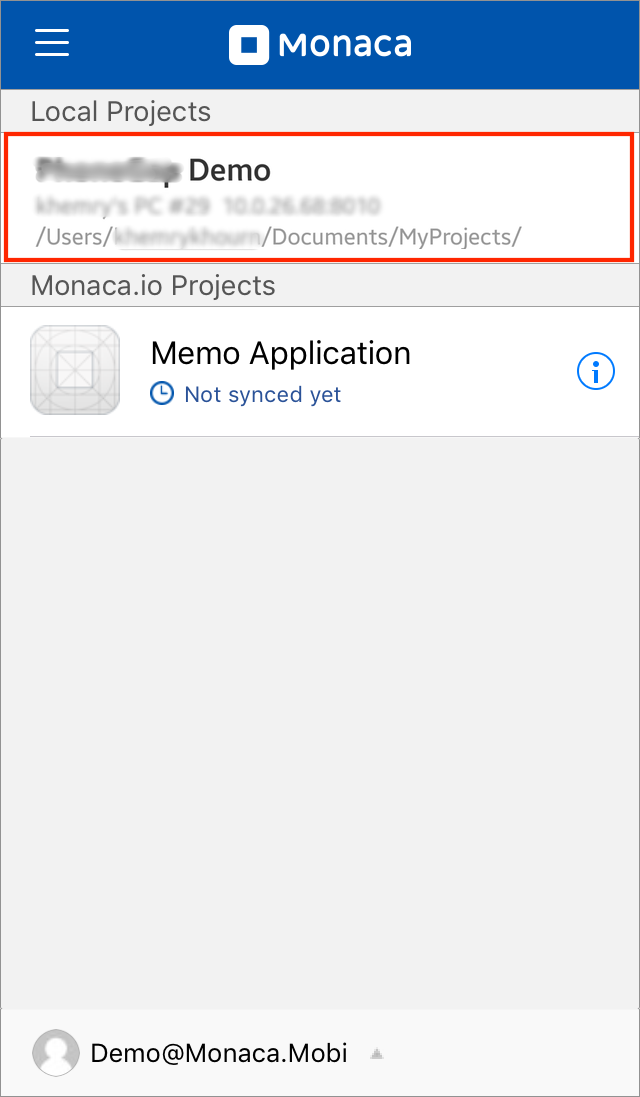
7\. To run a project, tap on the project name in the Monaca Debugger (as shown in the above picture).
8\. Your project should now be running in the debugger. Go ahead and try out your application. After that, try making some code changes and save them. You should see the changes reflected in the debugger.
{% hint style="info" %}
To stop debugging and unpair the debugger and the PC, press `Ctrl+c`.
{% endhint %}
## Building the app
Now that you know how to use the Monaca CLI commands with your Angular project, let’s start building it with the Monaca CLI. For simplicity, we only show how to create a debug build for Android in this guide.
#### Using only the CLI commands
1. Navigate to the project directory.
```
cd
```
2. Start the Android debug build
```
monaca remote build android --build-type=debug
```
#### Using CLI Command with GUI
1. Navigate to the project directory.
```
cd
```
2. Open the `Build Window` to start building.
```
monaca remote build --browser
```
3. The debug build is selected by default. Click **Start Build**.

4\. It may take several minutes to complete the build. The following screen will open after the build is successfully completed. Then, you can choose the way to install the app in your device.
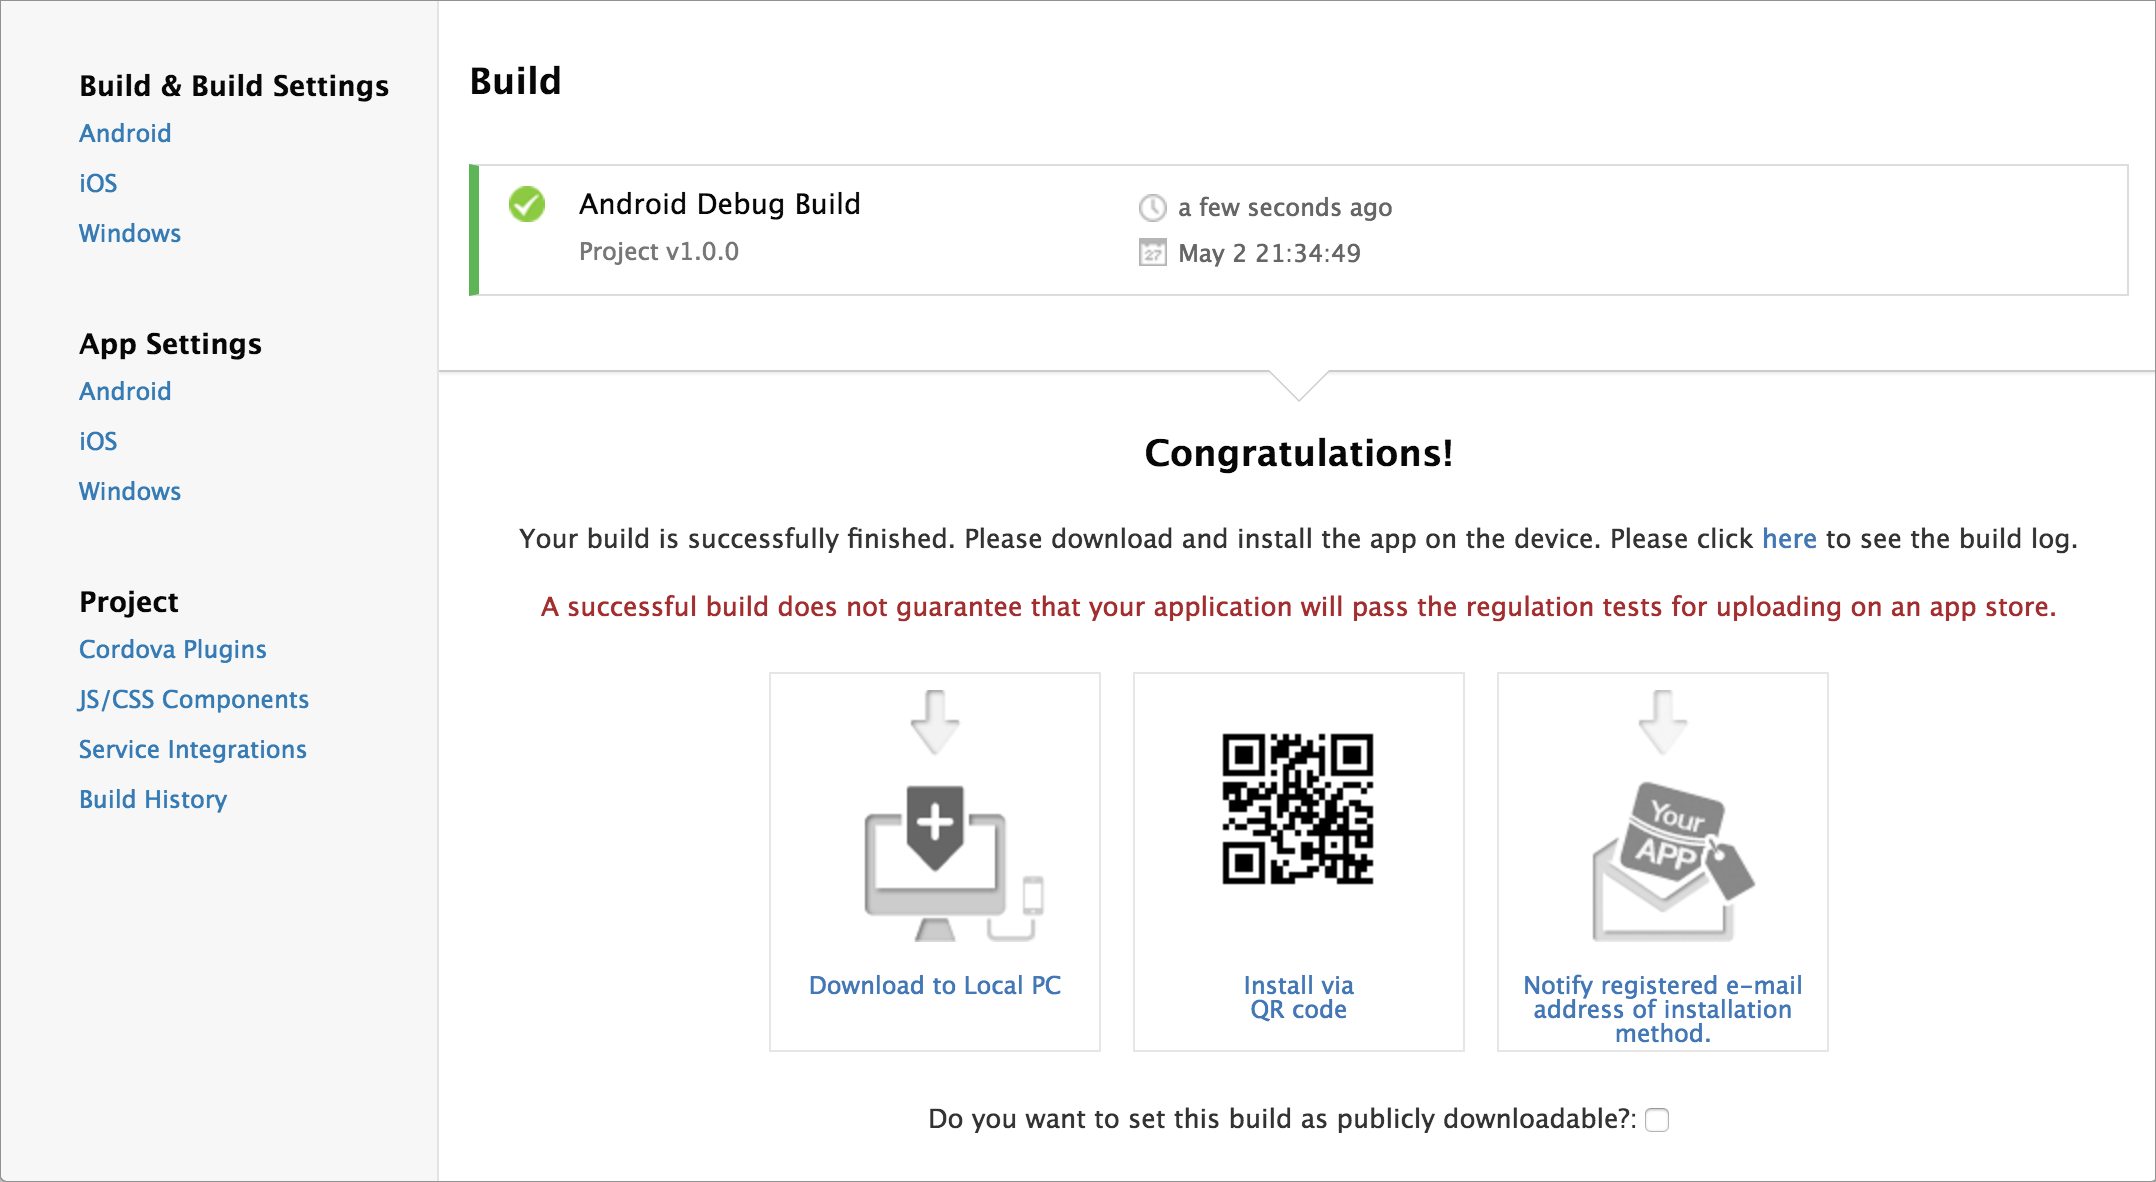
## Where to go from here
To learn more about Monaca, please refer to the following materials:
* [Monaca CLI Tutorial](/products_guide/monaca_cli/tutorial)
* [Monaca CLI Manual](/products_guide/monaca_cli)
* [Sample Apps](/sampleapp/samples)
# Migrating from Ionic
This page demonstrates quick and easy steps to migrate an Ionic project into Monaca using the [Monaca CLI](/products_guide/monaca_cli). After finishing this guide, you are able to run, test, debug and build an app of your Ionic project using Monaca.
## Prerequisite
1. Before starting the migration process, please make sure to read the [key points](/products_guide/migration/key_point) in order to have a seamless migration.
2. Install the Monaca CLI globally with npm:
```bash
$ npm install -g monaca
```
## Migration steps
1. After the Monaca CLI installation, login with your Monaca account:
```
monaca login
```
2\. Navigate to your Ionic project directory.
```
cd
```
3\. Then, run `monaca init` to convert your project to a Monaca project:
```
monaca init
...
? Are you sure you want to continue initializing this project? Yes
? Is it a transpilable project? Yes
? Which command do you use to serve the app? ionic-app-scripts serve
? Which command do you use to build the app? ionic-app-scripts build
? Which command do you use to watch the changes from your app? ionic-app-scripts watch
```
4\. Add these three new commands to your **package.json** file:
```
"scripts": {
"monaca:preview": "ionic-app-scripts serve & ionic-app-scripts watch",
"monaca:transpile": "ionic-app-scripts build",
"monaca:debug": "ionic-app-scripts watch"
}
```
## Debugging with the Monaca CLI
[Monaca Debugger](/products_guide/debugger) is an application for testing and debugging your Monaca apps on real devices in real time. When developing Monaca apps on your local PC, all changes you make to the project files reflect in the Monaca Debugger as soon as you save the changes.
Let’s get started with the Monaca Debugger as follows:
1. Install the Monaca Debugger app on your device from Google Play or AppStore.
[ ](https://itunes.apple.com/us/app/monaca/id550941371?mt=8)[](https://play.google.com/store/apps/details?id=mobi.monaca.debugger\&hl=en)
{% hint style="info" %}
If you want to install Monaca Debugger on Android emulator, please refer to [Monaca Debugger for Android Emulator](/products_guide/debugger/installation/debugger_emulator).
{% endhint %}
2\. Launch the Monaca Debugger app and sign in with your Monaca account. Make sure you are using the same account as for Monaca CLI.

3\. Check that the Monaca Debugger and the PC are connected to the same network connection (LAN or Wi-Fi) and disable the firewall of the PC.
4\. To pair your device to the PC, navigate to the project directory in the command line and type `monaca debug`.
```
cd
monaca debug
```
5\. A popup message prompting you to pair the debugger with the PC opens inside the Monaca Debugger.

6\. If the pairing is successful, your local project name will appear under `Local Projects` in Monaca Debugger. However, if the pairing fails, please refer to [Fail to pair the Monaca Debugger](/products_guide/debugger/troubleshooting#fail-to-pair-the-monaca-debugger).

7\. To run a project, tap on the project name in the Monaca Debugger (as shown in the above picture).
8\. Your project should now be running in the debugger. Go ahead and try out your application. After that, try making some code changes and save them. You should see the changes reflected in the debugger.
{% hint style="info" %}
To stop debugging and unpair the debugger and the PC, press `Ctrl+c`.
{% endhint %}
## Building the app
Now that you know how to use the Monaca CLI commands with your Ionic project, let’s start building it with the Monaca CLI. For simplicity, we only show how to create a debug build for Android in this guide.
#### Using only the CLI commands
1. Navigate to the project directory.
```
cd
```
2. Start the Android debug build
```
monaca remote build android --build-type=debug
```
#### Using CLI Command with GUI
1. Navigate to the project directory.
```
cd
```
2. Open the `Build Window` to start building.
```
monaca remote build --browser
```
3. The debug build is selected by default. Click **Start Build**.

4\. It may take several minutes to complete the build. The following screen will open after the build is successfully completed. Then, you can choose the way to install the app in your device.

## Where to go from here
To learn more about Monaca, please refer to the following materials:
* [Monaca CLI Tutorial](/products_guide/monaca_cli/tutorial)
* [Monaca CLI Manual](/products_guide/monaca_cli)
* [Sample Apps](/sampleapp/samples)
---
[Next Page](/llms-full.txt/1)