> For the complete documentation index, see [llms.txt](https://en.docs.monaca.io/llms.txt). Markdown versions of documentation pages are available by appending `.md` to page URLs; this page is available as [Markdown](https://en.docs.monaca.io/products_guide/monaca_ide/build/build_android.md).
# Building for Android
## Types of build
In Monaca, an Android app has two types of build: debug and release. The differences between these types of build are as follows:
| Type of Build | Description | Installation |
| ----------------- | ------------------------------------------------------------------------------------- | ------------------------------------------------------------------------------------------------------------------------------- |
| **Debug build** | An unsigned package that cannot be distributed in the market | |
| **Release build** | A signed package with the developer’s code sign that can be distributed in the market | - Sideloading
- Google Play Store and other eligible markets
|
{% hint style="info" %}
Sideloading typically refers to media file transfer to a mobile device via USB, Bluetooth, WiFi or a memory card. When referring to Android apps, "sideloading" typically means installing an application package in APK format to an Android device without going through the market.
{% endhint %}
## Step 1: Configure an Android app
1. From the Monaca Cloud IDE menu, go to **Configure → App Settings for Android** .
2. Fill in the app information:
General settings:
| Setting | Description |
| ------------------------------------------ | --------------------------------------------------------------------------------------------------------------------------------------------------------------------------------------------------------------------------------------------------------------------------------------------------------------------------------------------------------------------------------------------------------------------- |
| Application Name | The name representing your app in the Market |
| Package Name | A unique name that will be used when uploading to the Android Market. It is recommended to use the reverse-domain style (for example, `io.monaca.app_name`) for app ID. Only alphanumeric characters, periods (at least one period must be used) and underscore are allowed. Each segment should be separated by a period and started with an alphabetic character. |
| Use Different Package Name for Debug Build | If enabled, the package name of a release built and a debug built apps are different. The package name of a debug built app will have `.debug` extension, and the one for a project debugger will have `.debugger` extension. However, this option is disabled by default because it made some plugins impossible to be debugged due to the fact that they are tied to the exact package names (eg. in-app purchase). |
| Version | The version number of your app. A version number consist of numbers separated by dots (for example, 1.0.0). |
| Version Code | The internal version number of your app, relative to other versions. The value must be an integer, so that the applications can programmatically evaluate it for an upgrade. |
| Fullscreen | This option is only available with the Cordova 3.5 and later. If enabled, your app will run in a fullscreen mode which hide the status bar. |

Misc: settings regarding your Android app:
| Setting | | Description |
| ------------------- | ------- | ------------------------------------------------------------------------------------------------------------- |
| Allowed URL | `*` | Specify the URLs that can be accessed from your app. If set to `*`, you can access all domains from your app. |
| Keep Running | Enable | Enable this if you want Cordova to keep running in the background. |
| Disallow Overscroll | Enable | Enable this if you want to disable the glow when a user scrolls beyond the edge of the webview. |
| Screen Orientation | Default | You can also set the device’s screen orientation when running your app as a landscape or a portrait. |
After finishing the configurations, click **Save**.
{% hint style="info" %}
Currently, when you update either iOS's app ID or Android's package name, both of them will change as they are configured to be the same. However, it is possible to make them different from each other. Please refer to [Can the iOS' App ID and Android's package name be different?](/faq/application.md#can-the-ios-app-id-and-androids-package-name-be-different).
{% endhint %}
3\. Set of adaptive icons
If you are using a Monaca project with Cordova 9.0 or later, you can set an adaptive icon for Android 8.0 or later.
To set an adaptive icon, upload an image file under the `res` folder and add a `background` attribute and a `foreground` attribute to the `icon` tag of the `config.xml` file. If the previous src attribute is set, the value of the src attribute is not used.
If the OS version does not support adaptive icons, the image set in the `foreground` attribute will be displayed. If the previous `src` attribute is set, the value of the src attribute takes precedence.
An example of placing an image under `/res/android/icon/`:
```markup
```
An example of setting the `src` attribute:
```markup
```
{% hint style="info" %}
Currently, it is not possible to see or upload adaptive icons from the App settings of Android. Follow the manual above and update your `config.xml` yourself.
{% endhint %}
## Step 2: Configure Android KeyStore
A KeyStore is a binary file that contains a set of private keys. A private key represents the entity to be identified with the app, such as a person or a company. A KeyStore is encrypted with a password and it cannot be restored if the password is lost. When a KeyStore is lost or it overwrites another KeyStore, it is impossible to use the same key to re-sign the signed package.
A KeyStore is required for building a release version of your Android app. In Monaca, you can either create a new KeyStore or import an existing one. In order to create a new KeyStore, please do as follows:
1. From the Monaca Cloud IDE menu, go to **Configure → Android KeyStore Settings** .
2. `Manage KeyStore and Alias` page will open.

3\. Click the **Clear and Generate New** button. The following screen will open:
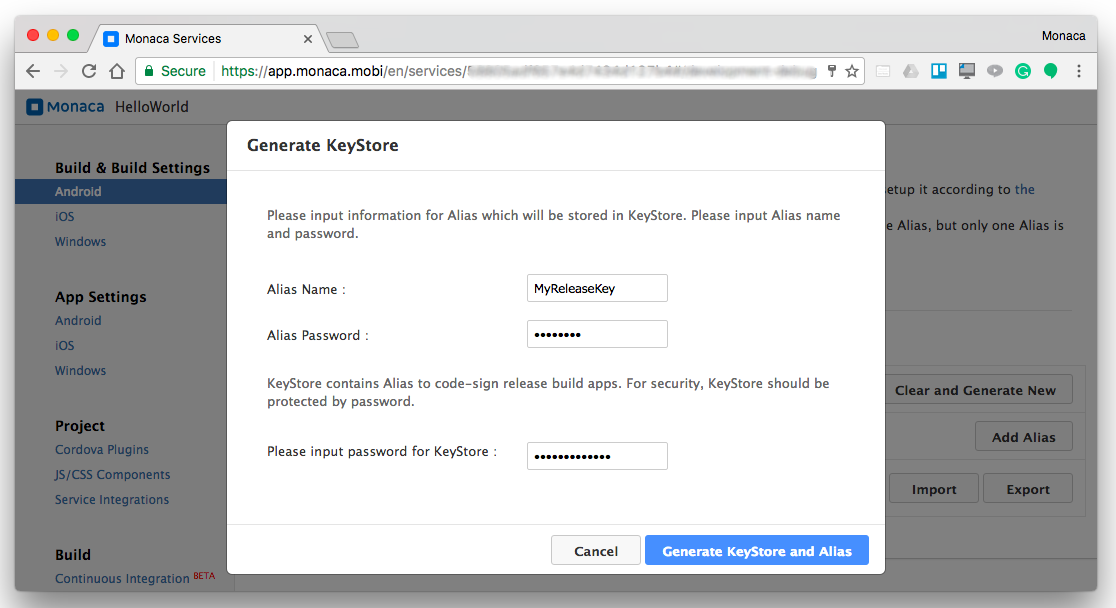
4\. Fill in the necessary information as shown in the above screen:
* `Alias`: the name representing the private key that you will use later when signing your app. Multiple aliases can be stored within one KeyStore.
* `Password`: the password for the private key (alias).
* `Password of the keystore`: the password for the KeyStore. You will need this password when importing the KeyStore.
5\. Then, click the **Generate KeyStore and Alias** button to generate the KeyStore.
{% hint style="danger" %}
When a keystore is lost, it is impossible to use the same key to re-sign the signed package. Therefore, always back up and keep the KeyStore that is used to sign application(s). Use the **Export** button to download your KeyStore.
{% endhint %}
## Step 3: Build the app
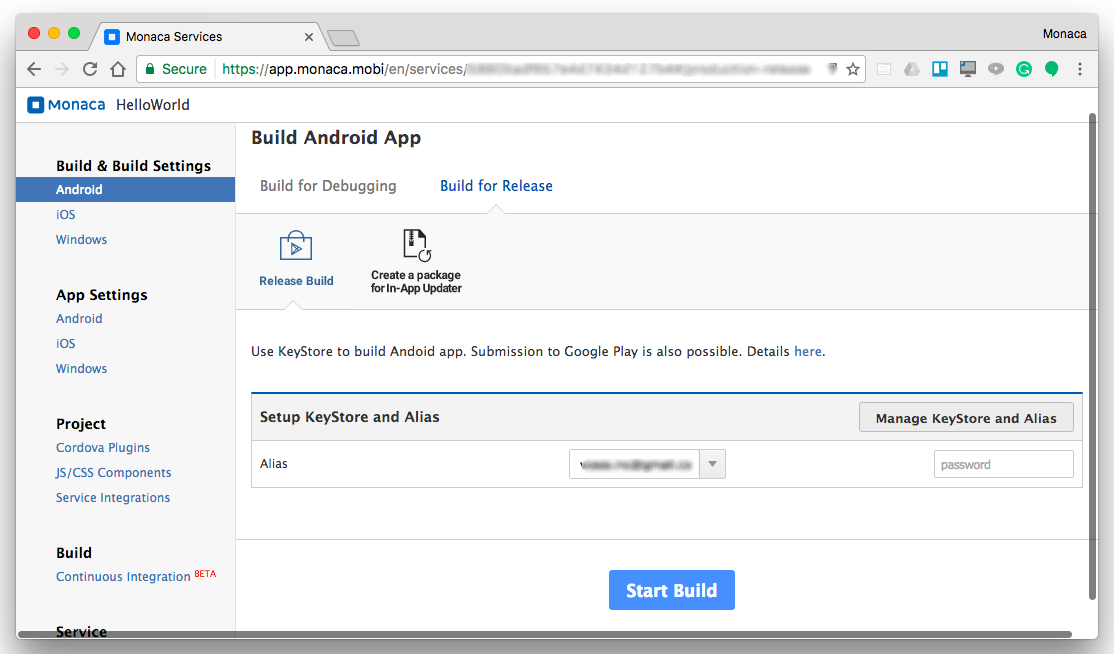
1. From the Monaca Cloud IDE menu, go to **Build → Build App for Android**.
2. Select the type of build you want and click **Start Build**.

3\. If you choose `Release Build`, you will also need to select an alias to sign your package before starting the build.
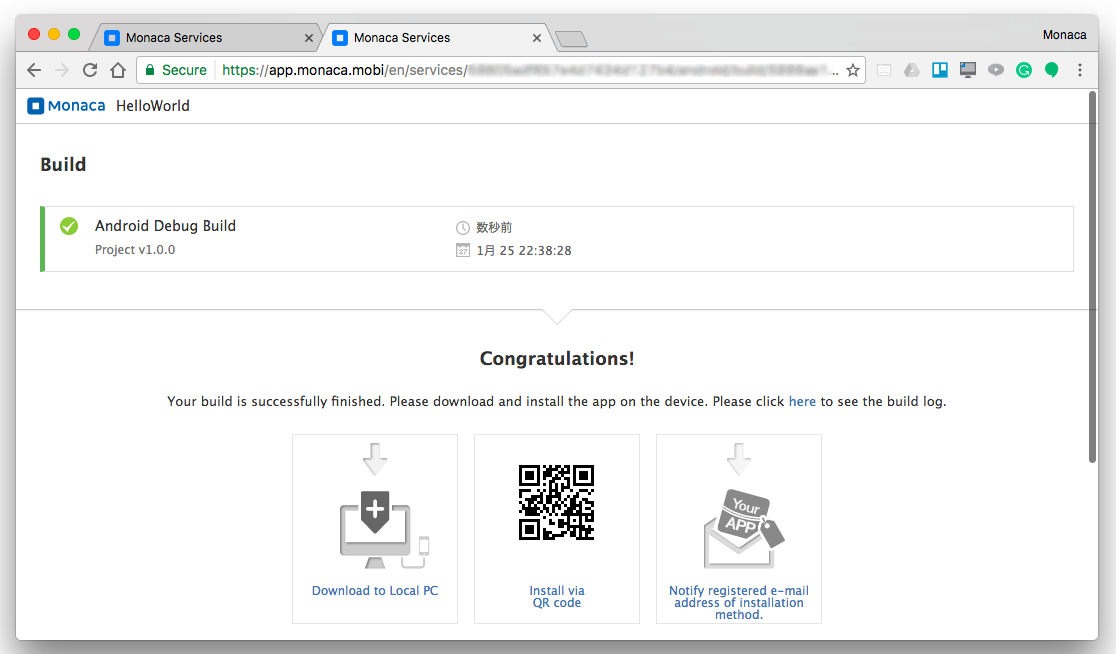
4\. It may take several minutes for the build to complete. Once the build is completed, your app is ready to be installed/downloaded. See the screenshot below as an example:
See Also:
* [Building for iOS](/products_guide/monaca_ide/build/ios.md)
* [Building for Windows](/products_guide/monaca_ide/build/build_winrt.md)
* [Google Play Distribution](/products_guide/monaca_ide/deploy/google_play.md)
* [Build History](/products_guide/monaca_ide/build/build_history.md)