Cordova Firebase Plugin
This Cordova plugin brings push notifications, analytics, event tracking, crash reporting and more from Google Firebase to your Cordova project.
Plugin ID/package name:
cordova-plugin-firebasexTested version: 16.5.0
Cordova Firebase Plugin 16.5.0 supports Privacy Manifests.
The custom build debugger can not check push notifications. To check push notifications, please check with a debug build or a release build.
Demo
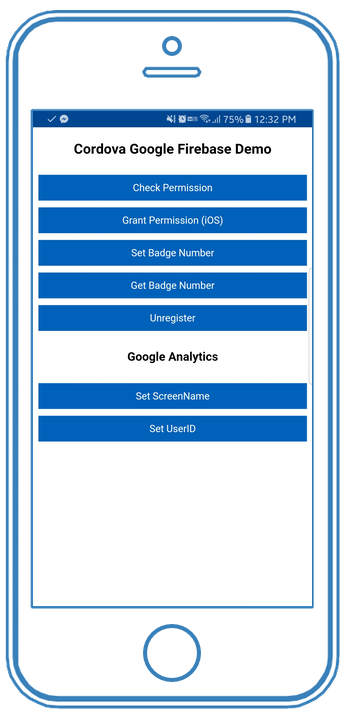
 Import Google Firebase plugin demo to your Monaca account
Preparation for iOS
When working with push notifications for iOS, an APNs authentication key or an APNs certificate is required. On this page, we will show you how to create a development APNs certificate for testing on an iOS debug build.
For a release build, a production APNs certificate is required.
In order to create a development APNs certificate, you should have signed up for the Apple Developer Program. Follow the instructions below to create the certificate:
From the Apple Developer page, go to
Account.Select Certificates, Identifiers & Profiles.

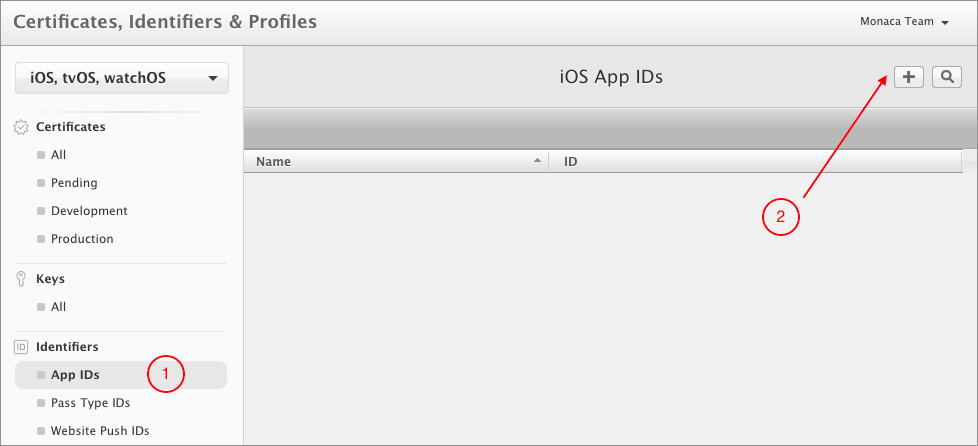
3. An App ID with push notifications enabled is required when creating an APNs certificate. Therefore, let’s create one. Under the Identifiers section, go to App IDs and click the ➕ button in the upper right corner.
4. Fill in the following information:
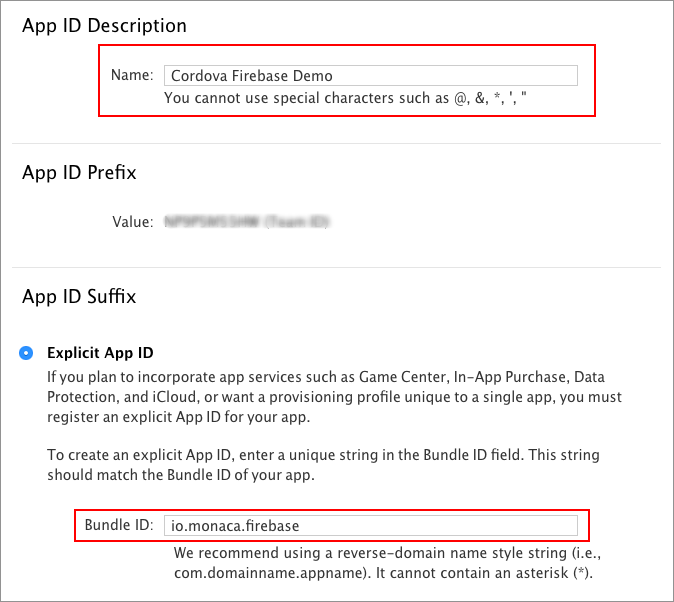
App Description: Input your app name here (e.g. Cordova Firebase Demo)Explicit ID: Select this option because a Wildcard App ID is not allowed for push notifications. Input a unique identifier for your app (e.g.io.monaca.firebase).
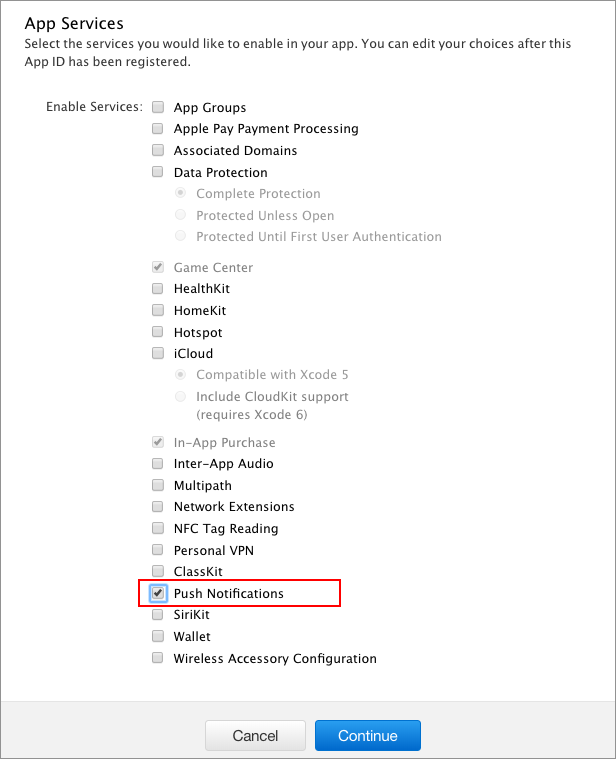
5. Scroll down to App Services section and tick the Push Notifications option. Then, click Continue.
6. You will be redirected to the Confirm your App ID page. Click Register to complete the process.
7. Now, you should be back on the iOS App IDs page. Select the App ID you’ve just created and click Edit.
8. Scroll down to the Push Notifications section and click Create Cerficate under Development SSL Certificate.
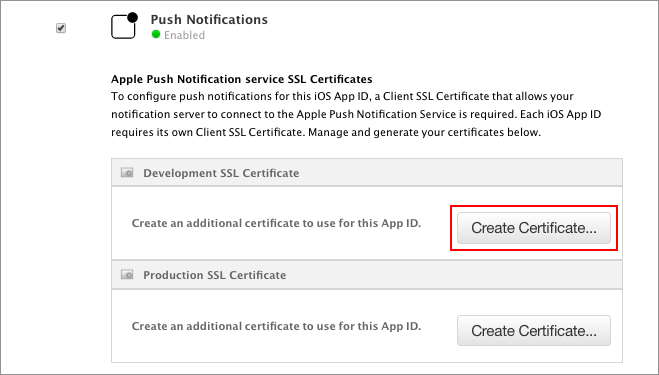
9. Click Continue.
10. After that, click Choose File to browse your CSR file. You can get this file from the Monaca Cloud IDE by going to Config → iOS Build Settings. Then, click Generate Key and CSR. After creating the CSR file, download it by clicking the Export button.
11. Next, click Continue again. When the certificate is ready, you can download it. Keep the file.
12. Upload the downloaded certificate by clicking the Upload Certificate button in the iOS Build Settings.
13. Click the Export icon of the target certificate displayed in Certificates registered in Monaca to export the p12 file. You will need it for the Firebase configuration in the upcoming section.
Configuring Firebase for push notifications
Go to Firebase Console.
Sign in with your Google account to enter the console.
Click Add project.

4. Fill in the project information and click CREATE PROJECT. You will be redirected to the Project Overview page.
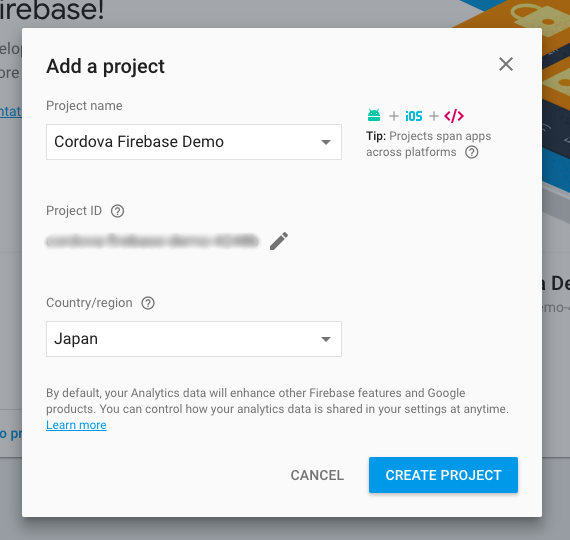
After creating a project, we can start configuring the push notification project for a specific platform.
For iOS
Go to the
Project settings.

2. Under the General section, click ADD APP and select iOS.
3. Enter your iOS Bundle ID (You can find it by going to Config → iOS App Settings). Then, click REGISTER APP.
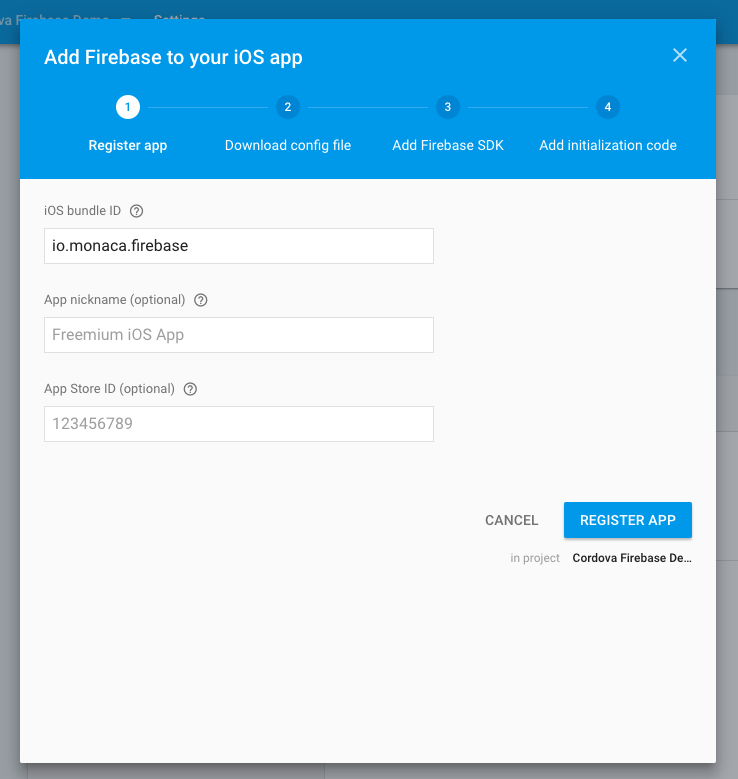
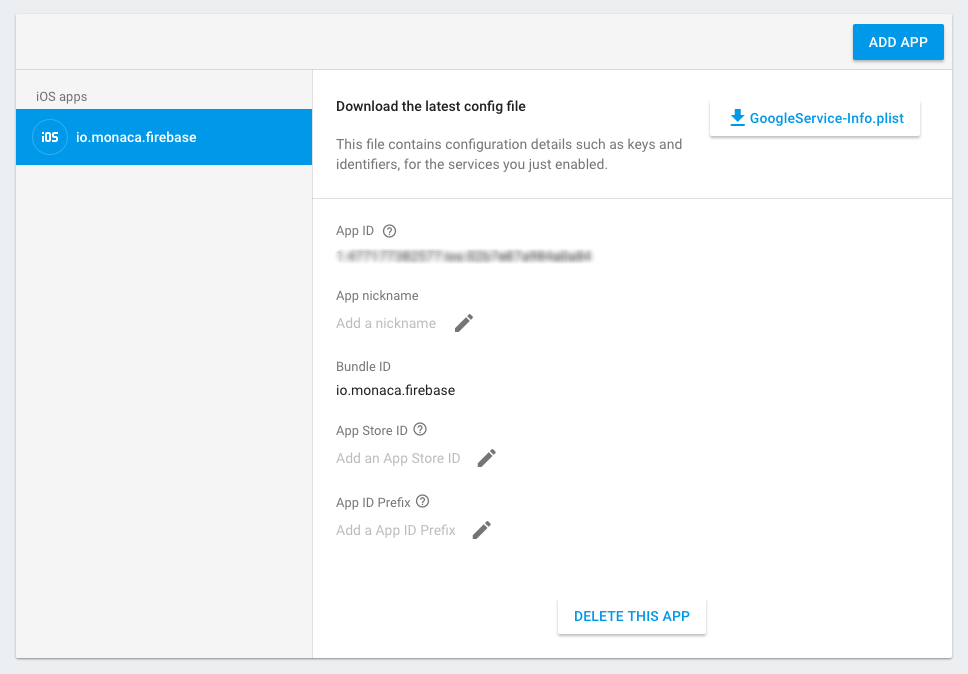
4. Download the GoogleService-Info.plist file and place it in the root folder of your project. After that, click CONTINUE.
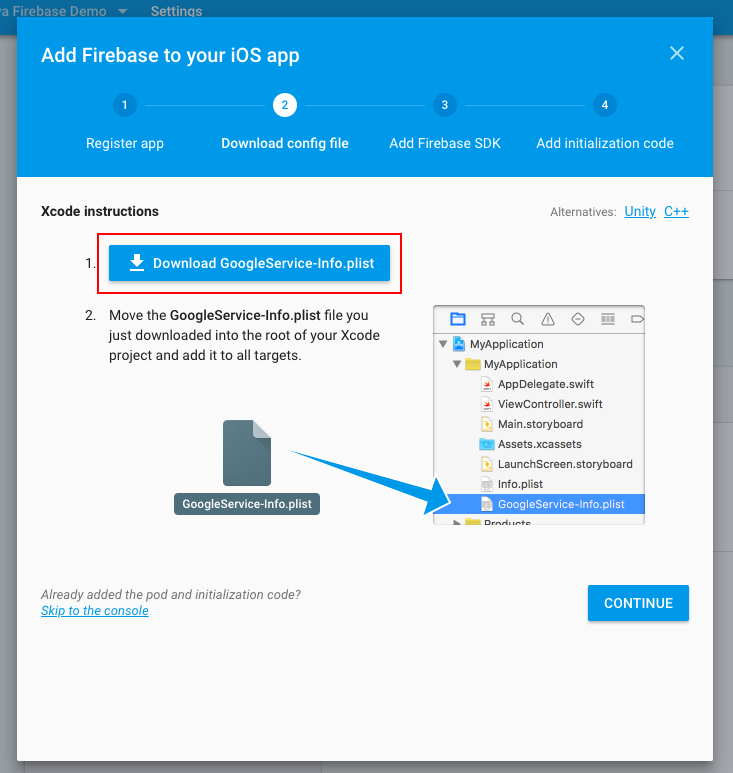
5. You will see instructions for adding the Firebase SDK into our project. However, we are not developing the app natively so we can skip this step. Just click CONTINUE to proceed. Then, click FINISH to complete the configuration. After that, you should see your iOS app on the Firebase overview page.
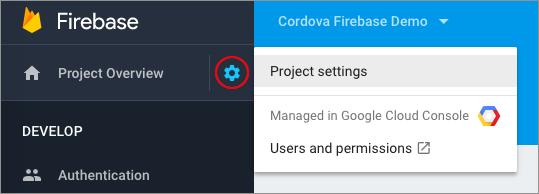
6. Now, it’s time to add the APNs certificates into this project. Go to Project settings and select CLOUD MESSAGING.
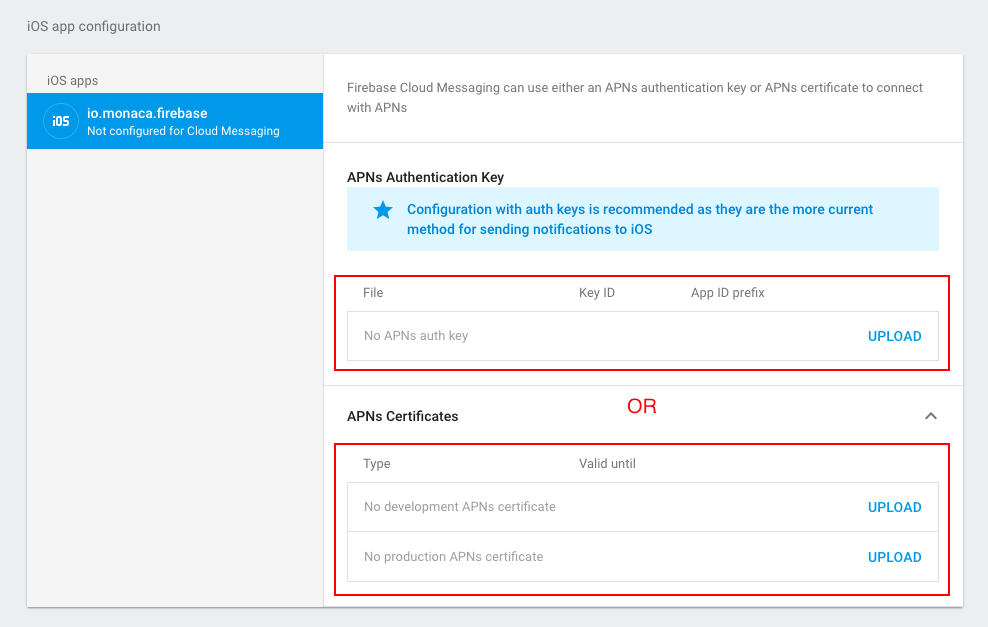
7. Scroll down to the iOS app configuration section and upload the APNs authentication key or the APNs certificates.
That's it! You are done with the iOS configuration.
For Android
Go to the
Project settings.

2. Under the General section, click ADD APP and select Android.
3. Enter your package name (You can find that by going to Config → Android App Settings). Then, click REGISTER APP.
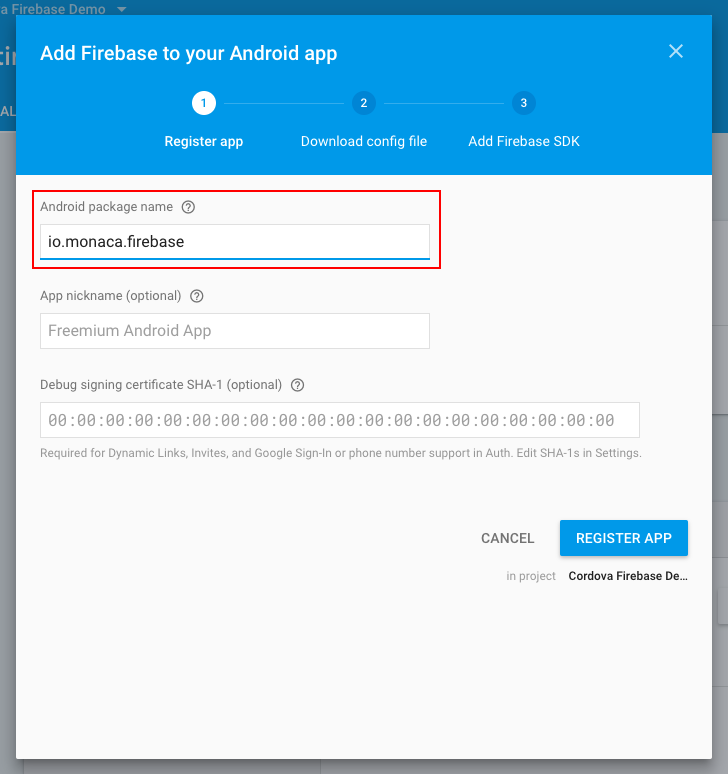
4. Download google-services.json file and place it in the root folder of your project. After that, click CONTINUE.
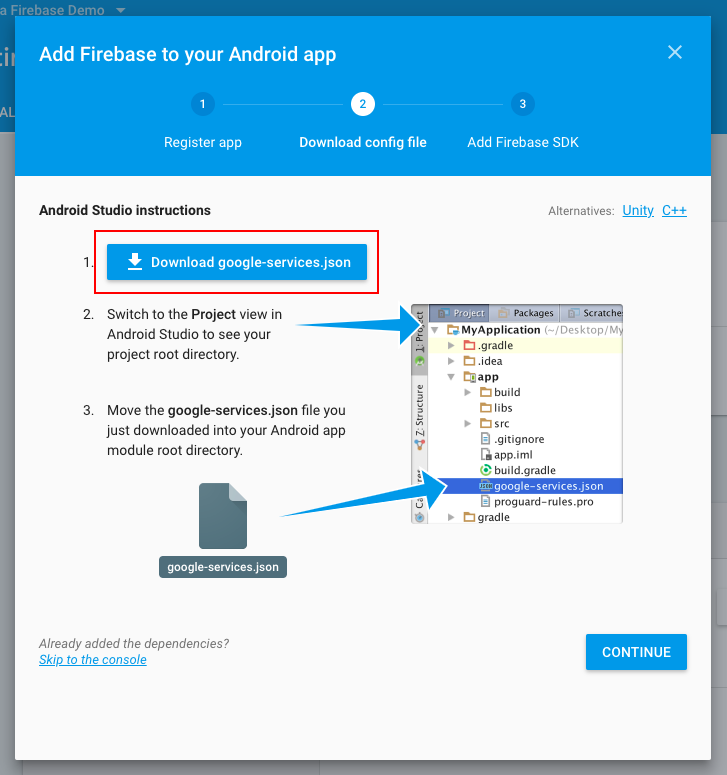
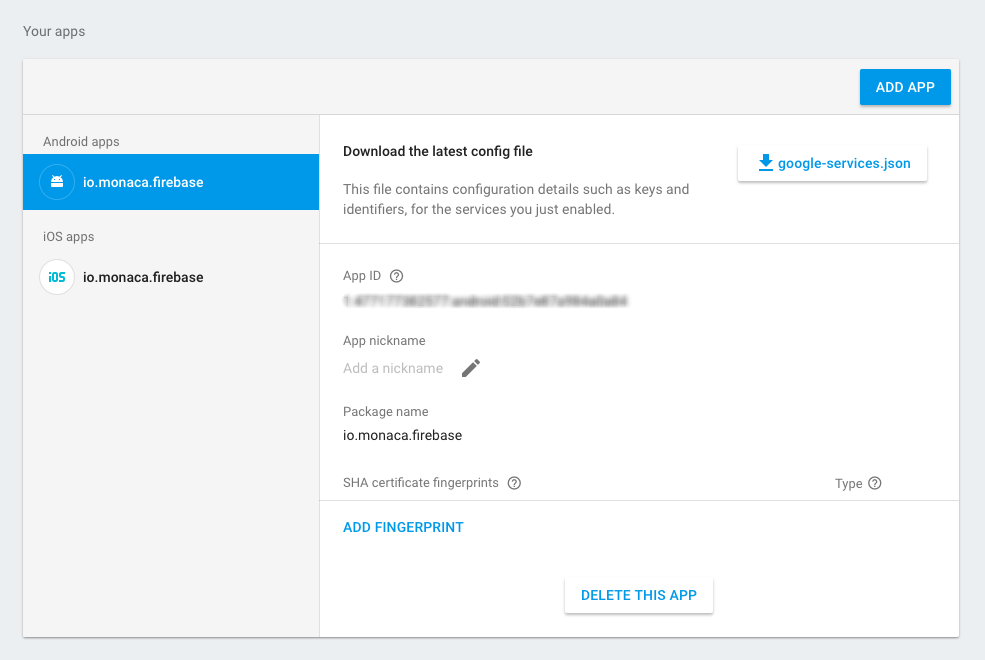
5. You will see instructions for adding the Firebase SDK into our project. However, we are not developing the app natively so we can skip this step. Just click FINISH to complete the configuration. After that, you should see your Android app in the Firebase overview page.
Adding the plugin to the Monaca IDE
From the Monaca IDE menu, go to Config → Manage Cordova Plugins.
Click the Import Cordova Plugin button. Then, you can choose to import the plugin using a ZIP file or URL/package name.
To support iOS 12.2+ devices, configure your config.xml as follows:
Usage
After importing the plugin to the project, you can start using it by generating a token for your device and setting an event for when a user opens a notification. Please make sure to call the plugin API after the Cordova is loaded.
API references
In this section, we only describe some main APIs used in our Demo. For a complete list of the API references, please refer to here.
getToken()
Get the device token. The token will be null if it is not established yet.
Example
onTokenRefresh()
Get notified when a token is refreshed. This is the best way to get a valid token for a device as soon as the token is established.
Example
onMessageReceived()
Get notified when a notification is opened.
Example
hasPermission()
Check the permission to receive push notifications.
Example
grantPermission() (iOS only)
Grant permission to receive push notifications for iOS (will trigger a prompt if the permission has not been granted yet).
Example
setBadgeNumber()
Set a number on the icon badge.
Parameter
Name
Type
Description
badgeNumber
Number
The number on the icon badge
Example
After setting the badge number, close the app. Then, you will see the badge number appear on your app icon. If you want to remove the number, set it to 0.
getBadgeNumber()
Get the icon badge number.
Example
unregister()
Unregister from Firebase to stop receiving push notifications. Call this when you logout user from your app.
Example
setScreenName()
Set the name of the current screen in the analytics.
Parameter
Name
Type
Description
screenName
String
Screen name
Example
setUserId()
Set a user id for the analytics.
Parameter
Name
Type
Description
id
String
A unique identifier, associated with a particular user. Must be sent with each hit.
Example
Last updated